Wooden Jointer Plane Dimensions Free,Carpenter Bees On Wood Deck Size,Woodworking Magazine Subscription Uk Quality - For Begninners
Now the vise screw proved tricky for me. Had I to do this again, I would have cut this out ahead of time with the bench unassembled. So spade bits, a jigsaw, and a rasp get me to a point where the vise screw can fit the bench. Then I bored for a through bolt to mount the vise from the bottom and used lag screws toward the back of the vise which ensures the vise is going nowhere.
I capped the jaw with a piece of scrap oak and used the brad point bit to mark the holes, pre-drilling, and then fired a screw in. This whole face was ultimately screwed in instead of glued in the event the vise ever needs to be changed or removed. This ensures I have vertical alignment, but allows me wiggle room left to right while waiting on the glue to cure. Then I flatten the top. Then I tilt it back on its side and flush the top to the apron.
For my leg vise I modified a lee valley tail vise screw by putting a hand wheel on it. This is entirely unnecessary but I just liked the look. I had to take the wheel to a machinist to get the holes right and then had some adventures driving in this roll pin. However, if it is something you're into, you can just pound out the cross pin on the lee valley screw and then replace the handle with whatever you like. The bolts I had on hand to mount it were a little long, so I cut them down with the angle grinder.
Threading the nut on first allows for repairing or reshaping damaged threads on the end when unscrewing the nut. I've never used Miller Dowels before and I have to say, I'm delightfully impressed. Miller dowels will be replacing all the screws in the workbench top.
These dowels come with a stepped drill bit that matches the topography of the dowel. You just drill, add glue, set, and trim the excess. The mortise is slightly trumpeted on the side opposite the receiving end, the side facing you on the bench and that's achieved by just chiseling at a slight angle instead of being dead square. I shape the entire leg on the table saw using some huge bevels to just provide some interesting embellishments to the vise. As a safety note, be extremely cautious when cutting these bevels, especially if you don't have a riving knife, as this thing is begging to bind up and kick back on you.
The parallel guide is made from ash and I cut the tenon itself on the table saw before drilling holes in the tenon to allow for the wedges to be driven in and flex outward. Then everything gets glue and the wedges are tapped in and later flush trimmed and planed. When dry, the vise screw and wheel are mounted.
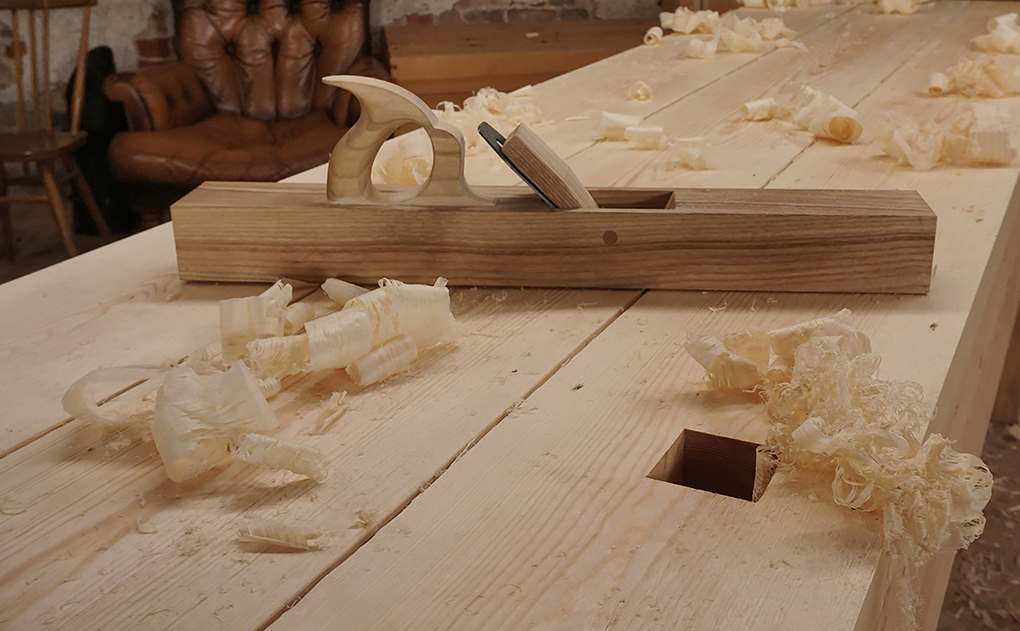
These two topics don't really go together but I didn't know how else to broach this subject with you. Much how I did on the aprons, dogs are drilled through the top. Since my forstner only goes so deep, I max it out and then switch to a spade bit for the last bit.
I ran some L shaped stretches along the bottom rails to start a lower shelf, set in with countersunk screws. Then to nail this inside measurement for the slats, I clamped two pieces of scrap which will give me a measurement to cross cut some tongue and groove boards to. Pre-made tongue and groove is not mentioned in the Schwarz book, but I was eager to wrap this up so a couple 12 foot boards did the trick.
I capped the ends with a fit to size tongue strip and a fit to size groove strip. After getting it into place I just tacked the corners in with a brad nail. The bench needed a plane stop, so I picked up the lee valley aluminum adjustable plane stop and hogged out the mortise with a chisel. Schwarz mentions these in his book and talks about the unruly bottom shape which makes these a bit difficult to install.
Finishing the bench is easy. Don't go over the top with some fancy finish like Osmo or Rubio or anything like that. This bench is going to take a beating.
Danish oil will do the trick. If you're feeling extra spicy some wipe on poly over the top of that isn't a bad idea either. Just use it all liberally and then wipe it off You're Wooden Jointer Plane Dimensions Tool done.
You now have an extremely fancy thing to make fancy things on. Crack open a cold one. Shout to the heavens. Overall, this was a pretty daunting build that forced me to learn a lot along the way.
The history and the why behind these benches is valuable to the growing woodworker, and at the end of the day, as said in the book, these benches are like lasagna and should be made, not bought. Don't forget to watch the video and subscribe to the channel! Let me know in the comments here if you have any questions, comments, and if you make one of these suckers tag me on Instagram!
Reply 2 months ago. Question 2 months ago. An extraordinary fine piece of craftsmanship. Any timber of that quality and size would be expensive in Denmark, so I wonder if pieces of plywood would do for the job? Honestly, it's just construction grade pine I'm using. It's the same stuff folks use for building decks and framing sheds and structures.
I don't know what the construction grade equivalent would be overseas but it's fairly inexpensive and the larger pieces were done through glue ups. You need the thickness for the bench top to be able to have the holdfasts work. It's definitely something that's feasible, but I would imagine that the labor would go up exponentially. An other option - use hardwood like maple on the top edges only, and build the rest in pine.
Ash is also a great and failrly inexpensive option too. Reply 9 months ago. I actually have a YouTube video on the channel showing the milling process. I actually made a speargun out of it recently, as well as a Japanese toolbox which I also have an instructable on, and I probably have enough left to do some chisel handles.
However, I just followed the Schwarz book which had the angled leg vise. I wanted to make something that was as close to authentic as I could without too many of my own editorials. Question 9 months ago. Great project, thank you. I plan to build one. Which version of Schwarz's book has the plans for this workbench, there are several?
Answer 9 months ago. Workbenches design and theory, etc. I have it linked in the comments on my YouTube video actually.
I much enjoyed witnessing your personal approach and commitment to the craft of woodwork. Your build is something I may well come back to in order to construct a more rudimentary facsimile of your very fine bench; being particularly drawn to the substantial aprons.
Very Nice! A perfect example of how craftsman met a need on the job by making their own tools Lots of great photos too! But it seems no one includes what I would consider a simple requirement for any wood working project In fact, many woodworkers treat them as one and the same.
It's basically a list of all the parts required to build a woodworking project that contains a number for each part along with its thickness, width and length. IMHO they should be required for all woodworking projects posted on Instuctables but sadly, no one seems to include them anymore :. Hey there! So I usually don't include cut lists on posts but I do typically do materials, etc.
However, for this build specifically I wasn't comfortable doing a cut list since I'd essentially be plagiarizing Christopher Schwarz. In the video, and I think even in this article, I'm very specific about the fact that I based this off his book on workbenches which has an extremely detailed cut list and material list.
I'm a big advocate of his book and advise everyone to get a copy. It also has Roubo plans in it as well. I have it linked in the comments and description in the video. Introduction: The Nicholson Workbench.
By cowdogcraftworks Visit my site! More by the author:. More About cowdogcraftworks ». On to the build! The leg vise is also made from rosewood and I brought these two pieces together with the domino. Wooden handles. Greenslade etc These have been in our family for at least 3 generations, please This advert is located in and around Poulton Le Fylde, Lancashire.
The Bahco has a little rusting to remove but all are in good, sharp condition. Various woodworking tools for sale, priced separately but open to sensible offers for some or the lot Please see my other adverts for more descriptions Antique Block Jointer woodwork Plane with This advert is located in and around Stoke On Trent, Staffordshire.
A nice Vintage Brass ruler by J. It might be older than vintage For sale is Plough Plane stamped E. This advert is located in and around Chelmsford, Essex. This advert is located in and around Wrexham. Collection of tools mainly woodwork tools. Circular saw drill ,sander, tile cutter. This advert is located in and around Stafford, Staffordshire. Stanley Hand Plainer in well used condition only have the handyman available now. Ideal for anyone skilled in various types of woodwork Been lying in the garage since these were last used but This advert is located in and around St Albans, Hertfordshire.
This advert is located in and around Carlisle, Cumbria. Oxfam Bookshop Carlisle The Woodworker magazine is an essential for any aspiring woodworker or established woodworker looking for helpful tips, handy guides and inspiration for their next woodworking This advert is located in and around Wirral.
Beechwood Base. Some surface rust but works perfectly. This advert is located in and around London. Comes with staples and nails. Ideal for most jobs, including This advert is located in and around Nr Banbury, Oxfordshire. Free standing mortiser. Used but in full working order. Single phase. Could deliver at extra cost. Sold as seen. Other woodworking items for sale.
Will consider a deal if several bought! Search by Keyword.


|
Amana Raised Panel Bits 70 Mortise And Tenon Jig For Timber Frame Control Hand Grasps Scale Volume Wood Workbenches Inc |

BEKO
15.02.2021 at 19:48:59
SERSERI_00
15.02.2021 at 17:59:33
Efir123
15.02.2021 at 14:43:42
585
15.02.2021 at 17:56:19