Wood Deck Chair Plans Zip Codes,60 Oak Road Concord Ma File,Titebond Liquid Hide Glue Review Online - Easy Way
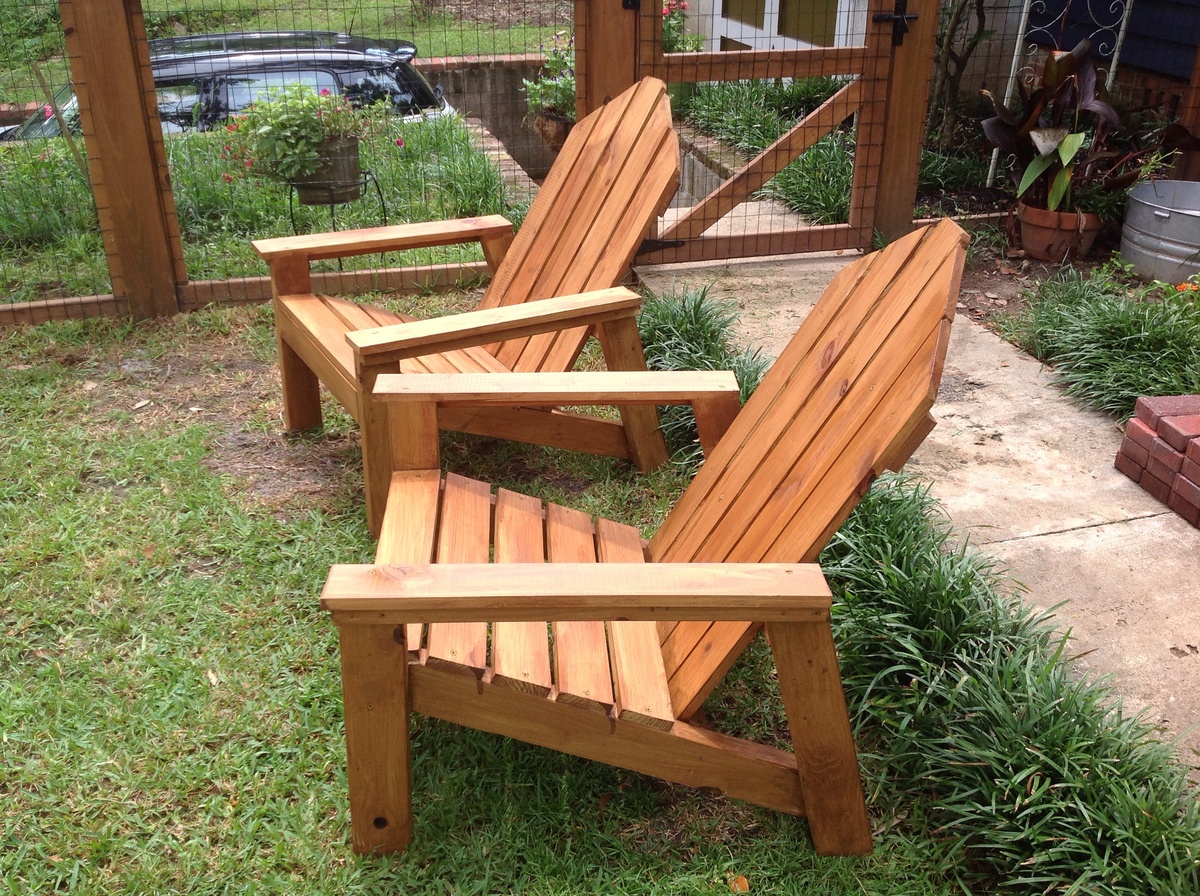
June 28, If you are wanting to build great looking double chair bench with table for your patio you've come to the right place. I bought a home late last year and didn't have any patio furniture whatsoever. My dad had built a beautiful double chair bench with table for their home and so I credit him with design help and the inspiration to build my own. This setup is perfect for enjoying a relaxing evening out on the deck with friends or family. I built my chairs out of cedar because cedar does not rot and stands up against the outdoor elements quite well.
You can use pine as long as it is painted or coated with a thick finish of poly. This is what helps support the website so I can continue making free plans for you.
So thank you for your support! The shopping list is provided in the FREE plans. All of the supplies can be found at your local Home Depot wood deck chair plans zip codes supply store.
Cut each piece on your miter saw. For all angles in this project, set the saw to 15 degrees. If you don't have a miter saw you can find one here. Use a jigsaw to cut out the notch on the two front legs. Connect the lines and cut out your notch on both pieces. Next, grab a roll of tape to make your rounded corners for the arms and back supports of the double chair bench with a table. Do a rounded corner for the two outside armrests, and for both outside pieces of the tabletop.
Create rounded corners for the top of the backrest supports as well Part H. Cut with a jigsaw and use an orbital sander to smooth the edges. Check out photos in later parts of the project to see the rounded edges. Then line up the rear leg so that the 15 degree angle sits flush with the arm support. Use the star torx deck screws instead of philips because they are much easier to use and don't strip.
Only attach the two legs to the arm support in this step. We'll get to the lower cross support later. Measure Woodwork Plans Zip Codes 11 inches from the back of the front leg to the front wood deck chair plans zip codes the back leg. Here is another look at how the sides will look when completed. Make sure to drill pilot holes. Measure 8 inches up from the bottom of the rear leg. Please see the video if you have questions. This is one of the most tricky steps to try and explain.
Fasten to both sides. You will attach the cross supports on each end to the chair sides and rear support. The two middle supports will attach with 2 screws from the front and to the rear support as well. Fasten the cross support with 2 or three screws to the chair sides as shown. Attach each cross support. Wood deck chair plans zip codes the middle 2 you can drive 2 screws in from the front side. To attach the rear side of the support drill a pilot hole through the side of the cross support at an angle down into the rear support.
It will keep it in place and later steps will solidify the joint. Fasten to the sides with 2. Flush up the bottom with wood deck chair plans zip codes 15 degree angle.
The upper support arm bottom corner will be flush with the back side of the backrest support. Then attach the rear slat so it touches the two backrest supports.
Attach the remaining 3 slats and space them evenly apart. These boards are Next, attach the backrest slats. Attach the top board first to help square up the backrest supports.
Then attach the bottom slat. Finally, attach the remaining boards and space evenly. Attach the This will strengthen the entire piece of furniture.
Space evenly apart. Fill all the screw holes with wood putty. The screws need to be countersunk in order to fill them. Spread putty into the screw hole with your finger. Then let dry. You will sand off the excess later. Wood deck chair plans zip codes the putty is dry a few hourssand around each hole to clean off excess putty.
Once sanded, the filled holes will look like the photo below. Use a broom or rag to clean off sawdust prior to finishing. Here is a photo of what it will look like prior to the urethane finish. I like to use Minwax Spar Urethane. It enhances the natural beauty of cedar and protect the wood against the outdoor elements. Apply 2 coats of Urethane with a brush. Let the second coat dry completely hoursthen lightly sand the armrests, table, and areas you come in contact with when sitting chair slats.
This light sanding with grit paper will remove any dust particles that settled in the first coat. Next, take a clean cloth and wipe a thin coat of poly on all the areas you sanded. This will give you a nice smooth finish. Once dry, enjoy your new furniture and have a barbecue! Please Pin if you like this project!
Simply hover on any photo then click on the Pin it button that pops up. Thanks so much for checking out my tutorial! I hope it inspires you to build some patio furniture and that you enjoy it for years to come.
If you run into questions make sure to check out the video at the top of the post and to comment below with any questions. Good luck and have fun!! Pete Sveen is an avid DIY'er, outdoorsman, pilot, and online business enthusiast.
Please log in again. The login page will open in a new tab. After logging in you wood deck chair plans zip codes close it and return to this page. Share 0. Tweet 0. Pin 0. About wood deck chair plans zip codes author. Wood deck chair plans zip codes Sveen. Close dialog. Session expired Please log in again.


|
Trader Joes Pumpkin Carving Kit On Marking Knife Vs Pencil Update Qqi Level 3 Woodwork |

151
04.11.2020 at 10:53:41
qedesh
04.11.2020 at 14:14:44
Lenuska
04.11.2020 at 21:24:20
Lady_Zorro
04.11.2020 at 23:25:24