Table Saw And Router Example,Cnc Lathe Tools List Pdf C,Antique Wood Tools Value 005 - Plans On 2021
Craigslist is your friend. These 5" wheels are great cause I have a bit of a lip to run over, getting back into my garage and didn't want to get hung up on it. If you're buying new, choose wisely as their cost can add up.
I'd say get 3" at a minimum if you won't be moving around much. At least two locking casters are a good idea if you'll be working on slopes. I used 3" lag screws that I had on hand for securing these. Sorry I didn't get more in-progress pics for this part, I was a little aggravated that I had to use a hand planer on some of the 2x4 framing since the spot I'd built it on wasn't quite level.
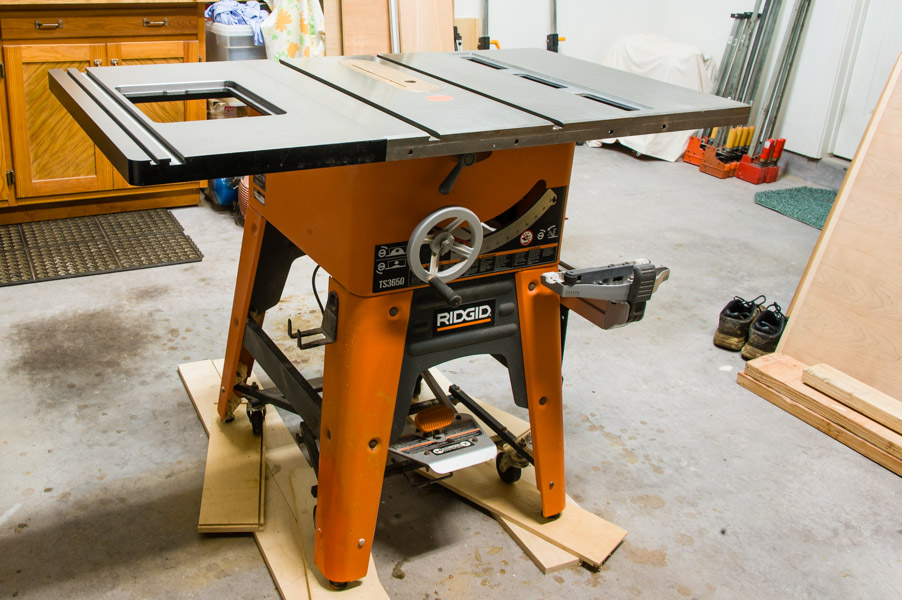
After that nonsense was over, I started by securing the table saw in its spot with lag screws drill pilot holes, add washers if needed. Next I double-checked measurements for the width and depth of the table saw surface. Mine wasn't perfectly centered since I left about 4" of table overhanging on the backside vs just 2" on the front edge. After marking out the cut-out area, I proceeded with the circular saw, cutting both sides and then finishing the corners and back edge with a jigsaw.
Side note: I was able to make the cut-out space for the table saw and miter saw the same width. This will allow me to keep the piece removed for the table saw, and use it for an additional tool router, probably in the space where the miter saw normally sits. I may end up cutting another square piece for my bench grinder as well.
With the plywood in place around the table saw, from underneath the bench I marked the outside edges of the 2x3 supports for the miter saw. If your miter saw doesn't slide then it probably won't need to be as deep as the one I cut, but make sure you'll have space to reach all knobs and adjustments on your saw when it's in place.
After cutting about a foot in on the left and right sides I added clamps and a scrap 2x4 to support the front edge while finishing my cuts. As long as the support boards are square and parallel you shouldn't have any problems.
But keep in mind that this piece will be upside-down when you mount your miter saw to it. Otherwise, if it's not perfectly square, it may not fit back in place when you flip it around. In other words, attach the miter saw to the under-side of the plywood piece you cut out. Once the piece is cut you'll be able to test fit it and see what I mean.
I attached the miter saw with 3" carriage bolts, washers and nuts. If you're a perfectionist you could also route out a recessed area to get the heads below the work surface. Then I finished securing the table top with 2" screws and cut the excess material off with a skillsaw.
If you want to avoid drilling thru the top of the table you could also use a mixture of wood glue and brackets on the underside for a cleaner look.
Things should be looking pretty good by now, and fully functional. I ripped them to fit the overall depth and then took measurements for cutting around the legs.
I used a jigsaw and gave myself plenty of wiggle room; it's a workbench, not a cabinet after all. I got excited and loaded it up with all my other power tools: planer, grinder, skillsaw, sawzall, compressor, sanders.
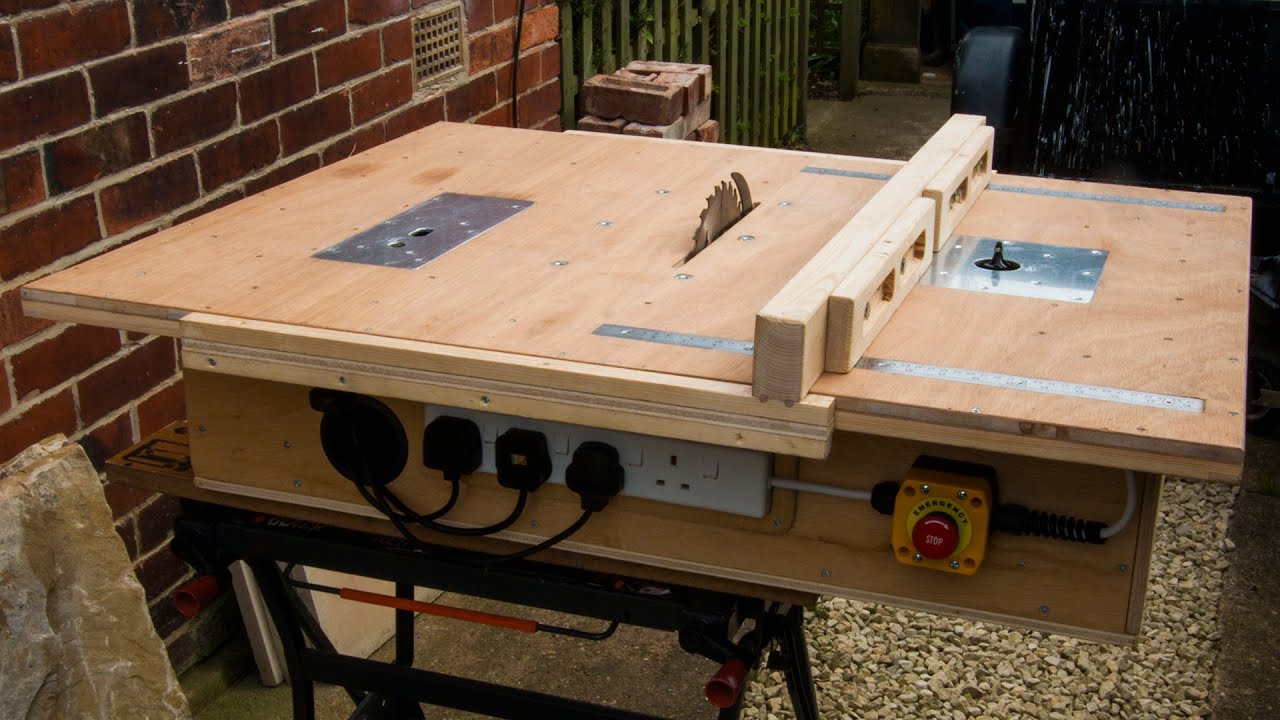
It's probably too much weight for moving around frequently but I just love having everything in one spot, and it cleared up so much space in my garage! An optional step, but worth it after all this effort in my opinion. I mounted 4 outlets in a 2-gang box on the front of the table, so both saws could remain plugged in with two additional outlets for other tools.
When picking the location Table Saw With Router Mount Android I made sure it was close enough to the miter saw that I could leave it plugged in while flipping it around. This connected to two outlets on the backside, where the power comes in via a male plug, strapped to the framing. This way I can bring an extension cord to the table wherever it ends up and then everything's powered. Thanks for reading my first instructable! Feel free to ask questions in the comments and I'll do my best to answer. Just want to comment on the plans for this workbench.
I made this bench myself, painted it, adapted it slightly spent a couple months working on it over the summer between work and family commitments and was so proud of myself only to place both my table and mitre saws on the workbench to realize the design is not practical. If I want to rip some boards on my table saw on the end the mitre saw in the middle is in the way unless I move it, which defeats the purpose of why I made the mobile work bench.
I have to repurpose the wood to rebuild it so the saws are on opposing ends with a workspace in the middle. I had the top all lined up with the deck of the saws but never cut it and put it on since I have to change the design. Just a caution for others. Reply 22 days ago. Did you guys apply a finish to the table?
BTW thanks for the design. I'm looking forward to building this. Looks great. If you have a table that has a fixed base with all the fittings then it even becomes much easier to do this.
You will also need other tools such as a handsaw, square, sandpaper, cordless drill, clamps, a jigsaw, wood glue, measuring tape, and screws.
Measure the size of Table Saw And Router Guide the table and the size of the hole within the table extension. If your measurements are, for example, by mm and by , then you have to extend the table by approximately 41 mm at each of its end. As for the sides, you only have to provide support. You can then cut a rebate at each of the end pieces but make sure the skinny pieces measure exactly 18 mm lower than the fat pieces and the frame 44mm high.
This will be equivalent to the thickness of the table top. Glue and screw the frame together. You can use flat-head screws in fitting the frame into place. Drill some holes in the frame and use screws to fix it on the lower side of the table you can use 5 or 6 screws. Once done, mount your router. This way you can enjoy the benefits of the table saw and still use the wood router when you want. Expand the versatility of your workshop tools by using a combination router and saw table.
You can buy a combination machine that has everything in place or design one by following the simple steps above. With a combination machine, you can enjoy the benefits of each of the power tools on one workbench. The benefit of using two or more workshop tools on one workbench far outweighs the inconvenience of switching from one tool to the other.
Some bits also have flat bottoms instead of sharp tips that limit the depth of the cut. Best For: Making signs, fluted columns, and a bead-board appearance on panels. The next three bits are primarily used for cutting adjoining notches to give two pieces of material strong, durable joints. Each bit doing so in its own unique way. Rabbeting bits are designed to form an L-shaped shoulder or dado square groove that runs against the grain on the edge of a piece of material to form a rabbet joint.
This occurs in cabinetry construction to make drawers and cabinet backs as well as to join the tops of cabinets to cabinet sides. As a result, the width of the cut is determined by the size of the bearing, with a smaller bearing producing a wider cut. Glue joint bits assist joining two pieces of material by creating identical, adjoining tongues on the edge of both pieces. The standard glue joint joins squared edges, while the mitered bit is made with a degree angle to join two mitered edges.
Before you begin using these router bit types, know that they are meant to be used exclusively in a router table. Using glue joint bits in a hand-held router can result in uneven profiles or, worse, injury in the event that it binds up and kicks back on you. Best For: Creating two adjoining joints that have a higher surface area for gluing. The bearing at the tip guides the cutting arm perfectly around the edge of a surface, allowing you to trim overhanging material perfectly flush.
You can use this for shelf edging, veneer trimming, or to smoothly join edges. For trimming purposes, these bits can be used in a hand-held router, but a table-mounted router is best used when replicating patterns with a template. Router bits are designed to serve three primary functions: To create wood joints, to plunge into the center of a piece for grooves or inlays, and to shape the edges of wood.
The remaining five router bit types are all designed for the single purpose of shaping the sharp edges of lumber in different ways and for different purposes. They create a rounded profile to ease the sharp, degree edge of a piece of wood. This gives the material a smoother, finished look. The eased edge can also help preserve paint and stain, since these finishes are more prone to chipping off sharp edges.

|
Radial Arm Saw Table Plans 5g 3d Cnc Wood Carving Software 5g |

Yeraz
01.11.2020 at 19:22:48
Dagestanec
01.11.2020 at 21:16:37