Table Router Joint Jig Keys,Ca Glue Near Me Map,Benchtop Bandsaw Reviews Uk App - Step 2
Miter joints are notoriously weak because they have no real mechanical strength; glue is all that holds them together. You can reinforce miter joints in a few different ways, but my favorite method is to use exposed keys. These hardwood keys are nothing more than thin lengths of wood glued into slots that span both sides of the joint to help hold everything together.
Keys not only add great strength to miter joints, they also provide a decorative effect. Once the jig is made, you can arrange the keys in any number of ways, using either a matching or contrasting wood.
For a slightly different look, you can cut wider key slots by simply adjusting the table saw fence to take two or more passes for each slot. For angled keys, which create joints that arguably are even stronger, simply angle the blade. You can even use this same jig at the router table to create dovetailed key slots — just be sure to hog out the bulk of the waste in the jig itself before you cut the actual box.
This jig can be made from plywood, MDF or whatever scrap you have on hand. I simply glue and screw through all the thicknesses to create one large chunk of material. Once the end cuts are made, cross- cut the stock into two separate pieces. Attach them point-to-point centered on a backer board. You should size the backer board so that it will stand a few inches above your table saw fence.
This extra height also provides enough room for you to secure your box with clamps when necessary. You can glue the angled blocks to the backer board, but I simply secure them with a few screws driven in close to the top of the angled blocks where there is no risk of a blade catching them as you pass the jig across the saw. When the jig gets chewed up from use, this allows you to replace fouled parts easily. Once the jig is ready to go, start by set- ting the height of the table saw blade.
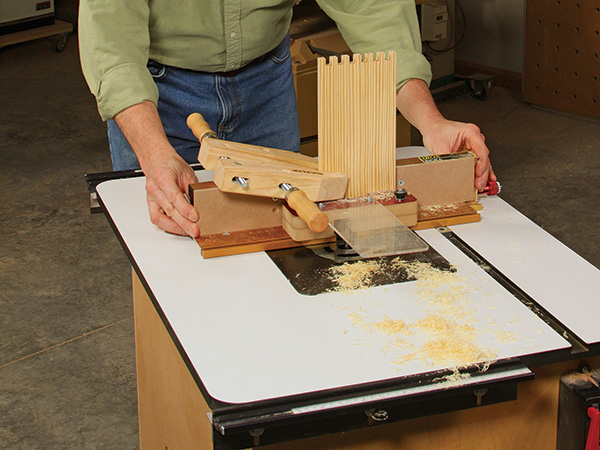
Position the box in the jig and hold it alongside the blade. The first goes against the permanent key, the second goes against the spacer. Basically, you are creating tongues and groves that will go together to form a joint. I was very pleased with the result. Now I must admit I looked at dozens of How Tos on making this jig and Frankensteined my own version to fit my router. You'll notice I only have one runner where as most I saw have two.
Even one I saw made a second runner off the side of the table. Some were so elaborate it'd take me forever to build it. The simple one I show here took a few hours on and off while doing other things around the house. It meets my needs, and that is the whole purpose. Make a jig to suit your personal requirements. I'm making my jig now. One question. In fig. Anyway to fix that? Reply 1 year ago. Hi, Allan, yes there is a way to eliminate that offset. When doing your first pass and you are NOT Router Table Box Joint Jig Plans Me against the key stop, make sure you accurately make that first cut without any tag--or offset as you called it.
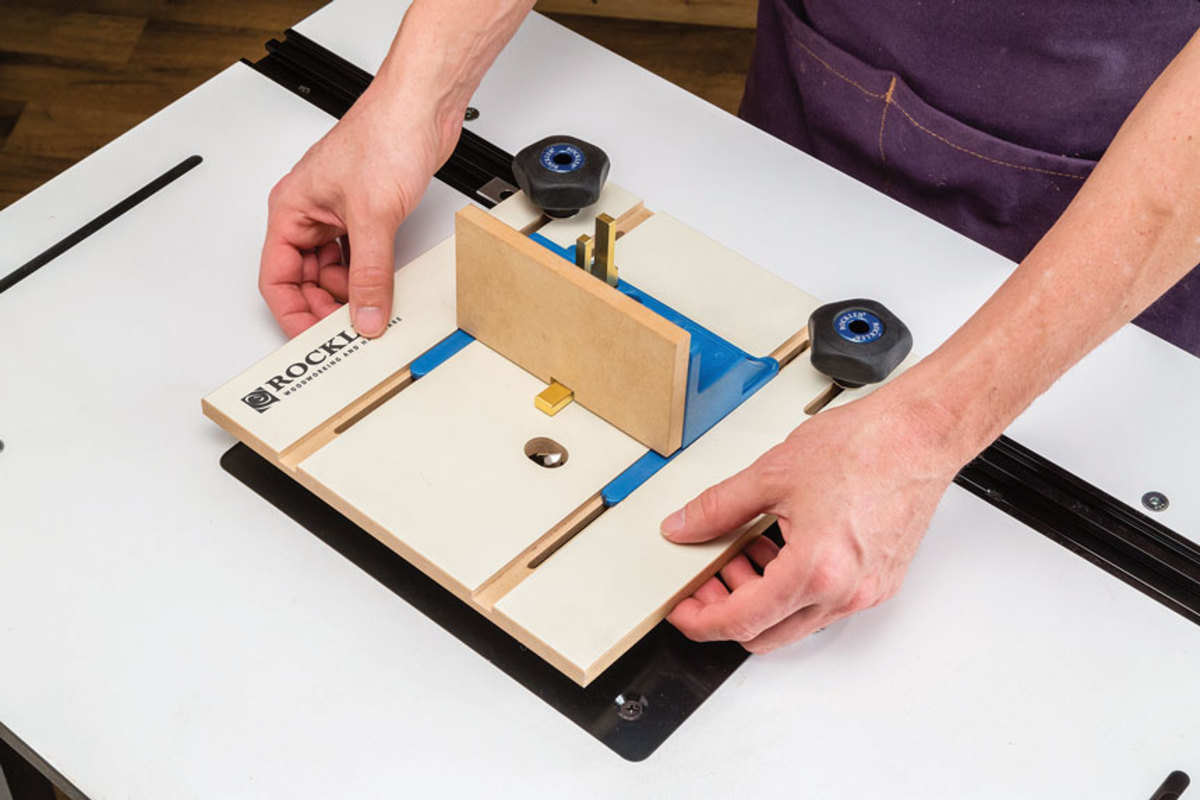
Some people use accurate keys in the open slot. What I eventually did was to carefully test scraps until I had an accurate starting point and made a mark on my jig. It works. Let me know if this helps. This jig uses precision-machined solid brass indexing keys to ensure uniform finger spacing and an airtight fit. The smooth-sliding sled features long ''skis'' that keep it square to the bit and tabs on the bottom that stop the sled at the end of the cut.
Lock it into the miter slot of your table with our comfortable Easy-to-Grip knobs and you're ready to rout. Make strong, tight-fitting box joints on your router table—great for small- to medium-sized boxes! Item Skip to the end of the images gallery. Skip to the beginning of the images gallery.


|
Veneer Supplies Location Best Bench Vises Uk |

LLIaKaL
13.09.2020 at 10:55:34
SweeT
13.09.2020 at 22:17:18