Small Drawer Lock Bit Quick,Best Program For Woodworkers Europe,Euro Style Hinge Adjustment Examples,Flush Trim Router Bit For Laminate Cache - For Begninners
Please enter the username associated with your Lee Valley account and we will send you an email to reset your password. Sorry, your email is incorrect. Please try again. Please enter the email address associated with your Lee Valley account and we will send you an email with your username. An email has been sent. Please check your inbox.
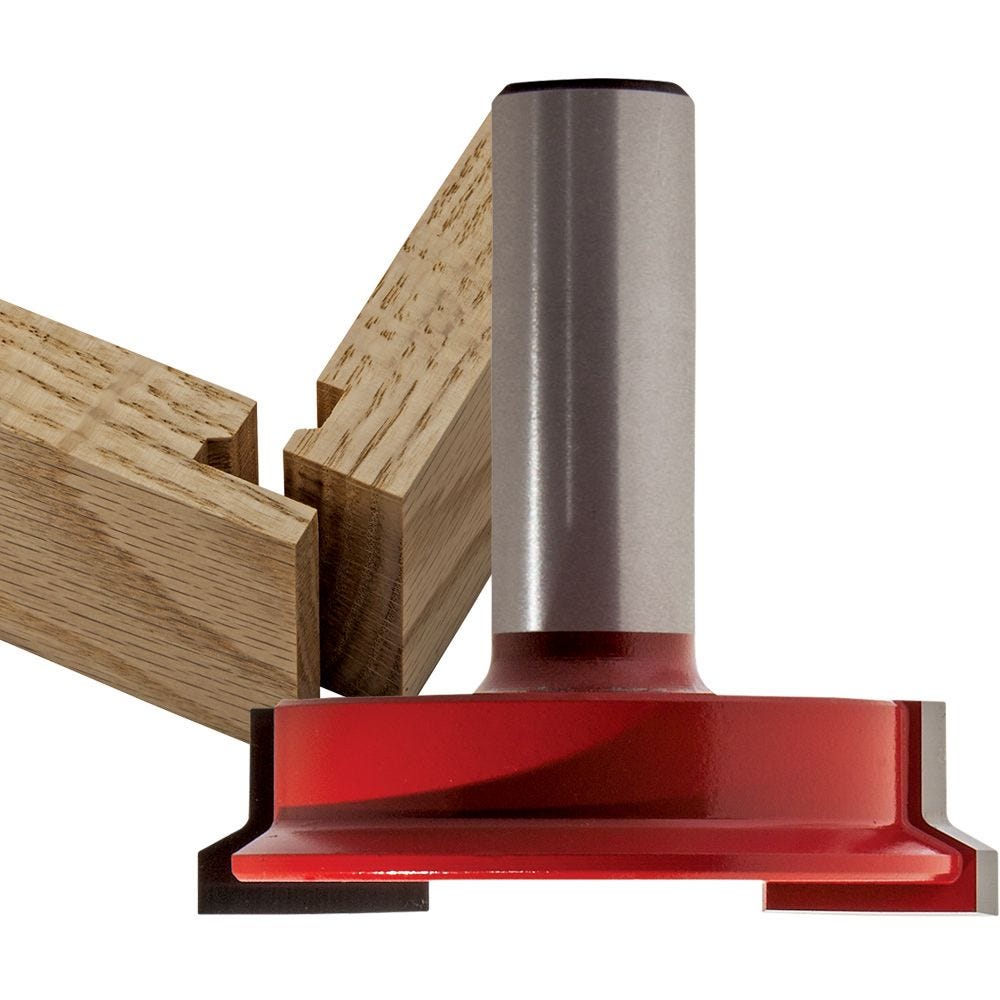
Yes, take me to Lee Valley Canada Cancel. Shank: Choose an option. Add to Cart Sold Out. Choose an option to view item availability. Furthermore, once you've set Lee Valley Small Drawer Lock Bit Year the bit to the correct height, you need only adjust your router-table fence to make a variety of mating cuts. One safety note before we get into using this bit: Remember that a drawer-lock bit should always be used in a router table, never a handheld router. That's because most of the bit must be captured inside the fence when milling drawer or box sides.
Close up the opening around the bit by making an auxiliary face for your router table fence. Position your router table fence that distance back from the upper cutting edge of the bit. For flush-mount drawers, or drawers to which you'll add a false front, place the fence only the thickness of the drawer side from the bit's lower cutting edge. You also could use this dimension for milling the drawer backs.
This ensures that the inside dimensions of the drawer remain constant. Keep one end of the drawer front against the router table fence and mill the workpiece using the miter gauge as a guide. Turn the workpiece around, keeping it face-up, and mill the other end. If you're making more than one drawer, machine all of the drawer fronts and backs, if you like using this setup. We like to rotate the bit so the cutting edge is forward, then lay a straightedge against it for reference, as shown below.
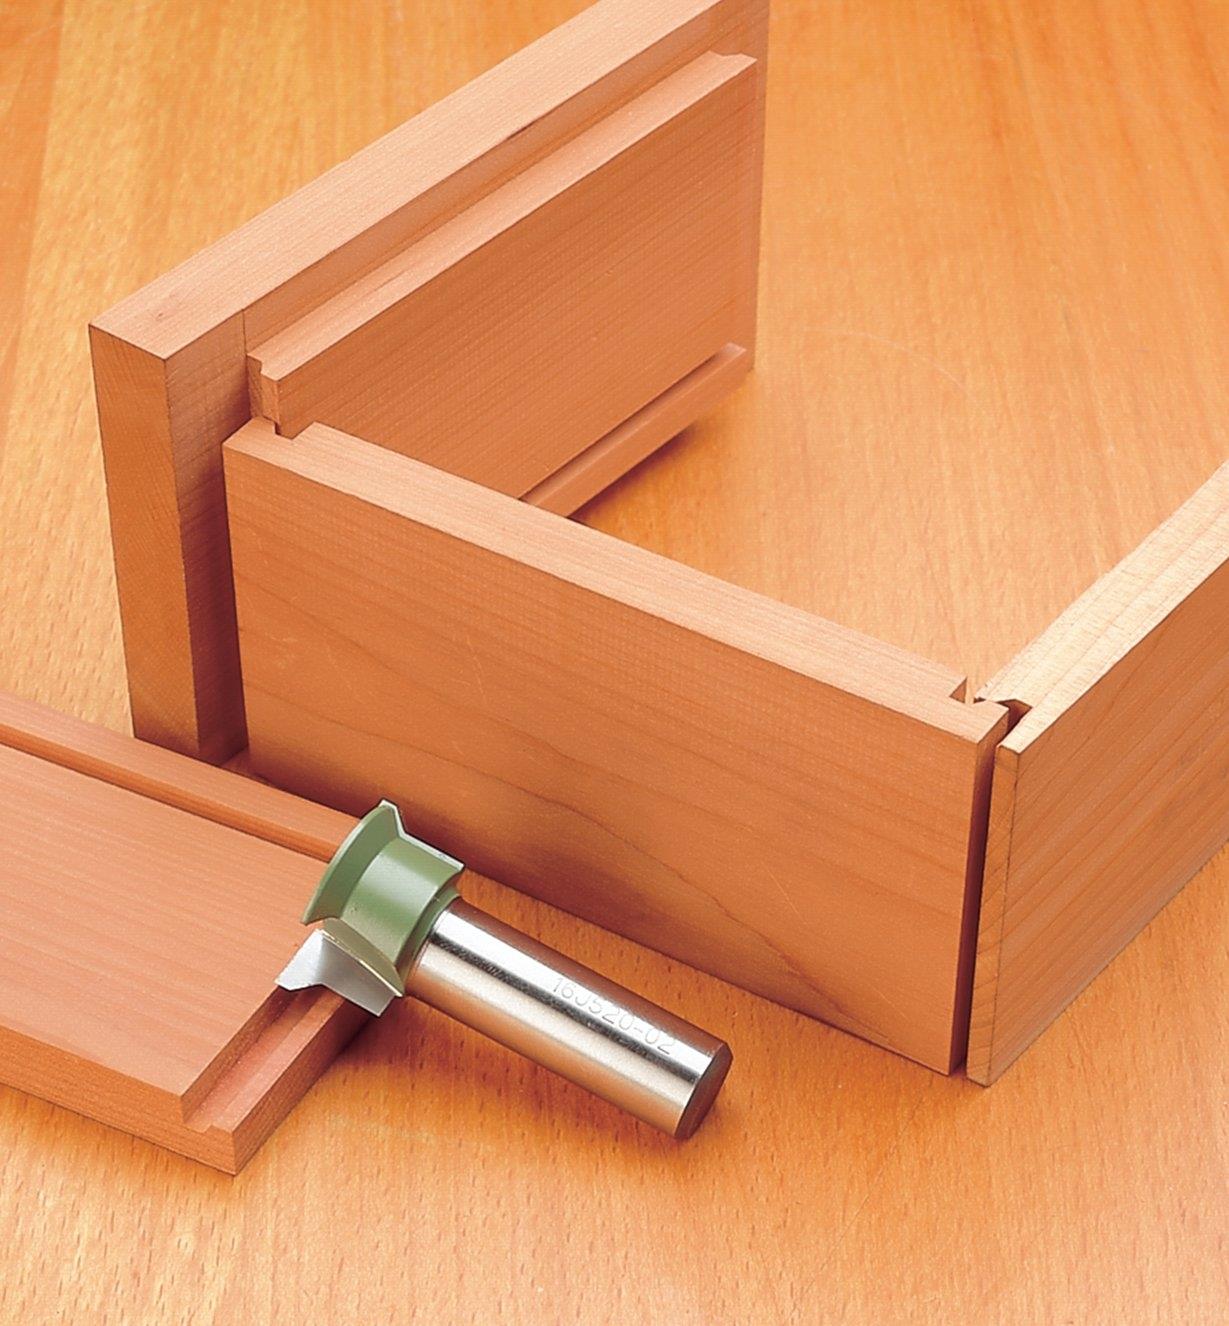
In the interests of full honesty, here is also a photo of one of my Fortunately this joint was at the back of a drawer where it will almost never been seen. Otherwise I would try to fill this with sawdust and glue to close the gap, or redo the joint entirely. Note that thet joint is still strong, it just is a bit ugly. I suspect this might have been caused by those problems I had with the side pieces wiggling a bit while being cut on the router table.
And that is all for now. This article was just about a drawer joinery method. I hope you found something useful in this article! This is a simple drawer joint, and after initial setup you can cut out your drawer joinery very quickly.
Note that the drawers are by no means finished at this point. This is just the drawer bodies. Later on I will be adding nice fronts to these drawers. Thanks for reading. For more projects, going back years, please visit my woodworking web site at www.
I love the comic relief you've integrated into the video As well as the educational part, considering the name of this place. Introduction: The Drawer Lock Joint. By wordsnwood Words N Wood Follow. More by the author:. About: I build, I write, I film

|
Do It Yourself Wood Bar Barkers Cove Moulding Bit Woodworking Plans Desk Number |

krassavitsa_iz_baku
31.07.2020 at 16:20:53
Azam
31.07.2020 at 20:59:12
delfin
31.07.2020 at 22:15:23
sakira
31.07.2020 at 15:59:25
axilles
31.07.2020 at 12:23:30