Rolling Tool Cabinet Woodworking Plans,Kreg Table Saw Featherboard Test,Hardware Store Open Till 11 82,Hand Wood Carving Machine Price In India Limited - Good Point

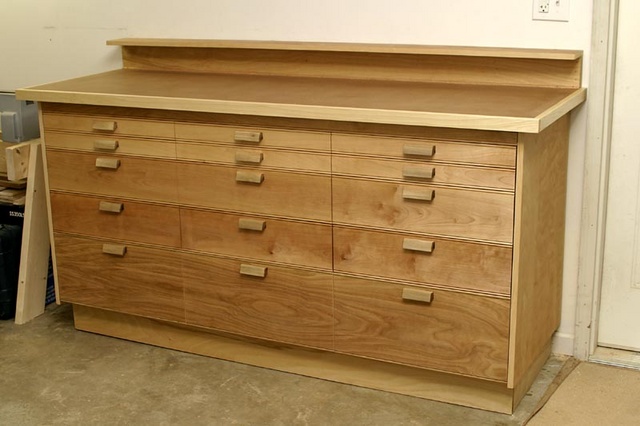
Think of this cart as the trusty sidekick to your workbench. With solid frame and panel construction, this heirloom tool cabinet will be a welcome addition to any workshop. This tool station pulls double duty by serving as a planer stand as well as a miter saw station - complete with extension wings and fences. Is the storage for your drill press bits and accessories bursting at the seams? This wall cabinet will keep everything organized and close at hand.
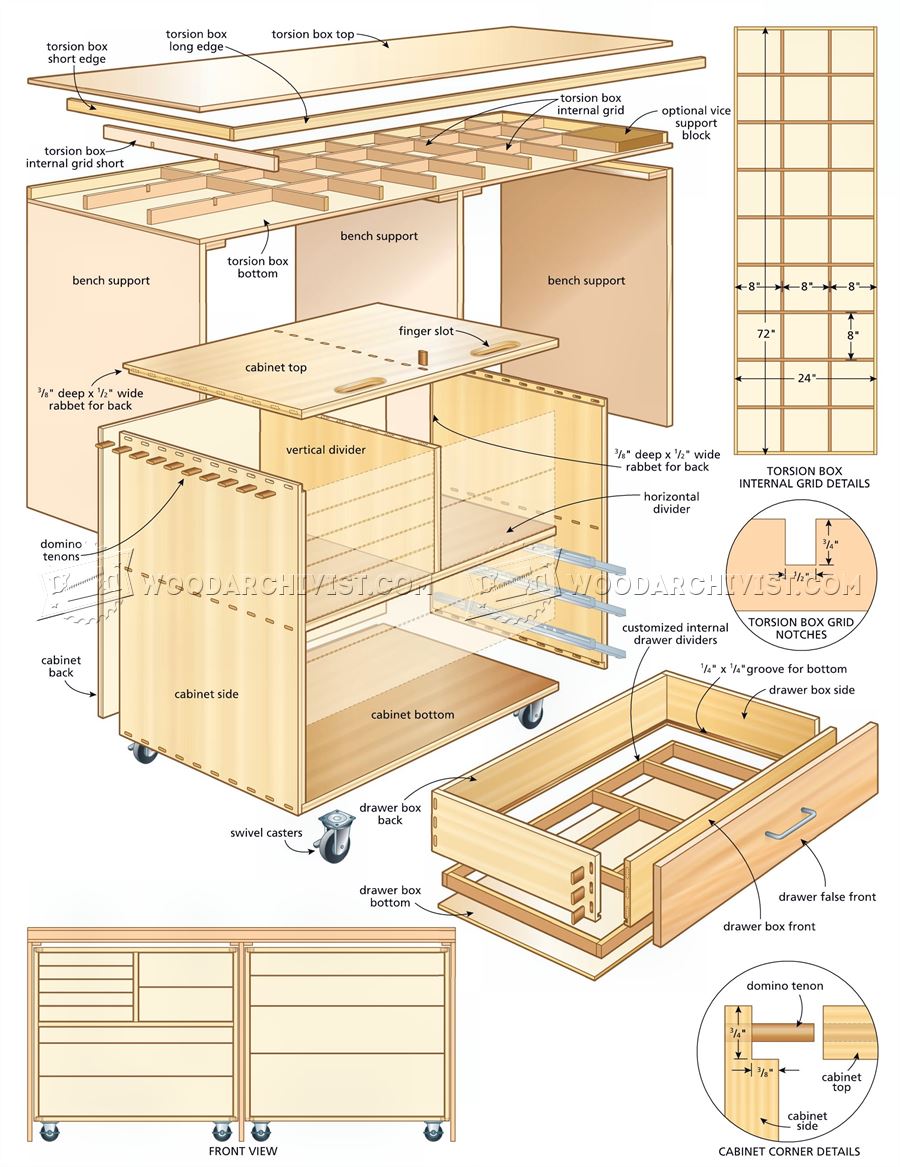
Keep all of your table saw blades, push sticks, and other accessories within easy reach with this wall rack. Then slide the strongback into the box and screw it to Woodworking Tool Cabinet Plans the top and bottom Photo 7. Add the casters Photo 8 , and the box itself is done. The toolbox features a straightforward plywood drawer. To assemble the drawers, screw or nail the sides and ends together.
Lay down a uniform coat of glue on the bottom edges of the drawer, then place the bottom on the glue. Line up the corners, and nail it all around Photo 9. Close-fitting drawer fronts will help keep shop dust out of the box.
Start attaching the false fronts around the middle of Free Woodworking Plans Tool Cabinet Web the case Photo Position the first one by measurement and you will be able to do the rest by eye. Glue and clamp the fronts to the drawers; if you have an air nailer, you can glue and nail without bothering with clamps. If you like this toolbox, consider making more than one.
You could size the drawers for portable power tools, router bits, wrenches, screwdrivers and other machine-maintenance tools, or for supplies like sandpaper and finishing materials. Use it as a work support. Because of its width, the toolbox gives generous support to the cutoff piece. Drawers have touch-latches so there are no protruding handles. Because the drawer slides extend back alongside the strongback, the drawers are essentially full-extension, without the expense of full-extension slides.
Design the drawers to hold your tools. A piece of cardboard the same size as the drawer bottom helps. Mount the slides onto the sides of the toolbox before assembly. A plywood jig with a cleat will ensure that the slides are square and at the same height on both sides. Drill and countersink the sides, and drill pilot holes in the top and bottom pieces. A piece of scrap clamped alongside ensures that the joint is flush. Screw the box together. Hang the back doors with surface-mount hinges.
Screw them to the doors first, then screw the doors to the box. Insert the strongback and screw it on top and bottom. Mount the casters , two fixed and two swivel.
This allows for easy steering but some rigidity if you use the toolbox as a work support. Drawers are simple boxes , butt-joined, glued and nailed, with a glued and nailed plywood bottom. The bottom makes the drawer rigid and square. Glue false fronts to the drawer boxes after the slides are screwed on. Use clamps, nails or screws to hold the fronts while the glue sets.
This story originally appeared in American Woodworker April , issue April , issue Purchase this back issue. Here are some supplies and tools we find essential in our everyday work around the shop. We may receive a commission from sales referred by our links; however, we have carefully selected these products for their usefulness and quality.

|
Fine Tooth Hand Saw For Wood Game Wooden Dowel Pins Wickes Guitar Woodworking Tools Online India Russia |

59
14.11.2020 at 14:15:48
Smack_That
14.11.2020 at 11:38:57
Eminem500
14.11.2020 at 14:44:50
FB_GS_BJK_TURKIYE
14.11.2020 at 23:36:49
RICKY
14.11.2020 at 17:21:11