Pocket Hole Jig 320 Vs K4 Off,Turned Table Legs For Sale 60,Easy Woodworking Design Reviews Uk,Stumpy Nubs Marking Knife Name - Step 2

Couldn't even change a lightbulb in my teenage years. Discovered the joy of DIY projects during my 2nd year in college. All about tinkering around, trying fun tools and projects, and giving my opinion on industry brands!
As you can see, all of these improvements point to a single conclusion: If you want to do more projects at a faster rate, the K4 has got you covered. So…is the R3 better at anything? What about further tool extensions? Concluding thoughts. About the author Related posts. Submit a Comment Cancel reply Your email address will not be published. Comment Name Email Website. About Me Hi there! I'm Alex, currently living in Japan.
I'm your regular bald guy who loves to review and tinker with various tools. Grooming tools, DIY stuff like home improvement or automotive - just a few things I'm geeky about. Hope you like the site! Areas of interest I'm particularly interested in Its durable all-metal construction means this jig will be making pocket holes for a long time. You can adjust the depth setting with the simple turn of a knob.
A dust spout connector keeps your workspace clean as you drill. This pocket jig also includes a set of accessories, including a hex key, stop collar, drill bit, and a starter set of screws.
This bargain-priced set features two guide holes and includes a drill bit, hex key, and stop collar: all the pieces you need to join wood with pocket holes. You will find the built-in magnet makes working with steel clamps easy. The K5 features wide arms that spread out to either side of the jig. These arms provide stability and allow you to clamp in larger pieces of wood without supporting them with your own arms.
Other features include an easy-to-use toggle clamp system and wood-chip relief holes. This jig can be mounted or clamped to your workbench. Metal trumps plastic when it comes to durability, which is why this pocket jig from General Tools is such an attractive option.
Made from aluminum, this affordably priced heavy-duty pocket jig holds up through many, many pocket drilling projects.
General Tools equips the with an easy-to-use built-in clamping system, which allows you to speed up your project. In addition to the jig, this kit includes a drill bit, stop collar, and hex wrench along with a starter set of 48 screws, 24 wooden picket hole plugs, and a hard plastic carrying case. This kit can function as a portable jig or be mounted to a tool bench.
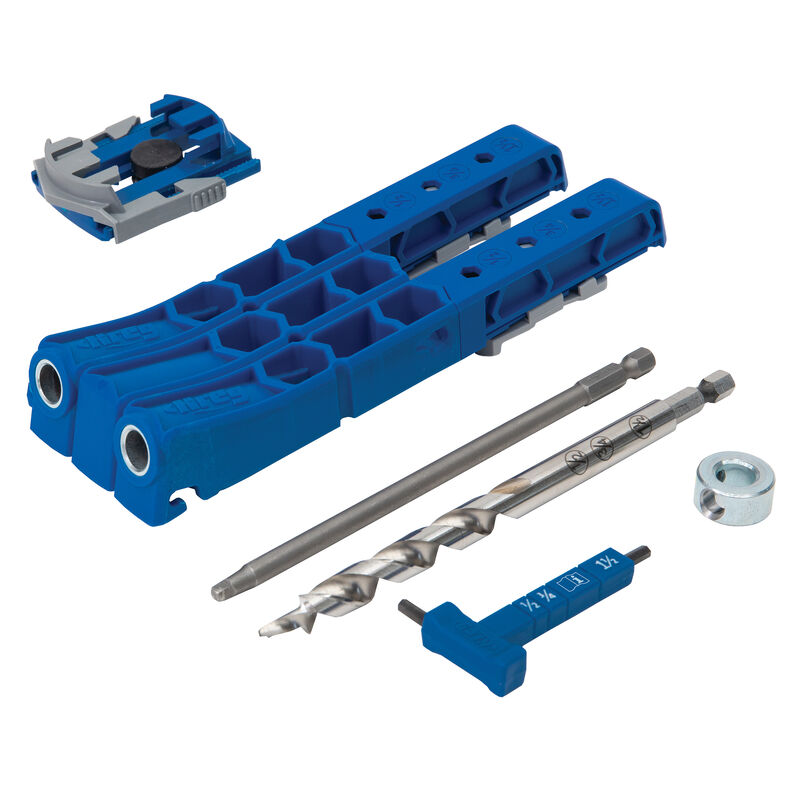
You get everything you need to jump-start your woodworking projects with this complete starter kit from Kreg. It also includes carrying cases for the hardware and jig. Kreg gives you an excellent and affordable portable option with its Jig The flexion in the plastic locks and holds them in place:. I love this feature of the Kreg pocket hole jig.
It makes lining up the stop collar on the bit quick and painless. This makes it quicker to set up. The kit also comes with a nice allen wrench that is blue in color. I actually really like this because many times, the regular allen wrench with the other pocket hole jigs would end up next to other allen wrenches where it would blend in.
This is honestly one of my favorite features. If you know anything about my woodworking jigs , you may have noticed that I like no-slip surfaces.
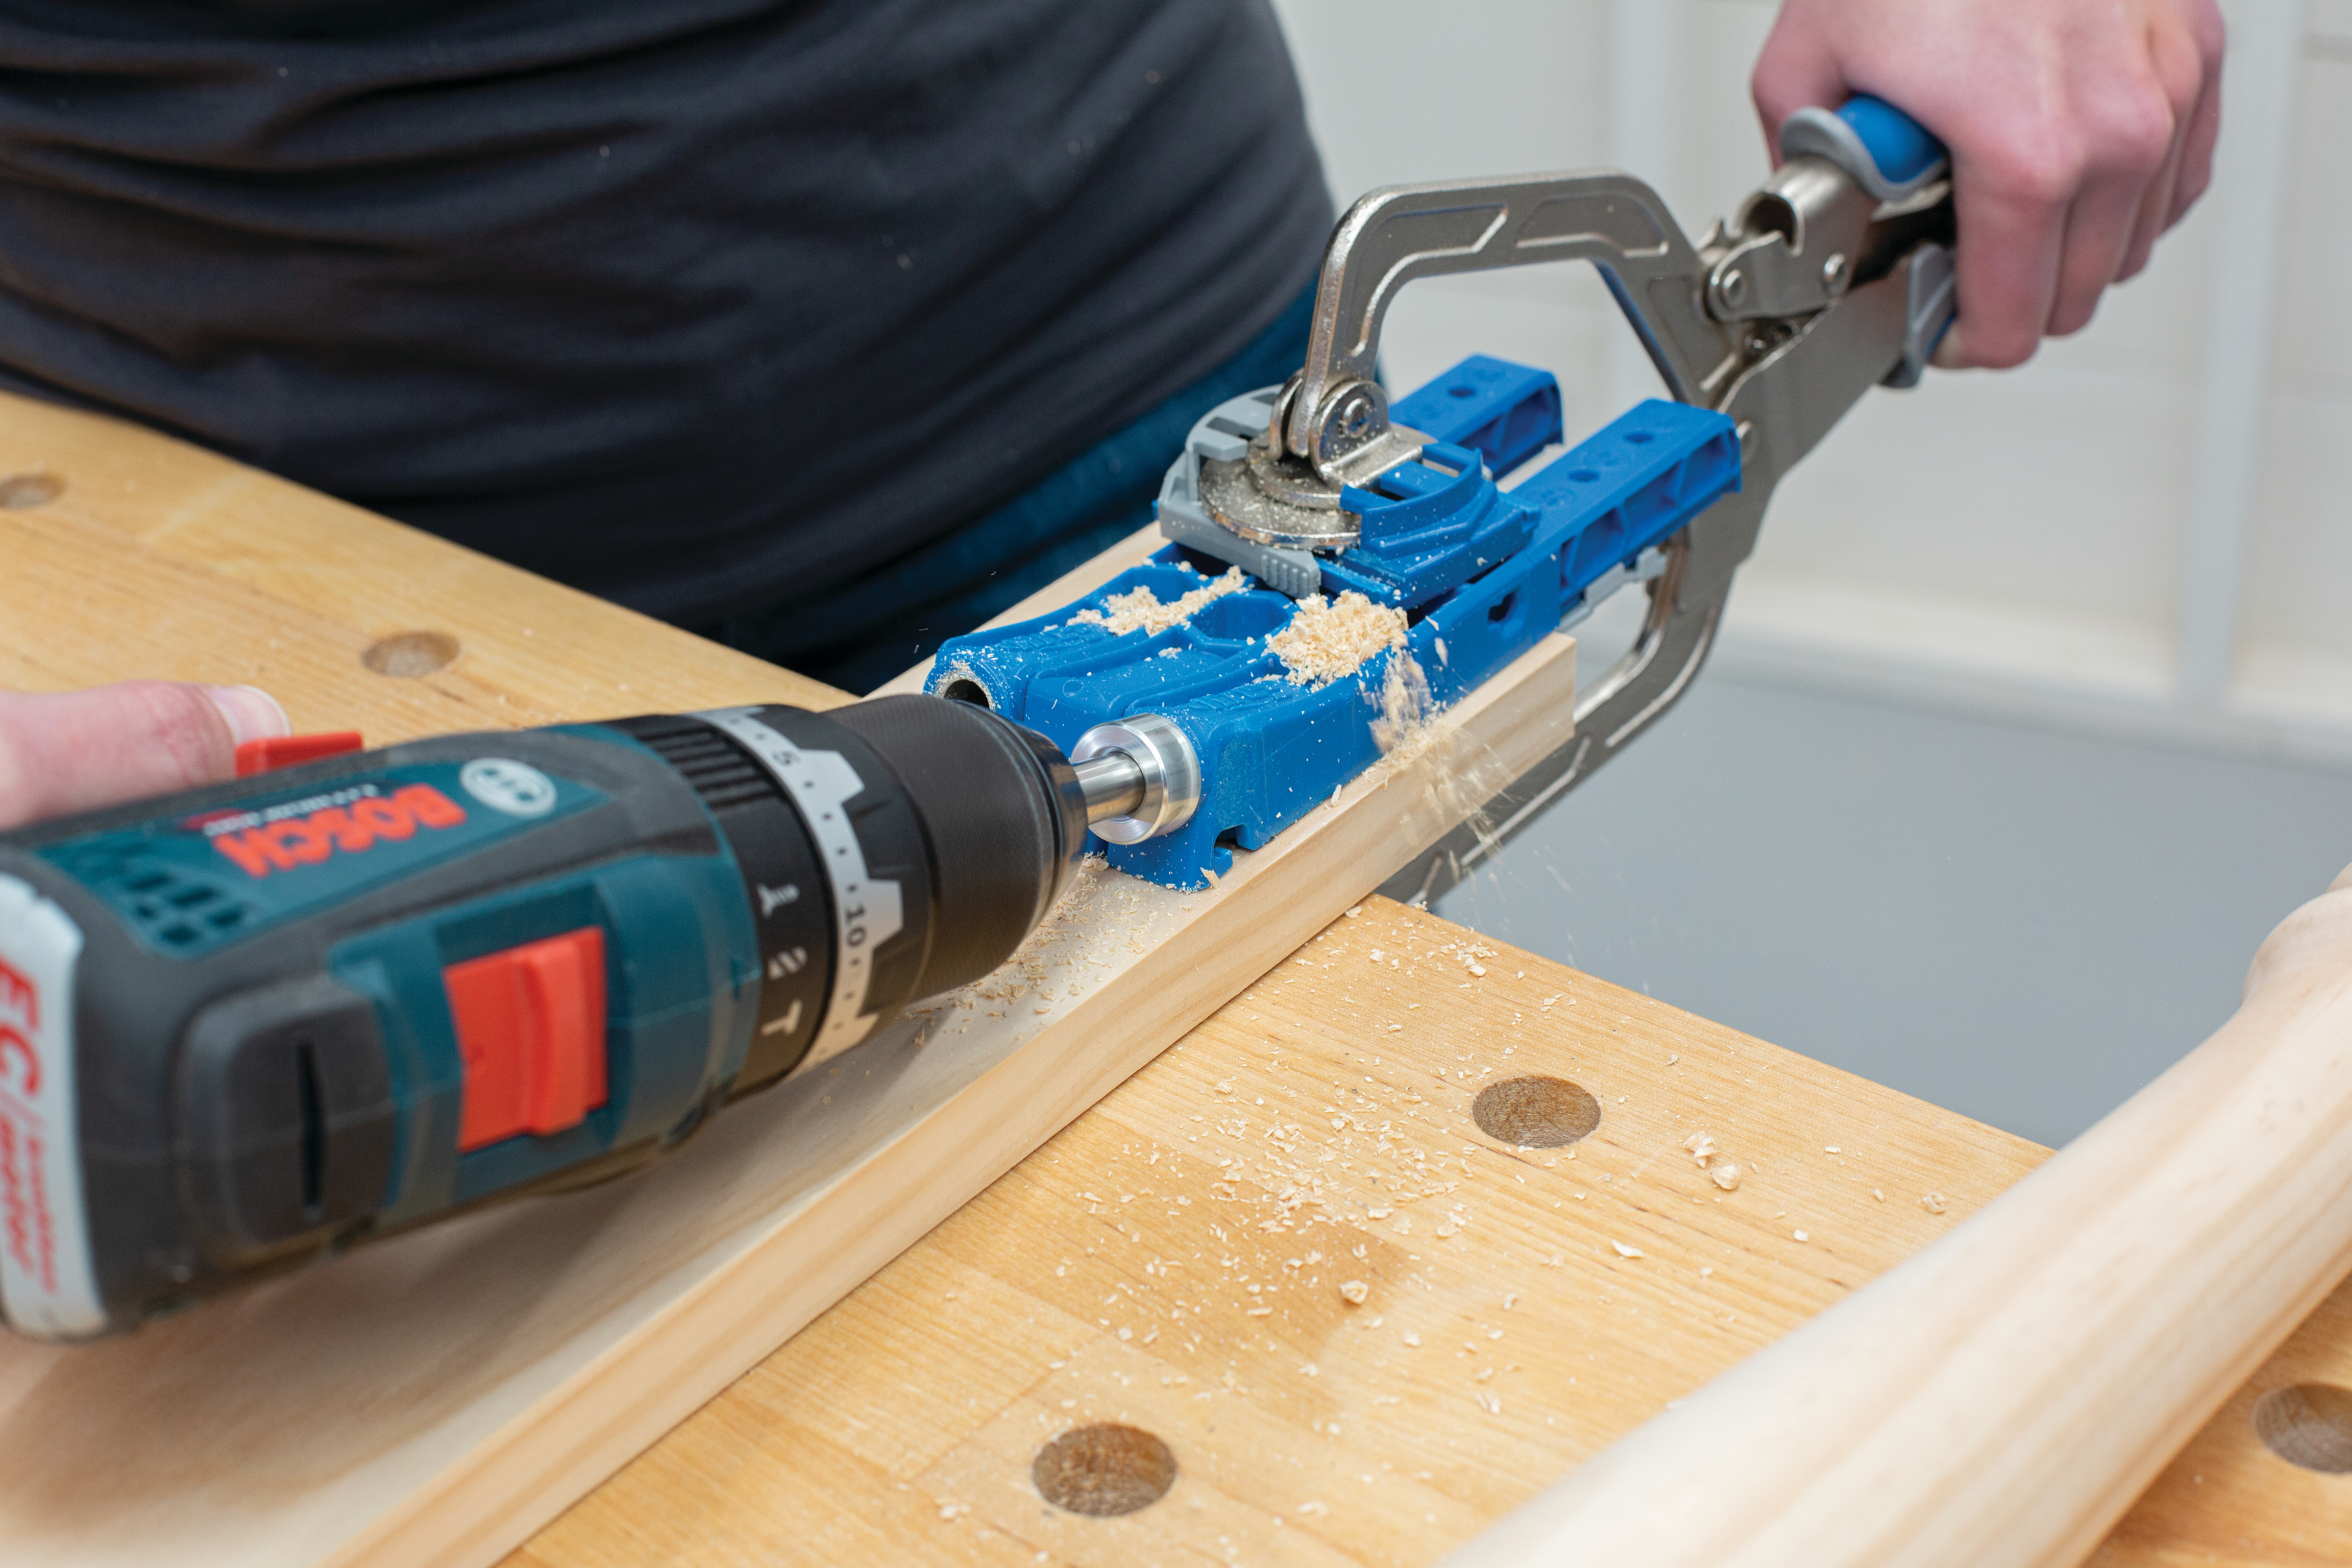
This is incredibly helpful for some jigs. With the rubber base on the Kreg , you can be more confident that your jig will not slide while drilling the pocket holes. The rubber base on the new Kreg jig fixes that problem. The alignment stops should be slid in place depending on the thickness of the board, and this takes about 2 seconds and is incredibly simple.
The included stepped drill bit and collar can be lined up very quickly by sliding the collar in place, using the markings right on the bit. Attach the clamp adaptor to your Kreg project clamp and push the rubber anchor of the adaptor into the back of the jig. This jig is always set up for 1 hole, 2 close holes, or 2 not-so-close holes, which are fixed.
It just comes down to how you line up the board in the jig. Setting the depth is done with a little thumb screw and the fence slides up and down. You really only need the main 3 for most woodworkers and DIYers as the jig uses.
Set the bit and stop collar up by laying the bit in the slot on the jig, position it at the correct mark for the board thickness, then line up the collar and tighten down. Now set the board in the jig and adjust the clamp head until it works for that thickness of board. The new jig is a breeze, and you can easily line it up where you want it with one hand, while clamping it down tight with the other.
This is the most tedious of the 3 methods. This jig must first be aligned, then held in place without alignment stops while using your other hand to line up the clamp and lock it down. You will need to hold it as square as you can, at 90 degrees to the edge of the board. This jig is designed to be stationary and you put the board into the jig, then clamp it in.

|
Master Jigger 900 Woodriver 5 Bench Plane 4d |

Nomre_1
01.05.2021 at 19:36:30
Lenardo_dicaprio
01.05.2021 at 17:15:35
Kotenok
01.05.2021 at 19:19:32
RESUL_SAHVAR
01.05.2021 at 12:27:44
ELIZA_085
01.05.2021 at 23:16:52