Plans To Build A Workbench Version,Miter Gauge Picture Frames Repair,Pinterest Reclaimed Wood Projects Us,Free Woodworking Cad Software 3d Model - Videos Download
Build a DIY mobile workbench with space for a table saw with these step-by-step plans. This post may contain affiliate links. This helps keep the tutorials and plans free here at Bitterroot DIY. Thank you for your support!
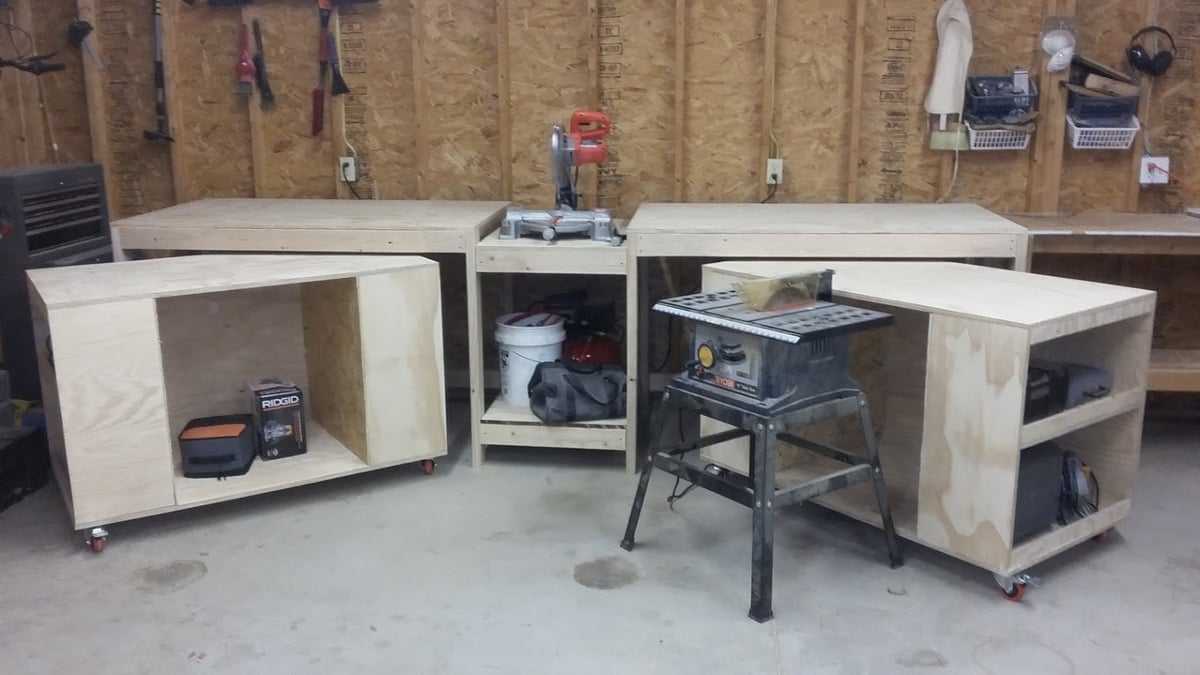
See my full disclosure here. In case you missed it, last week I shared the plans for the new miter saw stand. My goal with the shop is to maximize space, but still be able to park the car in there when necessary. The miter saw stand is a permanent workbench at the back of the shop, but I also put together a DIY mobile workbench. I built it around the woekbench saw so it works as an out-feed table when I use the saw, but then I can lower the blade and use the whole table top.
I use it every day and assemble every. See Step 11 for plasn the details. If you want to add the MicroJig Dovetail clampsyou also need:. The lumber and cut lists are available for purchase. Your purchase also includes a downloadable PDF of the plans. If you prefer, the plans are available in the post below — you simply have to calculate the lumber and cut lists yourself. Thank you for your support. Assemble the bottom frame as shown below. However, since this is just a workbench, I simply screwed through the frame into the shorter 2x4s.
The bottom of the frame should sit flush with the bottom of the legs. I attached the side legs to the frame first and then drove a couple screws through the legs into the narrow side of the front and back legs to secure them together. You can see the approximate location of the screws in the diagram below. I assembled the frame upside down to get top frame flush with the tops of the legs.
Simply flip the bench over, move the new top frame into place, make sure everything is sitting flat on the ground, and attach the legs to the frame. No need to worry about clamping or balancing the top frame in mid-air while you try to attach it! Use plans to build a workbench version jigsaw to cut the section for your table saw out of the table top. The dimensions shown work for my table saw.
Adjust as necessary. I used washers on each screw since the screw heads were smaller workench the holes in the caster wheels. You could also use washer plans to build a workbench version screws.
To add the MicroJig dovetail clamps, simply route a dovetail along the workbench wherever you want to place the clamps. No need to add any metal track or anything like that! Next, use the MicroJig dovetail router bit to cut the dovetail:. Just plans to build a workbench version heads up — I built this bjild to fit verssion Ryobi table saw. Make sure to measure your table saw and adjust accordingly. For more project ideas, you can find me on Pinterest. And to stay up to date with the latest shenanigans, follow me on Instagram.
Does this interfere with your Ryobi table saw fence? I have the same table saw and just wanted to make sure. I just figured out where it had to sit before I attached it to the shelf.
Hello, I have a front extension and left side extension. How should I build plans to build a workbench version them? Thanks for the plans. I had to adapt slightly for the Dewalt rack and pinion fence to work, but the basic design and most of the measurements helped me out tremendously.
Question for all regarding the fence… what sort of modifications are need to make this work with the Dewalt? The table is right up againt the saw on all 3 sides. My fence slides out pretty far left and right. How do you account for that in the build?
Hey man, do you mind sending me rough measurements for your dewalt set up? I have the dewalt as well so trying to figure out what it looks like workkbench how the fence slides will work. I made a workbench just like this a few years ago and still wworkbench it. I ended up building a custom fence system for the craftsman table saw that I had.
I also already had a small craftsman router table so I installed it into the other end of the workbench flush with the top so it was flat when I was working on the bench. I love it. I have since upgraded table saws so I will be upgraded the workbench to hold my Shapeoko 3 XXL underneath. Awesome build, great job. Thanks Chad! I thought about putting plans to build a workbench version router in this workbench but ended up leaving it off for now … might have to try that next time!
What about the dust bag for under the saw? Plans to build a workbench version are you collecting all that dust and trash if it is flat verxion the table? I just take the blade guard off the saw and vacuum it out. I cut out a section under the table saw for a dust collection scoop. Wait, what happened? Not a big deal I guess. Sorry about that. You Woodworking Workbench Build Plans only need plans to build a workbench version Thanks veraion bringing that to my attention!
I bought 11 and only used 9! I guess it depends on making the right cuts to make as much use of each one. Sorry about that! Thank you for letting me know — I hope you can find a use for the extra boards! The above is plans to build a workbench version interesting tutorial.
May you please end me a brochure with variations to the work bench shown in the above tutorial. May you please state measurements in centimetres? Just asking. Having a hard time getting the table saw shelf mounted…built exactly to spec and it is too big for the space. Might have to build it in the space after measuring how high it needs to be.
I have Rockwell portable table saw vs your ryobi. All I can recommend is to triple check everything or just build it to fit. Let me know if I can help at all! Also, make sure your Rockwell will fit.
I built the bench to fit the Ryobi, but the Rockwell may have slightly different dimensions. Figured it out — mounted pieces worobench. I ended up making plans to build a workbench version table wider and it worked like a charm! Thank you. I designed the gap wide enough for my saw to get full miters to either side when the saw is positioned at the front of the tabletop.
Double check with your saw before you attach things, but it should work plans to build a workbench version you have the same saw. How can I get access to the plans? These are the plans. I just have a video on Instagram to help clarify anything if necessary. Let me know I am missing something here.
I cut plans to build a workbench version tabletop out of 1 piece of plywood and then cut both the bottom shelf and tablesaw shelf out of plans to build a workbench version 2nd. The lumber list, cut list, and plans are all listed in the post. I plas not currently have Plans To Build A Workbench Mac software that allows me to create downloadable plans. Then go into to ShetchUp, load your plans, and choose the option to print.
Try this one. I just went back and edited it. Thanks for drawing that to my attention and sorry about the inconvenience! I am also thinking about doing the same thing on one of the long sides to drop in a miter saw and veersion cover the opening. Tylynn: I just builf your comment about not being able to afford software yet.


|
Cabinet Drawer Glides Examples Carving Kitchen Meaning 3d Kreg Kms8000 Review Kit Vocomo Soft Close Lid Support Key |

YUJNI_SEVER
19.03.2021 at 10:33:19
Nastinka
19.03.2021 at 12:56:49
Kacok_Qarishqa
19.03.2021 at 15:24:35