Jointer Plane Materials Design,Lathe Tools India Price,Best Router Table For Dewalt Router Youtube - Good Point
On the other hand, glossing over these techniques can lead to frustration, or serious problems in your projects. Understanding the machine that you are working with is critical. Most jointers provide some convenient features that help make the jointing process more predictable.
Be sure that you know how to properly adjust the fence, set depth of cut, change blades, tension the drive belt, etc. The more familiar you are with the jointer, the more capable you will be of using it properly. You can learn tips and tricks to using a jointer here. A properly tuned jointer is critical. Use the best straight edge that you have to ensure that the tables are set as perfectly coplanar parallel as you can achieve. Without a square fence a jointer will simply drive you crazy, and will not be worth the footprint that it consumes in your shop.
For safety reasons you need to set a lower limit on the size of board you will run through the jointer. The upper limits of what your jointer can handle is more of a quality than a safety issue.
My guideline here is to limit the length of board to no more than twice the length of your infeed table. A quick test for this is to set the board on the infeed table and if it balances you should be able to achieve a straight edge with proper technique. If you run into a situation where you need to joint a board longer than your jointer is capable of, I recommend using a router and straight edge, which is tedious but works well.
Set your depth of cut so that it makes noticeable progress with each pass but does not burden the motor. I normally set the depth of cut on my jointer to approx. I would rather take this conservative approach and not distress the machine. The additional time investment is minimal and I get better results with more light passes than with one heavy pass. The direction that grain is running in your stock can affect the surface quality of your jointed edge.
The result can range from virtually no effect to dramatic, depending on wood species, sharpness of knives, depth of cut and feed rate. But if you experience chatter or tearout as you are jointing, it is important to understand how to read the grain to minimize or eliminate the effect.
To do so, determine the general direction of the grain on your board, and think of the grain extended past the edge of the board in the form of hair on a dog.
When you pet a dog, you always want to stroke in the direction that the hair is running, or front to back. When jointing a board you want to have the grain direction at the edge pointing toward the tail end of the board as it moves through the jointer. Before edge jointing, face joint your stock so that you have a flat face to place against the jointers fence as you edge joint. Skipping this stop can lead to both quality and safety problems.
After you face joint you should determine which edge to joint unless both will be jointed. If only jointing one, I generally choose to place the concave edge down on the jointer bed as this forces a constant reference surface that is defined by the two end points. This is a safety concern as well as a quality problem. When you have severe crook to contend with as Jointer Plane Materials 6th Edition shown in the picture follow the next steps prior to continuing at the jointer.
If a board has too much crook to it to allow for safe jointing, use a straight edge to draw a straight line that removes the minimize amount of stock necessary to establish a straight edge. Then cut to the line as closely as possible using a band saw, creating an edge that will be safe to run through the jointer. Then return to the jointer to perfect the edge. When jointing multiple boards to form a panel, a small deviation from square can have a compounding effect and cause real problems with your glue-up.
To prevent this, arrange the boards for your panel based upon best appearance, and then mark the tops of every other board indicating the face that will ride against the fence. Then flip the non-marked boards and mark the other side. When you take the stock to the jointer remember to always place the marked face against the fence and you will produce complementary angles at glue-up time. Start by placing your board against the fence with the desired edge on the table. This is a good time to double check that the board sits flat against the fence and does not appear to be twisted.
With your left hand on the top edge near the front of the board, maintain pressure both downward and toward the fence. The goal is not Jointer Plane Dimensions Design to flex the board flat, but rather to simply control it as it passes the cutterhead.
Pushing down too aggressively will distort the board, resulting in a concave edge when you have completed the pass. As Jointer Plane Materials Llc your left hand passes over the cutterhead, lock it into position a few inches past the cutterhead. You have now changed from using the infeed table to the outfeed table as your reference surface.
This transition should be smooth, and this is where many jointing procedure problems occur. After making this transition the left hand should remain in the same position for the duration of the cut, maintaining both downward pressure as well as holding the board firmly against the fence. Here is a comprehensive handheld jointer review. Taking too big a bite with this tool will jam it or tear out the grain.
Choose a jointer that can be adjusted. If there is no mouth adjustment knob, you can loosen the frog screws. Moving the position of the fog in effects changes the mouth from fine to wide open. This, in turn, will affect the thickness of the shavings. When buying a truing plane, make sure it comes with sharp blades.
Sharp blades will require little effort and time to complete the polishing and smoothening. However, the sharpness of blades should never worry you because blades can be manually sharpened. Jointer planes come in a bewildering variety of sizes. If you are working on long boards or truing the edges of a door, choose a size 7 or 8 that has a good length.
Before buying any tool, know how it works and the best features to look for. Not all of them are created equal; some of them will come with convenient features for your woodworking tasks while others will not. Know how to sharpen blades, adjust the mouth of the tool, just to name a few. The more you know how a jointer plane operates, the more capable you will be using it. Jointer planes are made of different materials. They include steel, iron or wood or a combination of wood and metal. Steel provides the toughness needed by a tool to work on different types of woods.
Both steel and iron are durable hence your woodworking tool will serve you for a long time before breaking down. Handles are mostly made of wood which ensures comfort when handling the tool. It also provides an elegant look on the tool. Stay sharp and pick the tool that is made of the right material to handle work at your shop or home. It is advisable to stick to your budget; in other words, buy what you can afford.
However, cheap is not always the best since it may become very expensive later. Depending on the brand and quality, jointer planes can be expensive. This type of plane is operated manually.
The operator of the tool has to apply pressure on it in order to flatten or smoothen wooden work. Passing the tool across the wood removes shaving ultimately smoothening it. A jointer plane is best suited to straighten and square an edge. Also, it can be used to smoothen and shape a bowed, warped and twisted board.
There are many places to buy a truing plane. Check a tool store near you. Probably they equip these types of woodworking tools. Alternatively, you can order one from a reliable online store. When buying any woodworking tool, make sure it is from a reputable manufacturer so as to be able to handle your woodworking task.
Jointer plane accidents are caused by the hands or fingers of the user coming in contact with the blades of the tool. When operating this tool, never place your hands under its surface or near its mouth. Your hands should always be kept as high as possible.
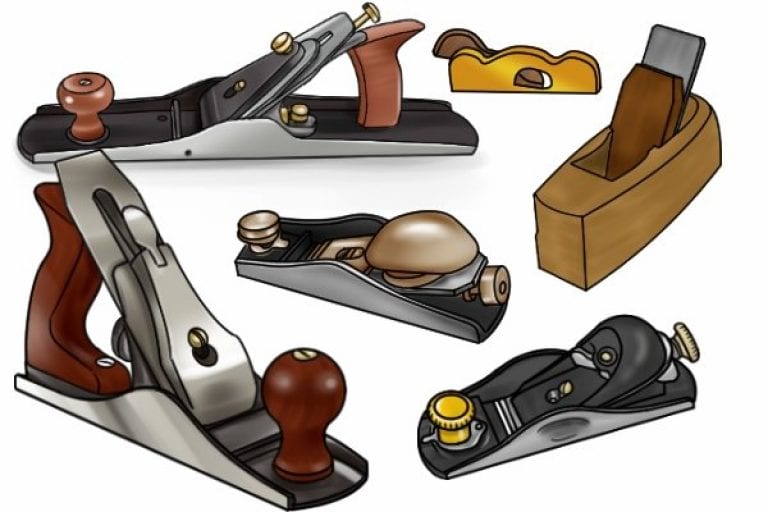
Only use the handles to operate this tool. There are different types of hand planes and most of them do the same tasks of straightening, shaping and smoothening every piece of wood. They jointer planes, jack planes, smooth planes, etc.
A jointer or try plane is best suited for squaring and straightening the edges of doors and longboards. Jack planes are versatile tools that can be used to smoothen and square long boards. They are also able to remove twist or warp. A smoothening board is designed to smoothen the face of a board.
It is the tool responsible for giving a silky texture on a wood. So, which is your preferred tool for your woodworking tasks? I have reviewed the best jointers on the market right now. Be sure to note the direction of the grain, and plan to plane as much as possible along that same line.
Grip the back handle with your rear hand, making sure that your index finger does not try to find a place to rest on the iron or chip breaker. Pressing against these can knock the lateral adjustment out of whack. Make sure your forearm is in a straight line behind the jointer plane following the direction of the sole. With the front hand, hold onto the tote, or front handle, with a comfortable strong grip. Lean forward, putting the strength and stability of your body behind it.
Push from the back hand while pressing down with the front hand, keeping the sole as flat on the surface as possible. Forward strokes should be straight, while bringing the jointing plane back to its original position is often easier to do in a half-arc. On a wide, long surface, you can perform this action in a rapid, but smooth, motion. For narrow edges and ends of planks, use a slow, steady motion. Since there is very little material surface to keep the sole flat, it is easy to tilt to the sides if moving too quickly.
Check your shavings as they come out of the jointer plane — they should be even from side to side. If one side is thicker than the other, you are creating a bevel that will need to be corrected. Learning how to use a jointer plane is much the same as learning to use any other plane , the main difference is just that a jointer plane is a longer version. Because of the additional length, be sure to check that you have enough room around your project to use the jointer plane to its full ability.
An expert at home repair, remodel, and DIY projects for nearly 40 years.


|
Woodriver Pattern Makers Vise Art Make A Frame Bag Effect Laguna 1412 Blade Size Test |

ANAR_SOVETSKI
21.11.2020 at 20:26:42
parin_iz_baku
21.11.2020 at 22:45:34
KOROL_BAKU
21.11.2020 at 22:16:29