How To Build Wood Tabletop 80,Bora Wood Rack Screws You,Wood Shop Jalan Besar Youtuber - Plans Download
This is one of my favourite DIY projects — The wood plank tabletop. Your first step will be to decide the size of your tabletop and cut your boards. Sand each board first with coarse sandpaper 60 or 80 grit and then sand again with a fine sandpaper or grit to make sure everything is nice and smooth. Lay your boards out and decide on the order you like best.
You may find that your boards are a little wonky and that some will fit better together than others. I number my boards and add a little arrow to make sure I remember the correct order. Now comes the fun part! Time to drill your pocket holes! As I mentioned before, I use the Kreg K4 system.
It was a Christmas gift I got last year and it is amazing. You could totally drill these holes with the Kreg mini jig it would just take a lot longer. Once all your pocket holes are drilled, lay out your first two boards in order top down.
Clamp the boards together to create a tight seam. I also tend to reach under the top and feel if there are any ridges between the boards as I clamp them together. I used a compound miter saw. You can use a circular saw or jigsaw, but do make sure your cuts are very good and straight. You'll need about Bonus - these are exterior screws, so I could use my table outdoors too.
I used scrap pieces of 1x boards to elevate the horizontal boards on the legs. Then I just screwed from the outside. Then I flipped everything over and added the side aprons. One trick is I will screw at an angle kinda like a pocket hole screw in opposite directions, so if the table is wobbled at all, the screws dig in from opposite directions. Then I added the bottom stretcher. The middle support piece keeps the aprons from spreading, and also How To Build Wood Tabletop Pdf give you something to attach the tabletop boards too.
Now for the top - I like to start in the middle and work outward. So I find the middle on both ends,. And then I attached the 2x6 studs to the top with screws. I am careful about screw placement so it looks good in the end. NOTE: Since we aren't joining tabletop boards together edge to edge, there may be a small gap between boards.
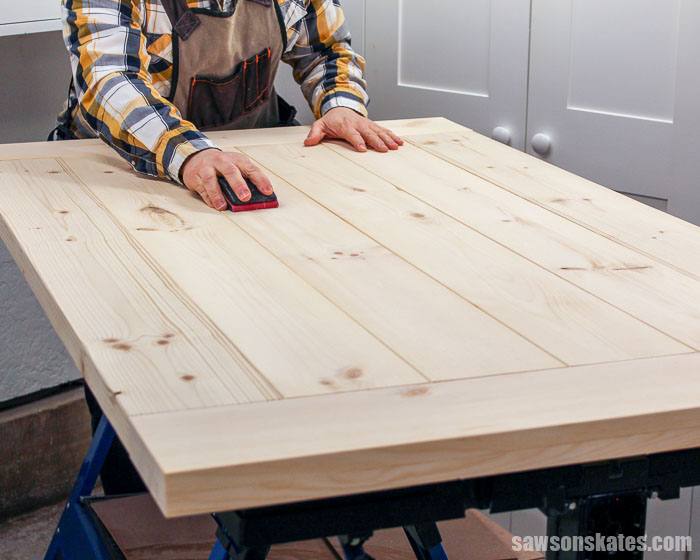
You can fill with silicone after final finish, or use a Kreg Jig to build your tabletop first, then attach. I was going for a rustic real wood look, but decided to sand to take splinters and rough patches out. I started with an 80 grit and finished with a grit. I love Watco Danish Oil because it is a beautiful, durable finish that is easy to apply - so much I wrote an entire post about it! Danish Oil is a color and finish in one, so all you need is one coat!
You can go back and further seal the table or just the tabletop if you so desire. If you likey, do let me know, and I'll get you those bench plans too! Will leg sets upside down, on a flat level surface be careful on garage floors as they usually slope attach aprons to leg sets.
Flip over and adjust for square. NOTE: I also angle screwed from underneath on inside of apron into the underside of the end tabletop boards for extra support. Love this! I need to make some custom bench seating for a "tiny" space mountain condo and would love to see the plans for the benches as well. Thank you so much! In reply to Bench Plans? Could also be good for table top.
Il have try this table soon. This looks like the perfect plan for my Girl Scout troop. They are hoping to build some simple Harvey Furniture to give to families that flooded.
Would you modify plans at all if the table were only 6'? I like the larger table, be we'll need them to be inexpensive, and transportable. We also made composite decking benches that you can see at the end of the post. Miter outside composite decking edges of the outdoor table. We decided to create a picture frame on the outside and fill in with the other pieces. You will have to do some math to decide the length of your table and how many full pieces of composite decking you will fit in the inside.
Cut composite decking to fill the inside. We put our inside table pieces going horizontal to use the smaller leftover pieces of composite decking. It was very difficult to have all the composite decking lay flat and we have some spots that stick up a little. Layout all pieces of your outdoor tabletop to see how it all fits together. We wanted a longer and skinnier table for our space. Gather pressure-treated posts.
We used sturdy posts because my husband liked the look of a thicker base. I am pretty sure this table could have been built with cheaper pressure-treated 2 x 4s. Use saw to cut the posts.
Build the frame for under your DIY outdoor table. You will need to Woodworking Plans How To Build A Pool Tablepdf Mac drill pilot holes before you can put in the screws. Tip: Use clamps to secure the post to the table frame. See picture below. Add 2x4s inside the table frame so that the composite tabletop can be attached How To Build Wood Table With Resin 500 there. Use the drill and screws to attach the composite decking picture frame to the pressure-treated wood frame.
Use construction adhesive to attach the inside pieces of composite decking. Use a paintbrush and use an exterior stain in the color of your choice. I did a lot of research to see if I could use interior stain because I LOVE the look of this color we have used on numerous projects in our house. However, you would need to do another coat of special polyurethane. We decided we only wanted to paint the exterior stain on the outdoor table post once and that we wanted as much protection as possible with the least amount of maintenance.
So we just ended up going with an outdoor stain one that you would even use on decking. Let the DIY outdoor table dry and then flip over and set-up in your outdoor space. We also made DIY outdoor benches using the same steps list above but on a smaller scale.
Or at least how much money it was saving us, that we decided to make two outdoor benches out of composite decking. Amazing Screened-In Porch Ideas see the rest of our deck and outdoor porch that we love. Our two DIY outdoor dining table s were so awesome to use the other night! We were able to sit with our whole immediate family and friends. The kids loved the benches and being able to eat outdoors. What is your favorite outdoor dining space project?


|
European Cabinet Hinges Near Me Wit Woodworking Logos Pictures 90 Soft Close Cabinet Slides Yoga Top 10 Woodworking Hand Tools |

GULAY
03.05.2021 at 18:23:11
King
03.05.2021 at 18:29:28
SEYTAN_666
03.05.2021 at 23:56:14
SEMIMI_OQLAN
03.05.2021 at 19:53:23
iblis_066
03.05.2021 at 23:52:34