Fun Wood Lathe Projects For Sale,Diy Wood Garden Walk Test,Things To Make Out Of Wood Crates King - Downloads 2021

By the way, I did eventually sell my first lathe. However, it was not out of frustration with turning, but because I wanted a bigger lathe with variable speed. This website started out as a collection of notes and pictures. Over the years, it keeps growing as I discover, read, watch, and learn about different ideas and techniques for woodworking and woodturning. Because of my initial unfriendly experiences with wood orientation, creating clean cuts, wood cracking, and dull tools, I have written articles on each of these topics.
I will be uploading these articles in the upcoming weeks. In particular, one article focuses on wood orientation. More specifically, how you mount wood on the lathe. Is the grain running parallel to the lathe i. This article also covers the advantages and disadvantages of both methods of wood orientation. Another article focuses on tool orientation, methods of cutting, and creating clean cuts.
Still another article provides an overview of wood, moisture, and cracking. This article also includes numerous methods to reduce or eliminate cracking. Other articles focus on sharpening tools. More specifically, methods to determine the sharpness of a tool , features of a good sharpening system , and how to sharpen various tools. Another article focuses on general woodturning ideas, tips, and trade secrets.
It covers such areas as spalted wood, turning bigger and smaller pieces, adequate lighting, shop layout , signing your work, and other general woodturning tips. I will also be including step-by-step instructions for creating some interesting and fun woodturning projects. When woodturning, safety is important step. For this reason, you will find safety mentioned in numerous articles on this website. The banjo slides along the bed of the lathe and supports the toolrest.
It allows you to adjust the toolrest and place in various locations, making it possible to hold the turning tool in the most convenient location for removing wood. Most modern lathes allow you to tighten and release the banjo quickly with a locking handle.
The bed is the horizontal part of the lathe that joins the headstock and tailstock. On many lathes, you can position the headstock, tailstock, and banjo at any point on the bed.
The steel mesh guard provides protection from flying chunks of wood and debris. You should always use the guard in operations that allow its use. You should wear a facemask when turning without a guard installed. The headstock holds the material that you will turn. It transfers power from the motor drive mechanism to the workpiece. Typically, the motor is below or to the side of the headstock and powers the spindle with a belt.
The spindle is the shaft in the headstock. This shaft is supported on both ends by thrust bearings that allow the spindle to rotate, yet prevents the shaft from moving in and out. The spindle typically has threads on the end which allow various attachments e. On the inside of the spindle, there is typically a Morse taper. This Morse taper can securely hold various attachments such as a drive center or a pen mandrel. The tailstock slides along the bed in alignment with the headstock.
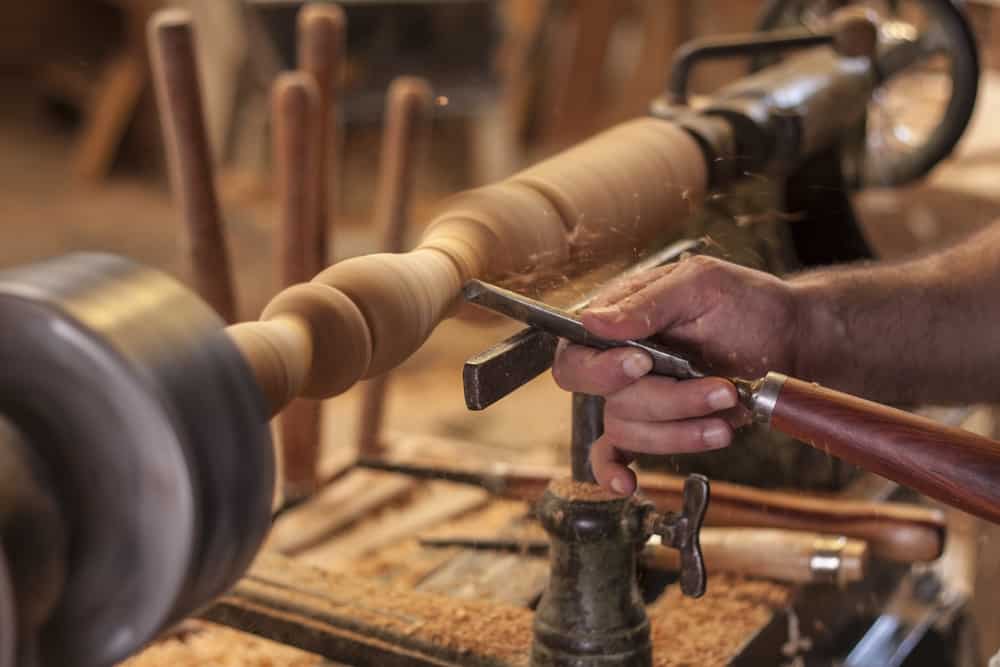
You can use the tailstock to help support the workpiece. This is especially helpful when the workpiece is either long or slender. You can also use the tailstock to hold drilling and boring tools for machining a hole. The tool rest supports the turning tool as an operator cuts into the wood.
You can adjust the tool rest for height and angle to the work. Most modern lathes allow you to tighten or release the toolrest quickly with a locking handle. There are many different sizes and shapes of toolrest available. For example, some toolrests are straight, some toolrests have a curve to assist with turning the interior of a bowl, and other toolrests have a curve to assist with turning the exterior of a bowl.
Funny article…. I bought a large Jet lathe last year. I had quite a catch…. Your article hit home, for sure. Glad I came across your article. My first lathe is being delivered in three days. Your email address will not be published.
Skip to content. My first set of turning tools. Time to Try Turning the Inside Since the outside of the bowl was not going as planned, I decided it was time to try the inside. Time to Research Woodturning That night, I researched turning bowls. Could my woodturning tools be dull? Now what is wrong? My first bowl. Woodturning for Beginners: Lessons Learned I would eventually learn two important lessons.
The second bowl I turned found its way into the fireplace. The Joys of Woodturning Most of my initial learning about woodturning was — through trial and error. Free green waste dump in Tulsa, Oklahoma. About this Website This website started out as a collection of notes and pictures. Logs ready for woodturning.
Parts of a Wood Lathe Parts of a wood lathe. Tool rest. Jet wood lathe. Laquana Revo wood lathe. Each gage has the thickness marked on it, in both inches and mm in the example below. All of the leaves fold up into the handle to protect them from bending or cutting you! Feeler gage set with a few leaves removed. While their intended purpose is to measure the gap between two surfaces, such as the electrodes of spark plug, when removed from the set, they make nearly ideal shims for adjusting the height of cutting tools - but only until you get a Quick Change Tool Post , of course ;- Just remove a few leaves from the set and stack them as needed under the bottom of the cutting tool until the tip of the cutting too is right on the centerline of the lathe.
You can find them at automotive stores and probably in the auto parts section at Wal-Mart; also at Harbor Freight. A follower rest is similar to a steady rest , but is attached to and travels with the carriage to provide a moving support for the work behind the cutting tool. This is very handy when trying to turn limber work which would otherwise bow out away from the tool. If you have ever wondered about the two screw holes on the left edge of the carriage, now you know what they are for - they are the mounting holes for the follower rest.
Centers are often used in the tailstock to support the end of a relatively long and limber workpiece. The minilathe comes with a 2 MT "dead" center. The drawback of a "dead" center is that the center does not rotate, while the workpiece that it supports does, leading to friction and possibly overheating. By contrast, the tip of a "live" center is rotates freely in bearings, and rotates with the workpiece so that the friction is greatly reduced.
Live Center mounted in tailstock ram. The Harbor Freight used to and may still come with a 2 MT "live" center but the 7x12's that I have owned did not come with one.
You can purchase them from a variety of sources, but you will want a very small one with a 2 Morse Taper arbor to work effectively on the minilathe.
MDF is not really an accessory, I suppose, but it is a handy, inexpensive, lightweight and easily workable material to have around the shop. It is a synthetic material something like masonite, but with different properties. It cuts easily using a saber saw, circular saw, bandsaw, table saw or radial arm saw. One disadvantage is that it tends to absorb moisture, but this propensity can be greatly reduced by spray-painting the surfaces.
It works best for applications such as bench tops since it resists compression well. It is weaker where the edges are exposed and especially when screws must be driven into the edges, since the screws tend to separate the layers that make up the material. Drilling pilot holes for the screws will help prevent this. You should wear a dust mask preferably a good, industrial-quality one when cutting MDF since the dust contains formaldehyde which can irritate your throat and lungs.
I have used it for lots of projects around the shop, including an enclosure for the mini-lathe and a base for the mini-mill. You will find it in the lumber section of your local hardware stores such as Lowes and Home Depot, in both 4x8' sheets as well as pre-cut "hobby size" 2x2' and 2x4' pieces.
Around September 02, a milling attachment became available as a standard accessory for the mini lathe. Before this accessory became available, many lathe owners made their own versions based on the one made by Varmint Al. Varmint Al's uses a standard milling vise while the one shown below uses socket head screws to hold the workpiece between the jaws.
While by no means a substitute for mini-mill, this accessory is an inexpensive way to add limited milling capability to your mini-lathe while you save up for a mill. Milling Adapter from LMS. While not exactly an accessory, I find all kinds of uses for this stuff in the shop, but where I find it most valuable is for tacking assemblies in place while prototyping the design of a component or machine modification.
The glue sets rapidly and can be accelerated by pulling the glued parts apart a few times after applying the glue. Hey, it's not my idea, that's what the manufacturer recommends and they're right, it really speeds up the setting time. This glue is strong enough that I have used it numerous times for permanent installations - especially for attachments to machines where it is difficult and time consuming to drill holes in the cast iron or steel of the machine.
It can be easily removed, if necessary, by soaking or flooding the part with some acetone or naptha use these solvents with caution. A little goes a long way. The Grizzly 7x12 comes with this accessory, as does the ToolsNow 7x12, but it is not included by all vendors. On this model, the fingers are brass and are adjusted by means of thumb screws and then locked in place by means of lock nuts. Use a few drops of oil to lubricate the contact surface between the work and the fingers to keep the work from heating up and binding.
The steady rest clamps to the ways with a clamp much like that on the tailstock, and with the same frustrating tendency to rotate to an orientation which does not fit between the ways. My tailstock fix should work here, too. OK, these aren't really essential, but they are so handy and so cheap you will kick yourself if you live without them and then later try them.
I use these for nearly all the hex head screws on the lathe. When you get them you will think they are junk, but mine have held up well for years in spite of heavy use.
After 11 years I have never broken one in spite of a lot of use and abuse. I use them so frequently that I bought another set of SAE and metric when they were on sale a few months ago so that I now have them at two locations in the shop. Update - Still going strong!! Tailstock Chuck and Arbor. Drilling is a fundamental lathe operation and you will need a chuck and 2 Morse Taper arbor to do it.
The arbor has a thread or Jacobs taper on one end - to mate with the chuck - and a 2MT on the other end to mate with the tailstock cylinder. For quite some time, HF did not offer a chuck and arbor that fit directly in the 7x10 tailstock 2 Morse Taper. At this price, which is about what I paid just for the arbor on my chuck, I decided to buy one just to have as a backup in case my main chuck failed one day and also to keep my web site readers informed.
It's not a great chuck, but is adequate - especially if you are just starting out and are on a tight budget. My main dislike is that the black metal shell is stamped metal, not a ground casting as you find on a better quality chuck. The other problem, but one that you will most likely encounter with any chuck that you buy for the 7x10, is that the arbor is too long for the tailstock spindle.
It fits, but the spindle must be extended out from the tailstock casting by about an inch to seat the arbor in the taper. Not only is this an inch of lost ram travel, but it is desirable to keep the ram extended as little as possible in order to maximize its rigidity during the drilling operation.
This can be be done with a hacksaw or a Dremel-type tool with an abrasive cutoff wheel. I cut mine using a cutoff blade in my radial arm saw with the arbor clamped between two pieces of wood in my heavy drill press vise. I took this cut very slowly and carefully since it generates a lot of heat and sparks.
The following photos compare the arbor on my Grizzly chuck, which also had to be cut down to size, with the arbor of the HF chuck. To remove the arbor, place the chuck in your bench vise with the jaws open just a little wider than the arbor diameter not clamping the arbor. Open the jaws up and use a short piece of round stock or a drift pin to drive the arbor out of the back of the chuck.
This should only require a fairly light tap of the hammer. It's a good idea to position a rag underneath the arbor to catch it so that it does not get dinged up by falling to the floor.
This chuck has a 6 Jacobs taper. The 2MT end of the arbor will most likely have a flattened end 'tang' that you will need to remove - otherwise it will be too long for the tailstock cylinder. Check the 7x10 interest group and search for 'tang' for ideas on how to do this. I used a fiber cutoff blade on my 10" radial arm saw and clamped the arbor between two blocks of wood in my heavy drill press vise.
The cutoff tool throws a lot of sparks so be sure to wear good-quality safety glasses and stay out of the line of fire. The blade also heats up the workpiece so I used a damp rag to cool it off in between cuts. After cutting, I smoothed the end of the arbor on my disc sander. While I recommend that you learn to grind your own tool bits from Tool Blanks see below , when you're starting out you may want to buy a set of pre-ground High Speed Steel HSS tool bits.
Not only will they get you off to an immediate start, they'll serve as good examples of the shapes you want to attain when you grind your own. Here's a very nice set from Walden Specialties. Pre-Ground HSS tool bit set. You can also find a selection at LittleMachineShop.
Yes, you could buy ready-made carbide tool bits, but learning to grind your own HSS tool bits is a valuable skill and part of the fun of learning to use the lathe. You will soon learn to grind special tools for parting, boring and other operations. This is true for some pre 7x10s as well. Made for the ashes of Bob Kirby. Pulled a Pinecone off a tree a short time ago. Here was the result. I turned this classic Yin Yang design using Maple, Walnut. I segmented the Maple, and Walnut using a bandsaw.
I recessed the two dots with a forsten bit, aft


|
Miter Gauge Zone Cabinet Locks With Keys Jumping Pen Turning Blanks Acrylic 90 |

prince757
06.07.2021 at 16:55:32
DarkSteel
06.07.2021 at 15:58:51
Detka
06.07.2021 at 22:16:14
KENAN18
06.07.2021 at 16:33:38