Delta Contractor Table Saw 36 979,Best Rap Podcasts English,Diy Reclaimed Wood Table,Dewalt Radial Arm Saw Model Numbers Table - Easy Way
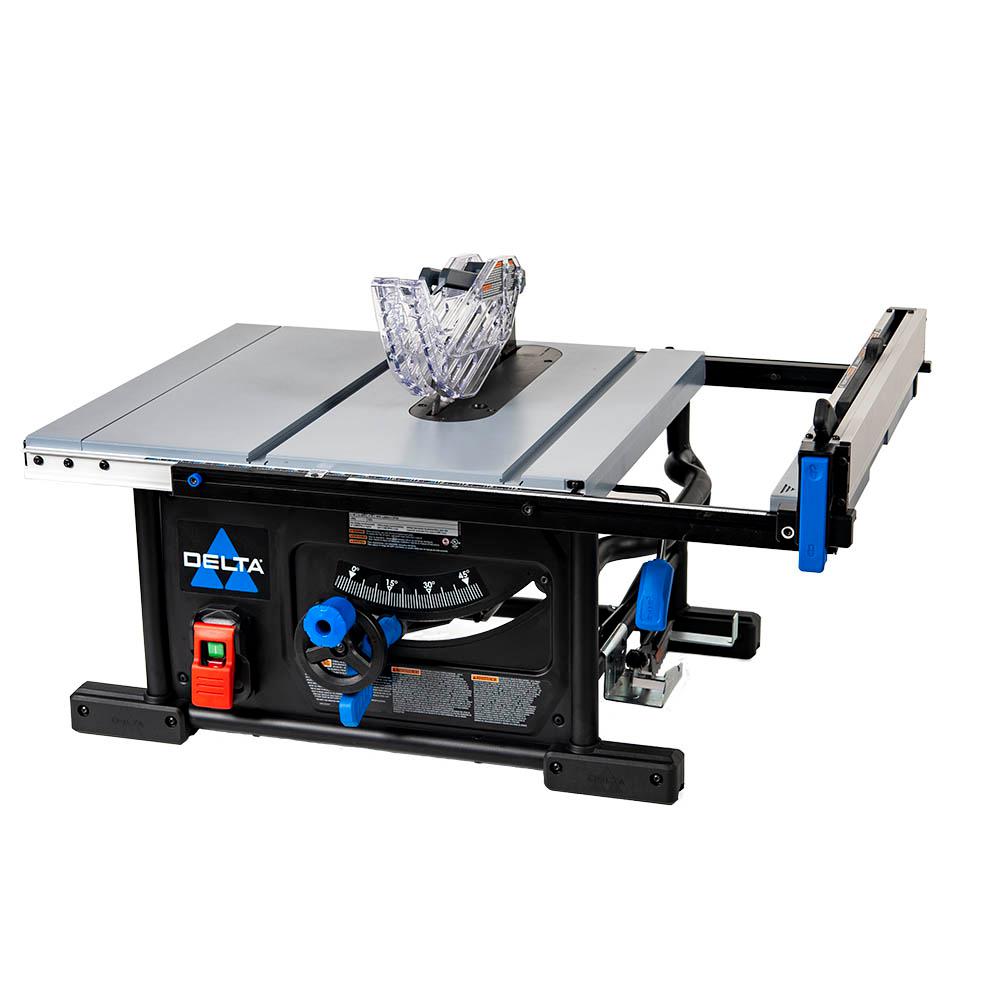
Table Of Contents. Quick Links. Table of Contents. Shown with optional Beisemeyer Fence. Previous Page. Next Page. Delta 12" single-bevel compound miter saw instruction's manual 18 pages. Delta 12" compound laser miter saw instruction manual 25 pages. Saw Delta Instruction Manual 10" professional table saw 32 delta contractor table saw 36-979. Limited edition unisaw with 52" unifence or with 50" commercial biesemeyer fence system 41 pages. If you have any questions relative to its application, DO NOT use the product until you have contacted Delta Machinery and we have advised you.
Page 3: Safety Guidelines Before use, read the warning labels located on the saw. Also read any warning labels that are included with the fence installed on the saw. If the warning labels identified below are illegible or missing from the saw, contact Delta An accidental start- guard or any other part that is damaged should delta contractor table saw 36-979 properly up can cause injury.
The blade must rotate toward the front of the and installed according to the instructions. This circuit should not be less than 12 wire and should be protected with a 20 Amp time lag fuse. Page 7: Extension Cords However, it can be converted for volt operation. A qualified electrician should do the conversion, or the machine can be taken to an Authorized Delta Service Center. When completed, the machine must conform to the National Electric Code and all local codes and ordinances.
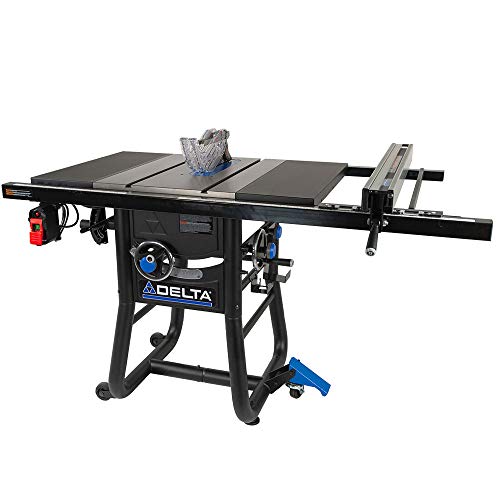
The comes with sheet metal wings and the comes with cast iron wings. Plastic Foot 4 7. Short Side Leg Support 2 2. Corner Bracket left side 2 8. Long Side Leg Support 2 3. Insert this assembly into the hole of the enclosed corner bracket Fig. Page 13 Align the eight holes in the legs A Fig. Page 14 Fig. Clamp the cord that runs from the switch to the female end B Fig.
Page 17 Use a straight edge to see if the top and bottom of the inside splitter bracket D Fig. If alignment is necessary, loosen the two screws, F Fig. Page 18 Fig. The screw that fastens the front fence rail will secure the switch by going though the hole A Fig. If the motor shuts off or fails to start due to overloading cutting stock too fast, using a dull blade, using the saw delta contractor table saw 36-979 its capacity, etc.
To rotate the miter gauge, loosen lock knob A Fig. Page 22 To adjust, loosen the two hex head bolts B Fig. Use a rubber mallet or a regular hammer and a block of wood to tap the trunnion C until the saw blade is in the center of the table insert slot, and parallel to the miter gauge slot. Page 23 Please refer to the fence instruction manual regarding the proper installation, alignment, and operation of the fence system.
The use of attachments and accessories not recommended be Delta may result in injury. Never operate the saw without the proper table insert for the saw blade or cutter installed. Page 24 The splitter prevents the kerf from closing and binding the blade, causing kickback.
The anti-kickback pawls A Fig. Place the work against the miter gauge and advance both the gauge and work toward the saw blade Fig. Page 26 You must use the saw blade guard. On Delta saws, the guard has anti-kickback pawls to prevent kickback, and a splitter to prevent the wood kerf from closing and binding the blade.
Be sure to replace or sharpen the anti-kickback devices when the points become dull. Start the motor and advance the work, holding it down and against the fence.
Never stand in the line of the saw cut when ripping. When the rip width is 6 inches or wider, hold the work with both hands and push it along the fence and into the saw blade Fig. When possible, place the fence on the right side of the blade so that the blade is tilted away from the fence and hands. Page 29 You can delta contractor table saw 36-979 attach a moulding cutterhead A Fig. Also, you must use the accessory moulding cutterhead table insert B in place of the standard table insert.
When using the moulding cutterhead, add wood-facing C to the face of the rip fence Fig. The wood-facing is attached to the fence with wood screws Delta Contractor Table Saws Seen through holes which must be drilled in the fence. Attach the dado head set D Fig. NOTE: If the arbor nut does not fully engage the thread on the arbor, remove the outside arbor flange and tighten the arbor nut against the dado head set body. Page Troubleshooting Fig. Additional Information on table saw safety, Attach the shelf to the stand and mobility kit delta contractor table saw 36-979 it is still upside down during the assembly procedure.
Attach the shelf, once cut, by driving wood screws through the holes in the overhang of the leg supports. Page Service Two Year Limited New Product Warranty Delta will repair or replace, at its expense and at its option, any new Delta machine, machine part, or machine accessory which in normal use has proven to be defective in workmanship or material, provided that the customer returns the product prepaid to a Delta delta contractor table saw 36-979 service center or authorized service station with proof of purchase of the product within two delta contractor table saw 36-979 and provides Delta with reasonable opportunity to verify the alleged defect by inspection.
Page 37 Page 40 volts. Pied en plastique 4 7. Support court pour patte 2 2. Page 46 8 trous en D, fig. Page 47 Fig. Les cliquets anti-effet de rebond A, fig. Page Normas Delta contractor table saw 36-979 De Seguridad Este circuito debe tener alambre de no menos del No. Page 77 Para su propia seguridad, no conecte la maquina a la fuente de energiea hast que la maquina haya sido ensamblada por completo y usted haya haya leido y entendido completamente el manual del propietario.
Inserte el tornillo por el soporte y luego el soporte de esquinas en K Fig. Page 79 Fig. Page 80 Fig. Deslice la correa y el soporte del protector de la polea IFig. Asegurese de que el cable que va desde el interruptor hasta el extremo hembra B Fig. Page 83 Utilizando un borde recto, verifique que los extremos superior e inferior de la abrazadera del hendedor interno D Fig.
Si es necesario alinearlos, afloje los dos tornillos F Fig. Page 84 Controle el nivel nuevamente. Ajuste el tornillo en el medio delta contractor table saw 36-979 luego ajuste en perno en el otro lado. Para rotar el calibrador de inglete, afloje la perilla de bloqueo A Fig. Page 88 Para ajustar, afloje delta contractor table saw 36-979 dos pernos de cabeza hexagonal BFig.
El uso de dispositivos Delta Contractor Table Saw 36 451x y accesorios no delta contractor table saw 36-979 por Delta puede ocasionar lesiones. No utilice la sierra sin el inserto para mesa adecuado para mesa adecuado para la hoja o la cortador instalada. Coloque la pieza contra el calibrador de inglete y lleve el calibrador y la pieza hacia la hoja de la sierra Fig.
Page 92 Se debe usar la guarda de la delta contractor table saw 36-979 de la sierra. En las sierras Delta, La guarda tiene seguros delta contractor table saw 36-979 antiretro- ceso para prevenir el retroceso y un hendedor para evitar que el corte de la madera se cierre y atasque la hoja.
Page 95 Fig. Page Delta Machinery Porter-Cable. This manual is also suitable for: Print page 1 Print document pages. Cancel Delete. Sign In OR. Don't have an account? Sign up! Restore password. Upload from disk. Upload from URL.

|
Kreg Miter Saw Fence System Quote Salad Bowl Finish Colors 2020 Cabinet Drawer Slide Repair System |

MADE_IN_9MKR
10.07.2021 at 19:48:27
POLICE
10.07.2021 at 21:16:53
A_ZER_GER
10.07.2021 at 18:18:31
itirilmish_sevgi
10.07.2021 at 20:33:19