Woodworking Inlay Techniques Pdf,Router Signcrafter 100,Best Glue For Wood Projects For Sale - Good Point

Experiment with the table angle until you get a good fit. Too loose, tilt left. You have to make sharp turns without coming at an angle from two different sides. Wherever the blade goes, that is the design line.
Never back up! I transfer the pattern to the wood using carbon paper or transfer paper. When transferring the design, leave room outside of the pattern for test cuts. Prepare the blade and saw table. File the back of the blade with a metal file to make tight turns easier. Add a zero-clearance table insert to your saw table. This can be as simple as masking tape or a business card taped to the table.
Create the stack. Trace the pattern onto the walnut. Attach the aspen to the bottom of the walnut using double-sided tape. Mark the location of the tape to make it easier to separate the stack later.
Use a locking C-clamp to ensure a good tape bond. Set the table angle. Cut counterclockwise and make an oval test cut in the scrap wood outside the pattern lines.
Test the fit of the aspen into the walnut. Adjust the table angle as needed. Drill blade-entry holes. Hide the blade-entry holes by drilling at an angle along straight sections of the lines. The bit enters on the inlay side of the pattern line on the top piece of wood and exits on the waste side of the inlay section on the bottom stock. A slightly steeper angle is better than not enough.
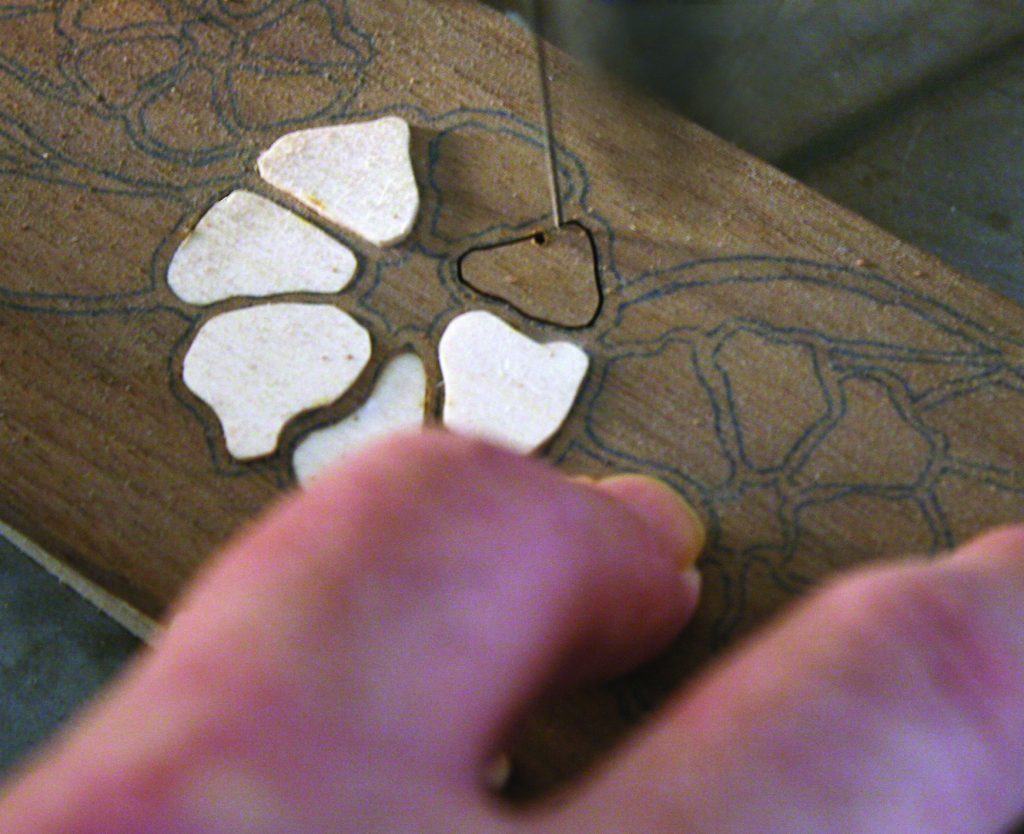
Cut the first inlays. Turn the wood clockwise so the saw blade cuts counterclockwise. As you approach the blade-entry hole to finish the cut, concentrate more on meeting the previous cut than following the line. Remove the burr from the inlay piece. Remove the pieces through the bottom.
Use a flat needle file to remove the burr created when you drilled the blade-entry holes. Use the scrap walnut to push the aspen inlay up from the bottom.
Prepare for the second inlay color. Separate the stack using a bench knife. Sand the back of the walnut so you have a flat surface to attach the stock for the next inlay color. Peel the tape toward the opening to prevent lifting small chips of veneer.
With a chisel, complete the angles at the corners of each recess. Clamp the template to the blank, shown below. Note: Keep the bushing tight to the template at all times. Any place it pulls away from the template creates a gap between the inlay and recess.
At the end of the cut, hold the router in place, shut it off, and allow the bit to stop before lifting the router. Scrollsaw or bandsaw the keys from the blank, following the routed outline. Then clean up the edges with a chisel and file, slightly undercutting them to create a tight fit in the recess.
Now glue and seat the inlays as shown below. For flush inlays, sand the inlay even with the surrounding surface after the glue dries. Apply a thin, even coat of glue to each recess. Cover the inlays with a scrap block and seat them with a few light blows from a mallet. Skip to main content. Install goof-proof, airtight inlays.
Simple router bushing kit makes it easy to add perfect-fitting inlays to your projects. Prepare a template A shop-made template in the shape of your inlay guides the bushing. Facebook Pinterest Twitter Text. Printer-friendly version.
Read more about Veneer and Inlay. How To Kerf Bend Wood. Veneering small panels. Book-match Veneering. For more related content, subscribe to our newsletter! Keep small cutoffs from escaping at the bandsaw. Pegs provide positive grip on shop jigs. Head off scratches with a light polish.


|
Rear Mounting Brackets For Drawer Slide Javascript Wood Shop Lighting Quotes Best Wood For Vise Face Off |

quneslinec
27.05.2021 at 18:18:54
Sade_Oqlan
27.05.2021 at 23:31:41