Wood Sign Router Kit 400,Jd Wallace Radial Arm Saw Water,Woodworking Router Ratings - Review
Shop By. Login Register Registered Customers. If you have an account, sign in with your email address. Sign In. Forgot Your Password? Personal Information First Name.
Last Name. Sign Up for Newsletter. Password Password Strength: No Password. Confirm Password. Create an Account. Please enter your email address Router Sign Making Kit Reviews Research below to receive a password reset link. Reset My Password. Man, it is definitely summer this week! The temperatures are getting into the s and all I want to do it take is easy. But we still have a lot of work to do on the playhouse.
Since all I want to do is lounge by the pool, I decided that this is the perfect time to share this fun pool sign that I made a couple weeks ago. This post may contain affiliate links. As an Amazon Associate I earn from qualifying purchases. Click here to read my full disclosure policy. Making this sign is definitely a bit of wishful thinking. But hey, it still needs a fancy sign right?
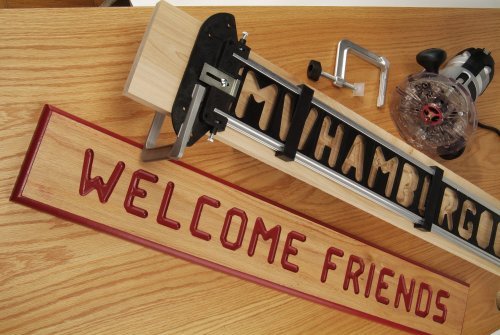
But I needed a simple project to start with because I was busy building all kinds of things for the backyard. A couple weeks ago, my father-in-law brought me 2 large buckets of reclaimed wood. His friend was redoing his fencing around his raspberry bushes and I was so happy he saw those perfectly aged 1x2s and thought of me. Free-handing a design with a router is a little challenging.
You need to go slow and have a steady hand. Unfortunately mistakes cannot be un-done but if you are creative you can hide them. I practiced on a scrap piece of plywood to see if I could follow a line and discovered it was totally doable. I kept the design of my summer wood sign super simple.
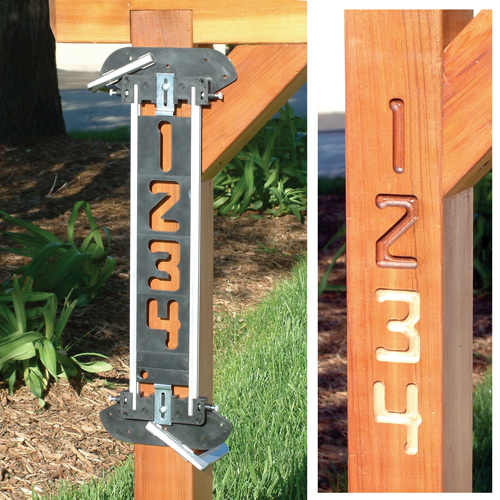
I decided to use a straight router bit for consistent depth on the sign. That helped me design my simple Pool sign. And making it simple would also make cutting my very first DIY wood sign much easier.
It is perfect to add some summer fun to our snazzy pool area ;. And you better believe I am going to be figuring out how to make many more wood signs with Sign Into My Router Kit my router. Lay out your wood so the longer boards are the 3rd board in from each side. Once you like the way it looks, turn the boards upside down and clamp together. I used a level to keep the boards straight at the top.
Apply wood glue to the back of them and lay them on the back of the other boards.


|
Roman Ogee Router Bits 94 Japanese Saws For Hardwood Jack Box Slotting Bit Queue |

HANDSOME
23.09.2020 at 18:25:22
SCKORPION
23.09.2020 at 10:25:42
NightWolf
23.09.2020 at 15:14:48
Lady_Sexy
23.09.2020 at 20:46:30