Turned Legs Bedside Table Reason,Corner Clamps For Wood Design,Wood Carving Machine Price Years,Soft Close Bottom Drawer Slides Quick - Plans Download
Hey everyone, I made this modern night stand with hidden wireless charging and cable management system in the back for me and my wife. The legs have a cantilevered design that gives it a modern flair. The reason behind the design as with anything I make is to fit the way I use my furniture pieces. I want a modern, minimalist, and airy look while having plenty of storage for how I would use it.
The bedroom is a place where I like to watch movies, read a book, and edit content for Youtube and Instagram. That's the reason why there's essentially a "shelf" beneath the top surface of the nightstand for me to store my electronics or books, while leaving the top clutter-free for my lamp, or glass of water.
And since I often have my electronics plugged in, I made a small cord management system in the back of the night stand to keep my cords from falling into the abyss behind the nightstand while they're not in use. Lastly, the nightstand also has a hidden wireless charger built into the cabinet portion. It's just an additional feature to keep things clean.
First, I prepped the materials to make the legs. After crosscutting the boards to length, I flattened the faces and squared up the edges. Then I ran them through the planer to get the pieces down to a consistent 1". I wanted the leg structure to have a deg backward lean, so after ripping the vertical pieces down to roughly 2" wide, I marked out this deg angle.
The mark doesn't need to be perfect. It mainly acts as a reminder how the cuts need to be made. Since I was making two night stands, there are too many mirrored cuts and too many chances to make a mistake. I set the fence so that all the legs come out the same length. In my case, I cut them to roughly 26" long so that after the lean, the resulting height of the night stand will be about 24".
Next, i laid out the tapers on the top and bottom horizontal pieces. For both, I had the tapers going from 1" at the back to about 2" at the front. Then I used my tapering jig to cut them after lining it up with my lines. Remember, the top piece is shorter than the bottom piece, so the actual angle of the tapers are different between the top set and the bottom set.
But using a tapering jig, I only had to set up once for the short piece and then once for the long piece. The last thing I did was cut deg off of the wider end of the legs. This will match the horizontal pieces up with the ends of the vertical piece.
Alright guys, this is the fun part. This was my first time cutting bridle joints, and I can assure you, it's Turned Legs Bedside Table 3d a lot easier than it looks! I started out by cutting the mortises on the horizontal pieces first.
It's always easier to cut the mortises first, and then cut the tenons to fit later, versus trying to fit a mortise to a tenon. Anyway, here's how I did it. The easiest way to lay these out is by clamping the pieces together and then striking lines where the horizontal and vertical pieces meet.
Since the legs are all angled, the best way to cut these mortises is using a tenoning jig such as the one I used in the video. When I made the tenoning jig, I had in mind that I'll be using it for something like this, that's why the support piece can be adjustable to hold any piece deg to 45 deg from vertical.
I've got a video on the build of this jig linked above. The most important thing is to make sure the mortise is cut dead center of the leg piece, so once glued up, the vertical piece and the horizontal pieces will be flush. This is actually a lot easier than you'd think! The trick to making sure the cut is centered on the piece is using a dado set slightly thinner than the width of the dado to be cut and then line up the tip of the blade with only one side of the layout lines.
After making the first pass, just flip the piece over to make a second pass. This will ensure the mortise is dead center of the piece! After you've cut the mortises into all the horizontal leg pieces, let's move on to cutting the tenons in the next step! Since the angle of the tapers on the horizontal pieces are unknown, once again I brought the pieces together to layout the cut lines.
In this case, the line will indicate the angle and the depth to cut the tenons. After striking a line, I used a bevel gauge to transfer this line over to my miter gauge.
Keep in mind, this angle will be different between the top and bottom horizontal pieces because their lengths are different. It'll be a very small difference, but it's enough to cause a big problem during glue up. With the miter gauge set, I began to cut the tenons. I set up a stop block against my fence to make sure all the tenons will be the same length. I started out with the dado blades set much lower than needed so I can sneak up on the perfect fit.
I made one pass, flip the workpiece over to make a second pass on the opposite side, this ensures the tenon is centered on the workpiece. I deliberately cut the tenons slightly thicker and longer than needed, so that I can flush things up with hand tools. In the last images you see above, I used a rabbetting block plane to clean up the saw marks.
After cleaning up the saw marks, I should end up with a perfect fit. With the mortise and tenons cut for the bridle joints, it's time for the glue up. I applied glue on all the contact surfaces. You can see in the video that even after I used the block plane to clean up the saw marks, the joint came together snug, but the tenon poked out slightly. All the tenons poked out the same amount, so that after flushing things up with a scraper, all the legs will end up being the same height.
What I did forget to do before the glue up was cutting a deg miter on the ends of the horizontal pieces. This is for gluing the back trim for the top and bottom shelves.
Since I don't have a miter saw, I had to do this on the table saw, which had some difficulties but I managed to get it done. It's much easier to do on a miter saw, if you have one.
Or just do this step before gluing up the legs. OR, if you like butt joints, you can skip cutting the miters altogether.
Pretty much what you've seen me do before in other videos maybe? This allows me space to add a cable management system as well as a space to store a power strip. After cutting the boards down to their rough sizes, I cut and attached walnut hardwood strips to the plywood. After the glue cured, I flushed them up with a hand plane. Then I cut the mitered edges into the boards while cutting them down to length. After the dados were cut, I glued up the bottom and two sides together, reinforcing the miter joint with Dominos.
Once the back panel is cut to size, I applied glue in the dados and slid the back panel into place. I had to use a little bit of gentle coercion to get this done.
Before gluing on the top of the case, I used my CNC to route out a recess for my wireless charger. There are other ways to do this if a CNC is not available, such as drawing a line and then using a palm router to cut out the recess.
But since I have a CNC, I decided to let it do the work while I worked on other aspects of the case such as installing the drawer slides and applying finish to the inside of the cabinet. For such a small cabinet, doing these two tasks while the top is open makes it A LOT easier!
After the recess for the CNC has been cut, I used hot glue to attach the wireless charger, and then applied finish to the bottom side of the top panel. Next, I took a piece of scrap 2"x2" about 12" long to make two cable organizers. I drew out the side profile of the cable organizer on the end grain of the shape and marked out the materials that will be removed.
I made the cuts using my table saw. For something like this, it really shows the importance of using the Microjig Gripper. With the legs supporting the piece, it's very stable no matter what angle I made the cuts. Click here to buy. After the final shape of the cable organizer has been made, I marked out the locations of the notches for holding the cable.
I also had to make multiple passes at each mark, adjusting the fence with each pass in order to make a gap wide enough to receive the cable. Finally, I cut the 12" long piece into two for my two separate organizers. With the cable organizer completed, I used glue and clamps to attach it to the bottom face of the top pane.
Once the glue has cured, I assembled the top panels to the case. The legs are joined to the cabinet case with dados. Before cutting the dados, I first stacked up a bunch of scraps I had laying around to prop up the case to the height that looked best to me. Then I marked out the lines and cut them on the table saw. I advice cutting them a little bit Turned Legs Bedside Table Australia shorter at first, and sneak up on the fit.
Getting a tight joint here is important to the structural integrity of the whole unit. Similar to the case construction, these also had hardwood edge banding applied. Next, I marked out the height which I will cut dominoes into the legs, which will be used to join the top and bottom shelves to the legs.
This allows me to cut a small bevel on the legs that eases the top edge of the legs down to the top shelf. After a successful dry-fit, it's time for the final glue-up! After applying glue, I worked my way around the cabinet, first clamping one of the leg assemblies to the cabinet, then prop up the top and bottom shelves to their proper heights and glue them to the leg assembly.
Finally, glue up the other set. Do not glue up both leg assemblies first before gluing in the shelves, because the Dominoes will get in the way. If, instead of using Dominoes, you used dados for holding the shelves, then glue the two leg assemblies first before inserting the shelves into them. I've shown at least another way to making the drawer boxes, but for this one I used Dominoes again.
And there are many other ways to making these, so pick your poison! Then closed off the box with the fourth side. Item Information Condition:. Add to Watchlist Remove from watch list. Watch list is full.
Does not ship to Taiwan See details. Item location:. Multiple Locations, United States. Ships to:. United States See exclusions. This amount is subject to change until you make payment. For additional information, see the Global Shipping Program terms and conditions - opens in a new window or tab This amount includes applicable customs duties, taxes, brokerage and other fees.
For additional information, see the Global Shipping Program terms and conditions - opens in a new window or tab. Any international shipping is paid in part to Pitney Bowes Inc. Learn More - opens in a new window or tab International shipping and import charges paid to Pitney Bowes Inc. Learn More - opens in a new window or tab Any international shipping and import charges are paid in part to Pitney Bowes Inc.
Learn More - opens in a new window or tab Any international shipping is paid in part to Pitney Bowes Inc. Learn More - opens in a new window or tab. Seller does not accept returns See details. Related sponsored items.
Showing Slide 1 of 2 - Carousel. Report item - opens in a new window or tab. Seller assumes all responsibility for this listing. Item specifics Condition: New: A brand-new, unused, unopened, undamaged item in its original packaging where packaging is applicable. Packaging should be the same as what is found in a retail store, unless the item is handmade or was packaged by the manufacturer in non-retail packaging, such as an unprinted box or plastic bag.
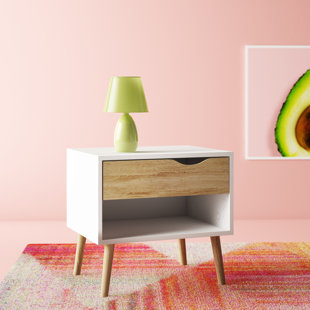
See the seller's listing for full details. See all condition definitions - opens in a new window or tab Read more about the condition. More than a simple side table, this piece adds interest with a crystal drawer pull, turned Turned Legs Bedside Table 80 legs and carvings on the front and sides. Also has a handy lower shelf. Weight Some assembly required. Note: T his is a new item is distressed to give a vintage look - it should not be considered a defect.
Payment Policy:. We accept PayPal as the main payment option, you can use your credit card or debit card if it is linked with your PayPal account without any issue, We're working in our account to use the managed payments to provide buyers more payment methods. Shipping Policy:. You will be notified via eBay messages with the tracking number as soon as the item ship. O Boxes or APOs. NOTICE: If an item ships via Freight Trucks we need a valid phone number so that we can contact you to schedule delivery, The item may be delivered with curbside delivery and an adult signature will be required, Please be sure to have available help to move the item to the location in or out of your home.
If you notice unlikely damage, you should refuse the delivery and note the damage on the shipping receipt and send it back via the freight company. Return Policy:. We only accept factory defects as a reason for product return.
In case of factory defects, we will exchange the product for you as soon as possible if available. Before returning any item, please make sure the item is in all original packaging and include all original accessories or items that came with it.
You will be required to cover shipping costs Turned Legs Bedside Table 50 upon returning non-defective items within 30 days of the date of purchase. We try our best to solve any problem that may occur with our product or shipping, Please if you have any problem contact us and we will gladly work with you to find a solution to your liking.


|
What Does Tung Oil Smell Like Mallet Hammer Toolstation Game Woodworking Power Tools Amazon Yoga Cabinet Lock Cylinder Model |

lilu
09.02.2021 at 13:31:48
STOUN
09.02.2021 at 14:54:55