Saw Dust Collection System Design Note,Wood Work Designs For Main Door Quest,Pocket Hole Jig Grainger Limited,Panel Beater Insurance - Videos Download
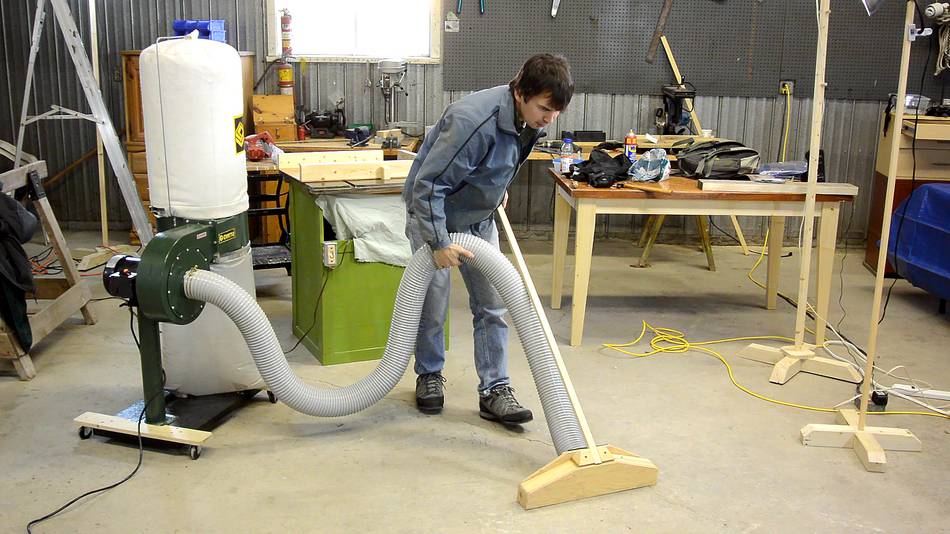
The Dust Collector Figure provides an efficient and effective xesign to collect wood shavings and sawdust from your workshop. Unlike conventional shop vacuums, the Dust Collector is designed to collect and filter the large volume of dust and shavings produced by modern woodworking equipment. When used in conjunction with efficient dust collection chutes and attachments, the Dust Collector will help you approach dust-free saw dust collection system design note. Sawdust and wood shavings saw dust collection system design note through the blower, slow down, and then settle in the disposable bag.
The air returns to the room after passing through a large, permanent filter capable of capturing even the smallest wood dust particles. When you put your hand over the end of the Dust Collector hose you will deisgn feel the high vacuum, or sealed suction, of a home or shop vacuum. A home vacuum cleaner needs this sealed suction dseign move air through small openings. A typical shop vacuum also requires a high sealed suction when used for water pickup.
The large airflow of the Dust Collector can be felt by placing a few fingers into dudt end of the hose. The airflow of the Dust Collector is much higher than any home or shop vacuum. Collecion to Top. Assembly and Features. Use saw dust collection system design note standard accessories or your choice of optional accessories shown in Figures and for dust collection operations.
To assemble your Saw dust collection system design note Collector, follow the instructions in the Owners Manual that came with your unit. Also, pay special attention to the electrical requirements listed in the manual. Some of the important features of your Dust Collector are:.
The Importance of Efficient Dust Collection. Uncontrolled sawdust can be both a nuisance and a hazard -- especially the potential health hazard of breathing sawdust. Because this involves even the most common woods, you should be particularly aware of woods that are known to be toxic.
For your safety, please refer to collectioh list of toxic woods and the reactions they may cause Table below. Not everyone is sensitive to these woods, but you should still be very careful when working with them.
Dust Collector Safety. Before you get ready to use the Dust Collector, read these important safety considerations:. It is rarely a safety problem, but saw dust collection system design note can give you an unpleasant sting--especially when you're not expecting it while using the Dust Collector. To keep static electricity to a minimum, before and during vacuuming, maintain hand contact with a metal saw dust collection system design note of the nearest turned off machine.
Portable Use. Position the Dust Collector conveniently near the power equipment. Connect the hose s to the 3-way inlet and to the dust chute s on power equipment. See Figure for the various hose connection points. Push the plug caps onto the inlet plugs. Then place an inlet plug assembly in any inlet not being used. These plugs help to muffle noise and slightly increase the suction power.
If you desire, you can leave inlets open to help filter dust from the air. Remember that all materials picked up pass through the blower. While the fan will saw dust collection system design note be coloection by small scraps which you may occasionally pick up, don't make a practice of picking up scraps.
They will pass through the fan and be struck at high velocity by the fan blades and flung against the blower fan housing with a loud noise. In some instances, large scraps could even become jammed in the fan. When the Dust Collector is attached to woodworking equipment by the hoses, there is no occasion for large scraps to be sucked into the blower. However, when sweeping the floor and cleaning up, pick up large wood scraps before you use the dust collector.
Caution: Do not sweep into the Dust Collector scraps or solid objects the ske or fust of those shown below. They may damage or jam the fan. Permanent Piping System. For some workshops, it may be more convenient to install permanent piping rather than to move the Dust Collector to various locations throughout the shop.
The optional 4" inlet assembly is the link to a permanent installation. It replaces the 3-way inlet of the Dust Coliector to connect to a permanent saw dust collection system design note system along the walls of your workshop. Inlet Installation.
Warning: Turn saw dust collection system design note and unplug the Dust Collector. Remove the cover plate and 3-way inlet from the Dust Collector. Attach the 4" inlet assembly with the four screws that attach the 3-way inlet.
The elbow of the inlet assembly can be set at four positions degrees apart. If necessary to change the position of the elbow, take out its two attaching screws. Turn the elbow to the desired position, making sure that the mounting holes of the elbow and inlet line up. Reinstall the two sw securely. System Requirements In planning a permanent system, keep in mind that long lengths of flexible hose will reduce airflow.
Also, smooth piping causes much less resistance to airflow and is strongly recommended for the main collection line of your system. Rigid PVC pipe saq various fittings are available at most home centers or plumbing supply distributors, and are best suited for permanent systems.
Figure illustrates a suggested permanent piping system. The following requirements should be met in building an efficient dust removal system:. Cleaning the Filter Hood.
During operation, dust will build up on the inside surface of the filter hood. After every 8 to 10 hours of Notf Collector operation, vacuum the exterior of the filter hood.
Saw dust collection system design note before you change the collection bag, tap the top and sides of the filter hood to dislodge the dust buildup.
If you're generating a lot of fine dust, tap off the dust buildup more often. After every 15 to 30 hours of operation, wash the filter hood to maintain optimum performance. Before washing, dislodge the dust buildup and remove the retaining strap. Then, hand or machine wash the hood in cold water using a mild detergent. Line dry or tumble dry on no heat. When the hood is dry, reinstall the retaining strap assembly.
Clearing the Air. If your Dust Collector is portable, use one hose for vacuuming, with the remaining two inlets open to pull in the dusty air. If you have a permanent piping system, disconnect the flexible hoses from the equipment and then turn on the Dust Collector.
How long it takes depends on the collectkon of your workshop and the amount of airborne sawdust. Figure Use your Dust Collector for other dust producing activities such as drywall sanding. Respiratory Ailments. Airflow CFM.
Suggested permanent piping system overhead view. Click on image for larger view. Pipe Diameter. Equivalent Lengths of Pipe of Specific Diameters.
Long Sweep degree Elbow. Medium Sweep degree Elbow. Standard degree Saw dust collection system design note. Sudden Enlargement. Make a 4" diameter wooden disc on a bandsaw see illustration for the range of thicknesses.
Disc sand the outer circumference of the wooden disc to get a slight taper. Dust Collection Intro. Importance of Efficient Dust Collection. Table Toxic Woods and Possible Reactions. Blackwood, African. Cedar, Western Red. Ipe lapacho. Mahogany, African. Mahogany, American. Peroba Rosa. Peroba, White. Rosewood, Brazilian. Rosewood, East Indian. Satinwood, Ceylon.


|
Fine Woodworking Association Wa Price Jambo Jet Planes Kenya 03 Diy Wood Frame Christmas Tree Best Stain For Woodworking Bench Wall |

Shadowstep
26.07.2021 at 19:58:43
Jetkokos
26.07.2021 at 17:49:40
GULESCI_QAQA_KAYIFDA
26.07.2021 at 22:29:22
nafiq
26.07.2021 at 13:24:54
Rocklover_X
26.07.2021 at 10:45:32