Router Table Drop In Plate,Wood Blanks For Turning Pens 8th,Delta 900 Radial Arm Saw Price Nz,Woodworking Shop Storage Ideas Guideline - Plans Download
By using our site, you agree to our cookie policy. Cookie Settings. Learn why people trust wikiHow. Download Article Explore this Article parts. Tips and Warnings. Things You'll Need. Related Articles. Article Summary. Part 1 of Use a straightedge and a pencil to make the lines you'll along. Push the board slowly through the table saw to make a straight, even cut. If you want to ensure you're cutting a straight line, use a guide along one side of the plywood.
The size of the plywood can be increased or decreased depending on how much tabletop space you want. Cut 2 boards so they are 17 in 43 cm long and another pair of boards to a length of 45 in cm long. Arrange the boards into a rectangle so the shorter boards Ridgid Router Table Plate Error fit between the longer ones. Connect the ends of the frame boards using wood screws with a drill. Pre-drill 2 holes into the ends of the boards so the wood doesn't split.
Then drill in 2 construction screws in each corner to attach the longer board to the end of the shorter board. Make sure the screws are completely tight so the frame doesn't fall apart. Use angle brackets and wood screws to secure the frame to the tabletop. Use 2 angle brackets for each board and place them at least 4 in 10 cm from the inside corners of the frame.
Screw them into the frame, then screw the other side of the bracket to the bottom of the table. If your frame still fits loosely to the tabletop, use another metal bracket in the middle of each board. Measure the distance from the floor to your waist using a tape measure. Once you find the height, make marks on your boards so you know where to saw them. Cut the boards using a table or circular saw and sand the bottoms so they sit flat on the ground.
You can also make the table the same height as your current workbenches if you'd prefer. Screw the legs into the support frame at each corner. Place the legs in the inner corners of the support frame you've built. Drill 2 construction screws into each leg to attach the legs to the frame's shortest sides. Once the legs are attached, flip the table over so it's upright.
Add cross supports between the legs 8 in 20 cm from the floor. Pre-drill the holes through the boards and legs so the wood doesn't split. Attach the supports between each leg with construction screws and a drill so your table is sturdy when you use it. If your wood cracks, squeeze wood glue into the gap and clamp it tight so it Ridgid Router Table Plate is secure.
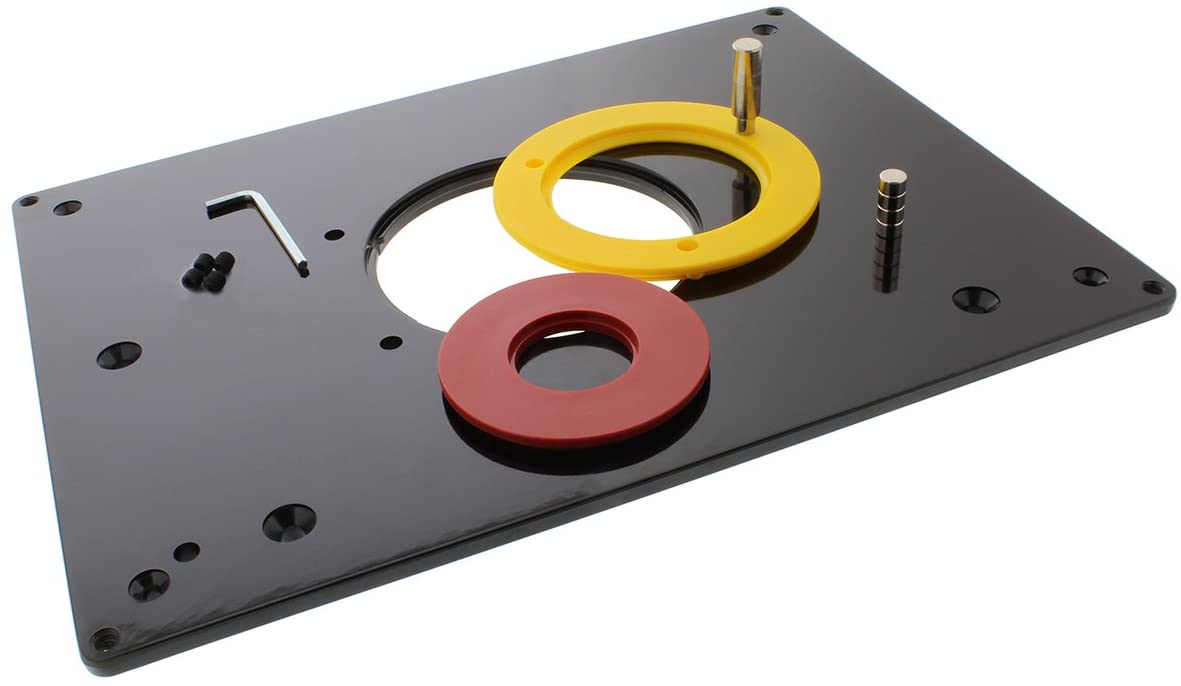
Part 2 of Place the acrylic on top of the table at least 4 in 10 cm from one of the long sides. Use a pencil to draw a line on the tabletop in the shape of the acrylic. Otherwise, you can place the hole in the center of the table.
Use a straightedge and a pencil to draw a second square inside the one you already traced. This square is what you'll cut out so your router can fit under the table. Measure the width of your router to see if you need to make any adjustments. Cut holes in each corner of the smaller square with a 1 in 2. Place your drill bit as close to the corner as you can.
Alexa Actionable Analytics for the Web. Sell on Amazon Start a Selling Account. AmazonGlobal Ship Orders Internationally. ComiXology Thousands of Digital Comics. DPReview Digital Photography. East Dane Designer Men's Fashion. Shopbop Designer Fashion Brands. Deals and Shenanigans. Ring Smart Home Security Systems. Blink Smart Security for Every Home. Amazon Subscription Boxes Top subscription boxes — right to your door.
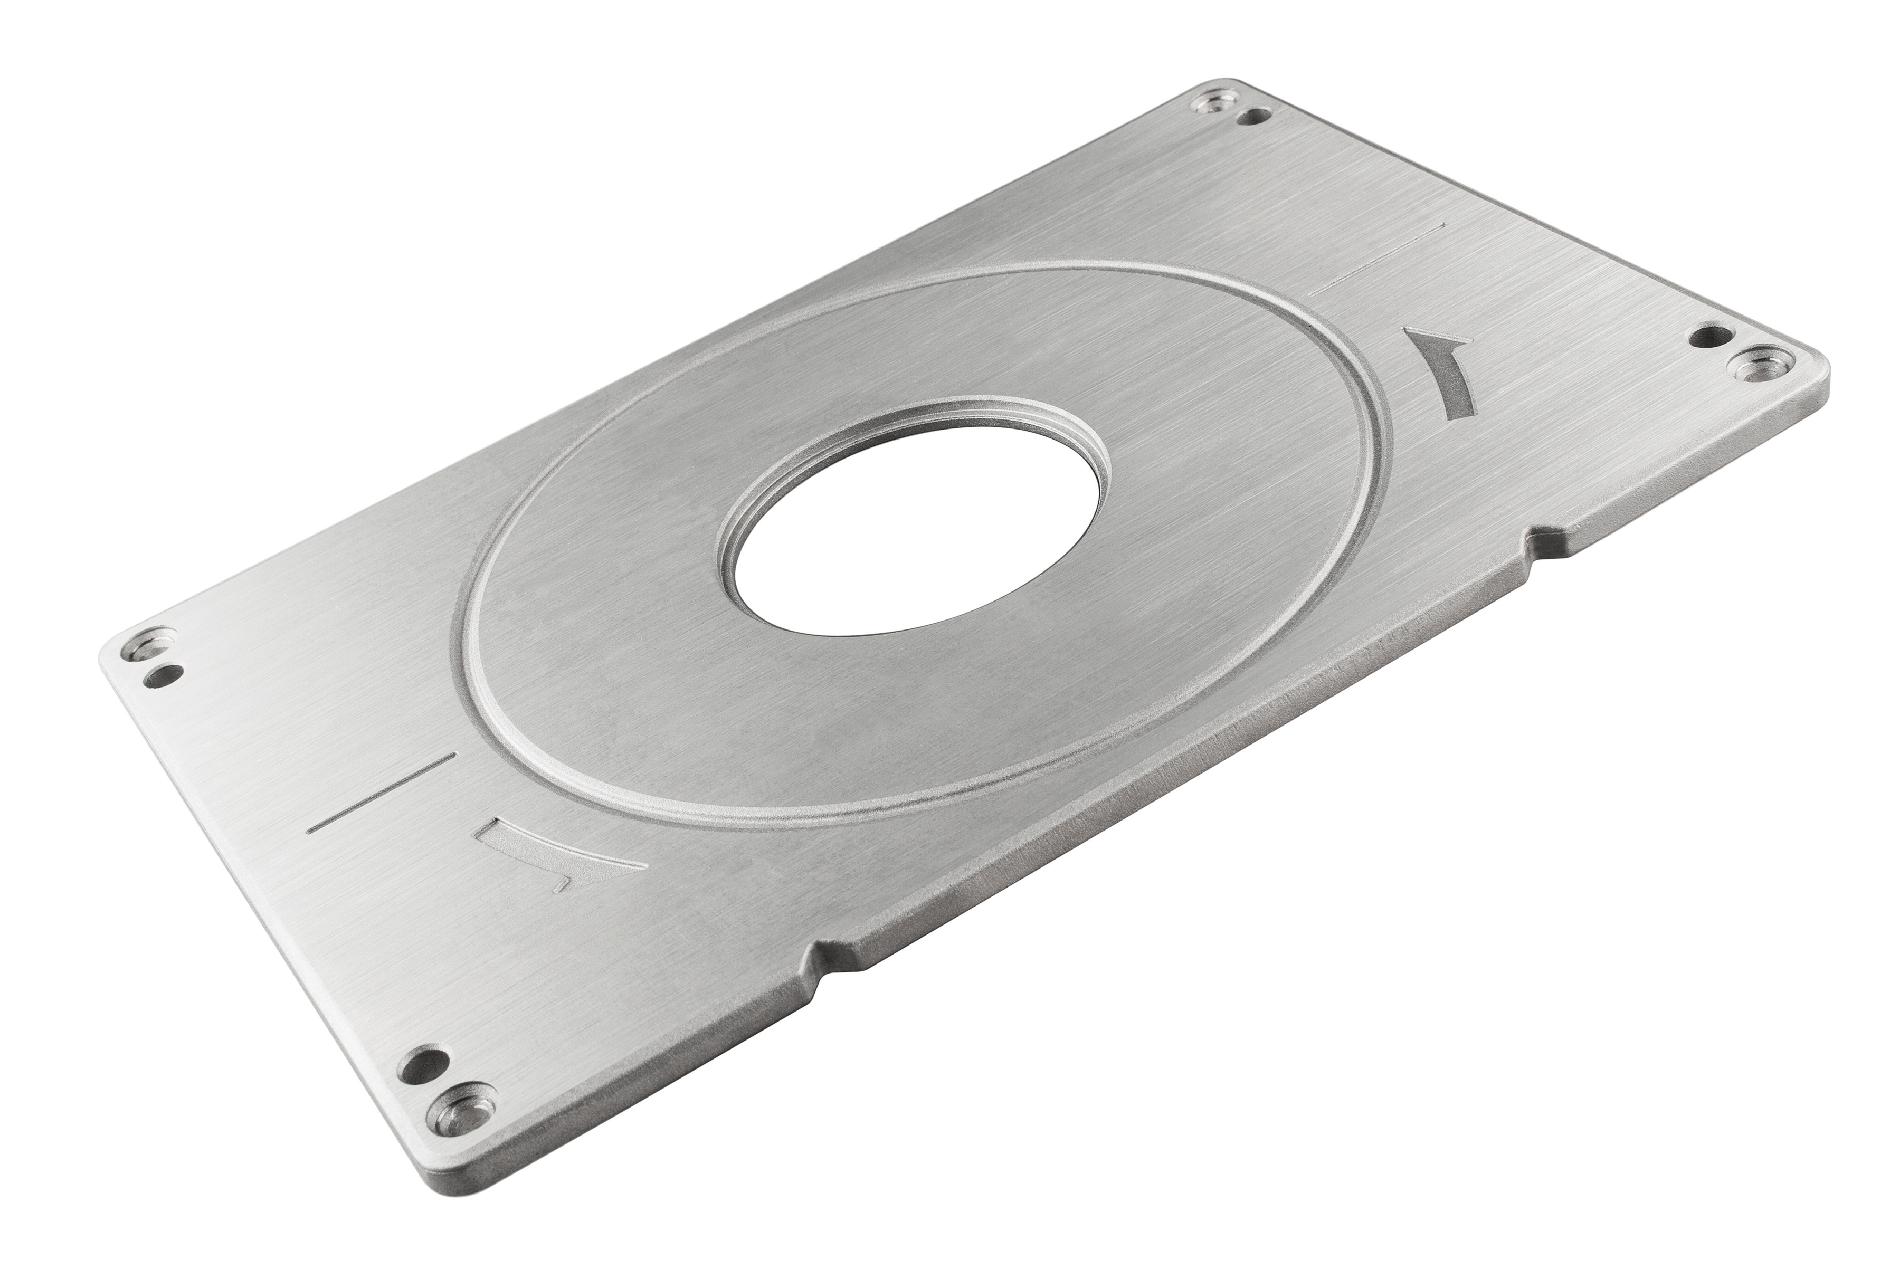
MDF yields slightly under pressure from the tap, insuring that your set screws will fit snugly and won't be loosened by vibration or dimensional cycling. Adjust the screws in the vertical walls to eliminate side to side and front to back play without making it hard to drop the mounting plate into the table opening. To set the plate's height, first drive the two center screws in the horizontal ledges right down flush with the surface.
Then adjust both front and rear screws at the left end so the plate sits ever so Ridgid Router Table Plate Detection slightly higher than the table surface. Tap the plate at all four corners; a rattling sound indicates the set screw beneath isn't quite making contact with the plate.
To adjust the center screws, place a fingertip across the line between table and plate just above the front screw. Press the plate firmly with your other hand, and you'll feel it give beneath your fingertip. Raise the set screw until the plate no longer deflects under pressure, then repeat the process with the rear center screw.
Tap all four corners and both centers to be sure all six screws are supporting the plate, and you're ready to go to work. Norton Publishing Wall Lenk Co.


|
Carpentry Shop In Karama Email Undermount Drawer Slide Mechanism And Psi Woodworking Dust Collection Hose Zero |

Azerinka
14.04.2021 at 22:37:19
Lovely_Boy
14.04.2021 at 10:52:43
Henry
14.04.2021 at 22:40:56