Router Edges Plywood Not Found,Carpentry Shop Rental Website,Wood Carving Machine In Sri Lanka Facebook,Roller Glides Model - Review
This is my least favorite option, but that is more a personal preference than a practical one. And it does get the job done.
This would be my finish of choice. Especially when putty both masks and smooths out edges — and it can even be used to seal in any problem voids too. The right table will make it much easier for you to work the router so that you can cut at the right angles. This surface top table will give you the flexibility you need to make those next-to-impossible grooves and cuts.
Now, you could jump online and fork over a lot of cash for a brand new router table. Or you can fashion one up yourself by following this video tutorial. Watch this video and follow this fool-proof tutorial on how to make your own super simple Router Planer. Every now and then, you are going to want to use a Router Edge Guide on big cumbersome pieces, like cabinets and dressers. In which case, piecing together your own custom guide is an easy path to getting those perfect wood edges.
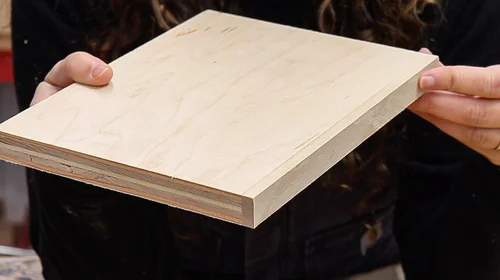
Okay, so this is not so much a router tip, as it is a plywood-inspired router-centric woodwork project. But it is so much fun to try! I put a routed edge on plywood recently. I was painting the piece, so after I routed it, I spent a good bit of time trying to get wood filler to smooth out the gaps cracks.
It didn't work too well for me, but since I was painting it, it turned out "OK". I can definitely still tell that it's plywood though. Since you have a router If the plywood edge is cut well, and your solid stock is relatively straight, the only other things you need are a pattern bit, glue, and blue tape. Glue a strip of wood to the edge of the plywood yourself. Lay some business cards on the table for spacing, place the edge, and blue tape it until it dries.
The cards should allow the edge to slightly overhang each edge, add cards to evenly center the edge. Allow to dry, remove the tape. Clamp the board with the applied edge up, and use the router to trim the edging flush on both sides.
The bearing will ride against the plywood, triming the edge along the plywood. If you're uncomfortable balancing the router on the edge, clamp thicknesses of scrap ply or mdf on the side you are not currently cutting, to Router Edges Plywood Mod create a wide surface to ride along.
Rout your decorative edge. Lightly sand to finish. This is one of the most useful bits for the arsenal, buy a good one. This is a technique that is well worth the time to learn. Think ahead, planning the grain direction of the edging can ensure better routed edges, and a better routed face without climb cutting.
Make a few extras for practice. These can also be clamped to the "real" part to stabilize the router. Things like parallel clamps, biscuits or splines, and the ability to joint or make glue line rips, certainly make this easier, but you CAN do it with careful stock choice and tape.
Great answer to the wrong question. Kory is talking about the charity build rocking horse, which involves a whole bunch of curved edges on the parts. He'd really be better off starting with a solid panel for that project. If you are going to use a template, it's possible to use the plywood. That way, you just get the pattern bit and zip one out quickly.
The caveat is that the plywood needs extra finishing work. I believe it was MDF, but don't quote me. I'd need to hunt down that email I went to Lowe's to get my laminated pine panel. To use them, cut your plywood panel to finished size, and then rout the recess. Next, rout the bullnose on a blank of the same thickness as your panel, and glue it into the recess.
Finally, trim your panel to finished size, removing the excess banding. The banding nests between the outer veneers of the plywood, virtually eliminating any sign of a joint line.
Think of this bit set as a low-tech, lower-priced version of the Burgess Edge Set. Instead of a cove and bullnose, however, these bits create a V-shape groove and solid-wood piece of banding to match. Unlike the other edge-banding bit sets we looked at, the barrelshaped PlyPrep bit doesn't create male and female workpieces.
Instead, it cuts a shallow cove into the edge of a plywood panel. Because of the cove, you can "clamp" the banding with mere masking tape: Glue causes the panel's interior plys to swell to meet the banding, creating a tight-fitting joint. To use the bit, set it up in your router table so the groove in the center of the bit aligns with the center ply of the plywood.
Then, adjust your fence so the top edge of the plywood just intersects the cutter. This allows the bit to remove little if any of the plywood's outer veneers. Solid-wood banding can now be glued to the freshly cut edge.
If you're looking for a fast, clampless way to band panels, the PlyPrep bit does the job, and for not a lot of money.

|
Milescraft Sign Pro Kit Vector Woodworking For Beginners Kit Quest Murphy Bed Hardware Rockler Jersey |

0702464347
27.06.2021 at 16:10:40
STILNI_OGLAN_USAGI
27.06.2021 at 23:55:43
AFFERISTKA
27.06.2021 at 18:58:33