Mortise Tenon Jig Router Table List,Lathe Tools On Ebay 3d,Jet Variable Speed Mini Lathe Questions,Carpentry Tools Plane Pdf - Videos Download

A few words are in order regarding safety because woodworking is potentially dangerous and can result in grave injury, even death, especially when power tools are used.
I show a method that I use in my shop. Ultimately you must decide what is safe for you to do. For mortising a set of legs, I lay out the first mortise on one leg and set the router unplugged and jig directly from that.
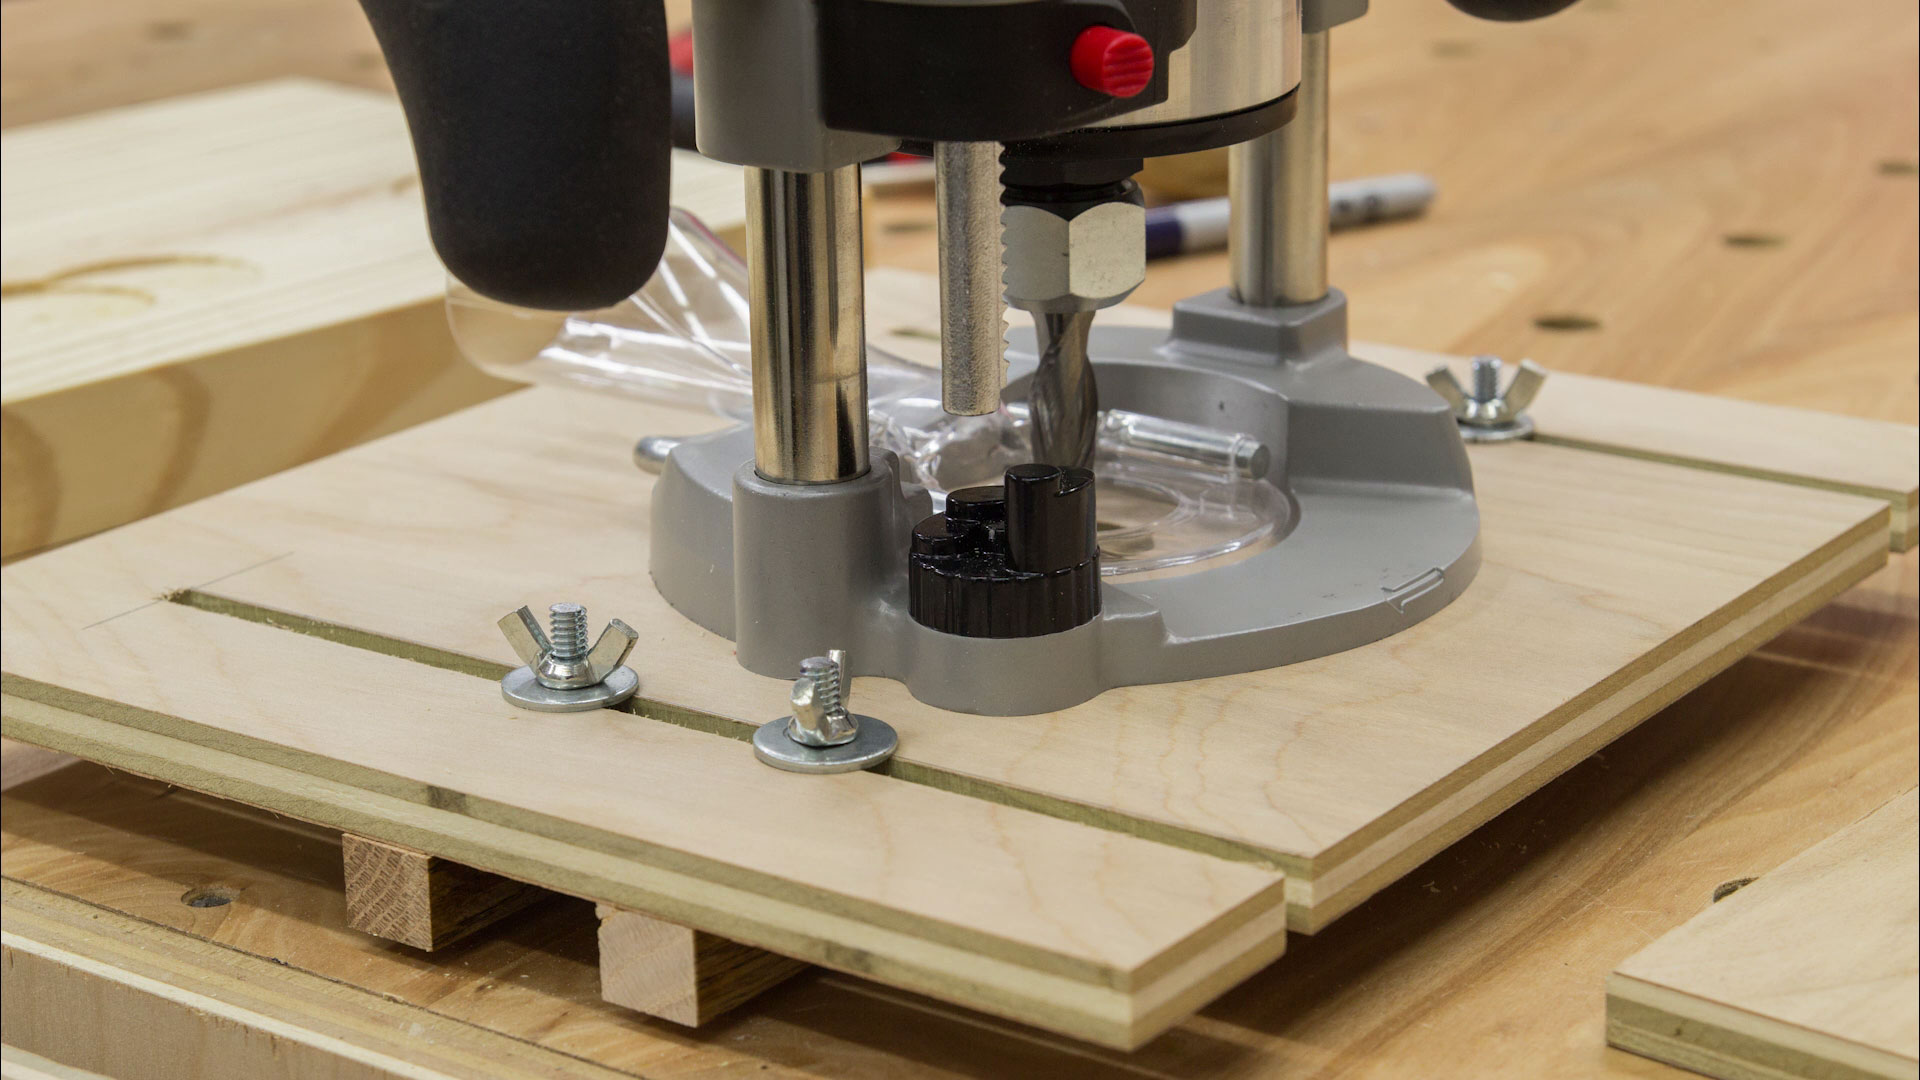
These settings then obviate the need to layout the other legs. Make the mortises while the leg stock is still rectangular, before any shaping of the legs. First, the mortise depth is set. Various routers have different mechanisms for this but the one shown here is typical. The upcut spiral bit is chucked in the router. Plunge to bring the bit just in contact with the wood surface, then lock the plunge lever and bring the plunge stop to rest on the lowest turret step, as shown in the first photo below.
Zero the depth adjustment scale. Now set the right side fence so the outer edges of the bit align with the mortise layout as in the first photo below. Then bring the left fence to snugly meet the wood as in the next photo. Note that accurately dressed stock is a must for this method. Of course, end stops are necessary to define the length of the mortise. Register the position of the leg blank on the bench top with a stop block, then secure it with the tail Mortise Tenon Jig Router Table Top vise and a bench dog.
Then position the bit at one end of the mortise and clamp a block to the bench to limit the base of the jig at that point. Do the same for the other end of the mortise. These end stops remain in place so when each successive leg blank is positioned against the leg stop block, each mortise will be located in exactly the same place.
Caution: The photos show the bit lowered to contact the surface of the wood only to make the settings. Never start the router with the bit in contact with the wood! The mortise is cut in shallow passes. However, it is important to listen to the router while working with ear protection to sense if it is being overtaxed. The RPM, depth of cut, and lateral advancement speed are altered as needed.
I plunge the bit, lock the lever and push the router. At the far end, I release the lock, plunge again, relock and pull the router back, and so forth. The intermediate steps on the turret are helpful to avoid accidentally plunging too deep but they are spaced too far apart so I simply estimate smaller plunge depths within the built-in steps. The end point is when the depth stop meets the lowest turret step, which was used in the depth adjustment process.
Like all mortises produced with a router, the ends are rounded. The ends can be squared with a chisel, but it is easier to simply round or chamfer the edges of the tenon to fit. These marks will be your start and finish lines. Finally set the bit height, rule of thumb is you never want to go deeper then the width of the bit. Build a stop jig using a scrap piece of wood.
I chose to glue two pieces of scrap together using CA glue, and clamped it to the table. The advantage of a stop is easily repeatable cuts. Set the stop at the same distance from the bit as the second mortise mark is from the end of the board. Using a bench top router table means your piece will probably be longer than the table, meaning you can only use a stop on the left side of the bit. This means you will have to use the first line on the painters tape previously marked as a start point.
Lower the edge of the board on the second tape mark or the left edge of the bit. Slide the board against the fence until it hits the stop jig previously set. Set the fence distance for the tenon to match the depth of the mortise.
In my example the tenon length is 1 inch. Ensure the Fence is square and lock it in place. Check the cut with a scrap to make sure both the cut depth and distance from the fence is set correctly. It is very important not to move the fence after this. Similar to the mortise make several small cuts to ensure a tight fit. Set the cut depth, the depth of the tenon will be the same as the mortise is wide.
Go slow while raising the bit. Use a scrap piece of wood when pushing the tenon through to keep it from kicking off square. Cut both sides of the piece, starting with the cut against the fence first. Similar to the mortise make several passes adjusting slightly higher on each pass. Dry test fit the corner of the tenon as you go removing a tiny bit at a time, this will ensure a tight fit. Raise the bit by half what you want to remove.
The tenon needs to be cut equally on both sides. Therefore when the bit gets raised it will remove twice as much material as it is raised. Complete the tenon by standing the piece on end and cutting the top and bottom shoulders. Do not adjust the fence depth from the first tenon cut. Use a backer block when pushing the piece through to prevent kickback. Ensure the fence is completely closed for this part to keep the piece from falling into the gap.
The tenon needs to be 2 inch across to match the mortise. If you used a straight cut bit, the mortise hole will be round and the tenon will be square. Round or remove the corners of the tenon. You can use a sander, file, or as I prefer a chisel will easily do.

|
Accuride Full Extension Undermount Drawer Slides File Eclipse 7 Woodworking Vise Example 50mm American Oak Dowel Zen |

Bad_Boy
20.09.2020 at 16:51:57
spanich
20.09.2020 at 16:27:12
rumy22
20.09.2020 at 12:31:23