Marking Knife Material Job,Trend Pocket Hole Jig Single Review,Used Woodworking Tools For Sale 64,Quick Scrap Wood Project - Downloads 2021
The story of my Marking Knife goes all the way back toonly a year after I started woodworking. I was beginning to get to grips with using certain tools such as planes, chisels and knives and was starting to find out what worked for me. Secondly, I had also just started my job at Axminster Tools and Machinery which was exposing me to many different tool varieties and brands.
So even if I didn't necessarily own a tool, there was a good chance I would end up trying it while working at Axminster over the next 5 years of my employment. David was a furniture maker who trained at The Edward Barnsley Workshop and had produced a small batch of videos on various woodworking topics from dovetailing, setting and using tools, and general workshop inspiration.
During this time, he was beginning to transition into manufacturing tools such as the David Barron Dovetail Guidewhich he is probably most known for. I actually ended up buying one from him as well as a Gyokucho Dovetail Saw to aid with my dovetailing and they worked incredibly.
But what really stood out for me was one of his Marking Knives. They looked sublime. Beautifully shaped, a variety of colours, nicely finished, and of course came with a razor sharp blade. I wanted one. During this time, I was also reading David's blog and marking knife material job the process of him making batches and batches of these knives and I heard nothing but great testimonials from them.
Unfortunately, every single time I was ready to buy one, he had sold out. When they were back in stock, I had already splashed my monthly earnings on other tools that I needed. Which explained how he makes his dovetail marking knife. During toI was studying Level 3 Furniture Making and managed to complete my project a couple of weeks earlier than scheduled. So instead of going home and calling it there for the summer, I continued to come in until I was literally kicked out the workshop by tutors who were trying to set up the Rycotewood End of Year Show.
One evening, I was scrolling through eBay looking for cool pieces of wood I could buy. I was a cool 18 year old eh? I came across a Snakewood Turning Blank. Scarily, this was the first time I had used a lathe, and as usual I jumped straight in at the deep end. The first thing I did was get the 4 prong drive, and whack it into the endgrain of the Snakewood blank to bed it in. Let it be a lesson to anyone reading this that Snakewood does not take well to marking knife material job blunt prong drive being smashed into the endgrain.
Looks like this knife is going to be smaller than expected! I eventually managed to get it safely mounted in a 4 jaw chuck after some guidance from a fellow student who was far better at turning than I was. After a few catches and ropy moments, I managed to get it turned and even managed to get a bead on the end of it!
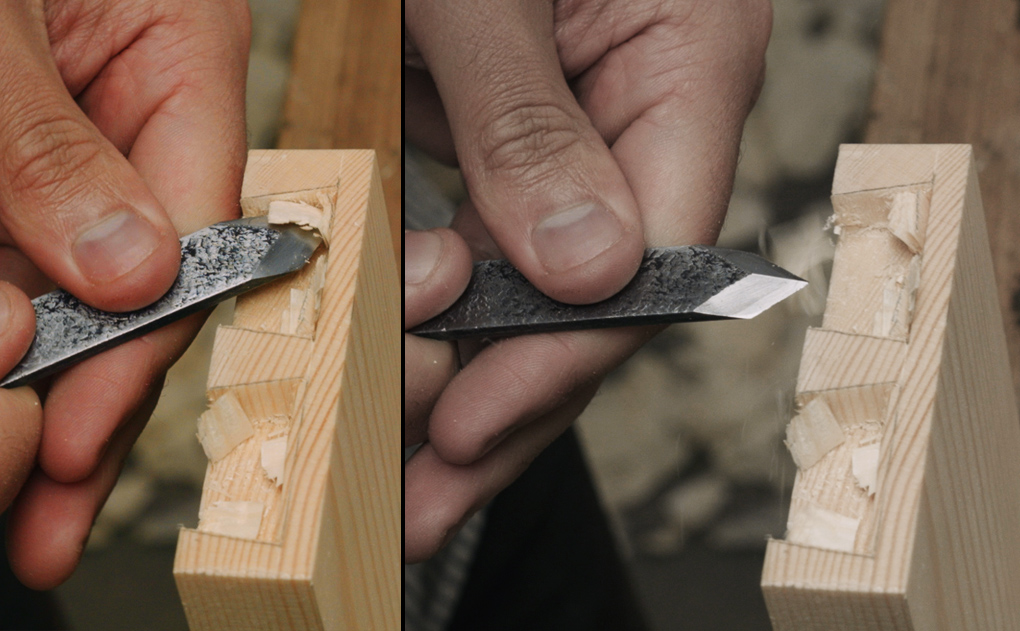
It looked crap but hey, it was there. I took the handle out the chuck, cut the slot for the blade, and slipped the ferrule into position. The article I was following stated that David tends to epoxy his blades in place. This seemed counter intuitive at first, although he made it clear that due to the chisel-like shape of these blades, it was entirely possibly to re-dress the point by simply honing it on a diamond stone.
I looked my existing marking knife. Chips, dents and glue took up more of the blade than a sharp point. I decided that I couldn't trust myself to solely use the knife for wood and had to make the blade removable. I purchased an M5 Tap and grub screw and drilled straight into the side of the ferrule and tapped straight into the Snakewood.
Due to the dense grain of the wood, the thread still stands today! I used this knife for several years and loved it. The blade was incredibly sharp, marking knife material job handle was intuitive to hold, and despite looking marking knife material job, I was proud of it.
On the 30th of December,I stopped working at Axminster due to trying to juggle too many balls at once. I had limited time to work on things that I wanted to pursue such as YouTube and a social life and sadly, Axminster got the cut. I anticipated this for months in advance and gave management plenty of notice, and in the meantime saved up a ton of money. In the 4 months prior to leaving, I was working at Axminsterteaching both day and evening classes at Rycotewoodand was also running my own business with the YouTube channel.
I grinded and saved a lot! I intended to make full use of my employee discount before walking out the door for the last time. Marking knife material job had been woodworking for around marking knife material job years by this point and decided that I wanted to expand my skills into other areas. Secondly, as my channel was growing, the tools I was using began gaining more attention. Everyone noticed the usual marking knife material job such as Lie-Nielsen and Veritasbut no one could marking knife material job the knife.
I also noticed that David Barron had ceased selling his knife. I had 4 things to confirm there was a gap in the market. Firstly, I had seen how many knives David was selling after reading his blog a few years ago. Secondly, I had a larger following than he did at the time of selling his knives. Thirdly, there was potential to make the blade replaceable which also had marking knife material job added benefit of allowing the user to choose from a selection of 6 different blade shapes.
Finally, I realised that it would be easy for me to make the handle and the ferrule fully customisable if I were to make these knives in-house. I began working on a design for marking knife material job knife, particularly the locking mechanism on the ferrule. I considered a collet, however there was no chance I could make one efficiently.
I considered a pin that slots through the side of the ferrule and through the hole on the blade, secured in place with a marking knife material job. But this would marking knife material job get lost in a pile of shavings if dropped. Everything pointed back to my original design marking knife material job using a grub screw to secure the blade in place. Marking knife material job course a grub screw could easily get lost in a pile of shavings.
But at least it was far easier to order spares online as opposed to a bespoke magnetic pin! So I got to work re-designing my original knife and faced a number of different challenges. The original knife required the blade to be cut shorter before being inserted marking knife material job the ferrule. But I did not want people to need to cut down blades in order to replace them. Not only from a convenience standpoint, but also from a safety perspective.
This mean't that the ferrule had to be longer on the new design to accept the entire blade. The nice thing about this is that it's added a nice amount of mass to the front of the knife so that it required less effort to cut, marking knife material job feels like a higher quality item. I wanted the grub screw to be in the centre of the ferrule along it's length. But after increasing the length of the ferrule, it meant that the grub screw hole was no longer aligned with the hole in the blade.
This was a big problem. If the grub screw was to be over-tightened against the side of the blade, there is a high chance the blade could chip and fill the blade slot with metal fragments.
As you'll see later in this article, these are impossible to remove. I tried so hard to avoid this being a carbon copy of David Barrons knifebut on the flip side there was so little I wanted to change about his original design because I loved it so much.
In the end I decided to remove the bead at the end of the handle, simplify the shape, I also removed the shoulder that leads the handle into a ferrule, and I was to offer it in a variety of materials. With the addition of a visible grub screw, the design is now noticeably different to Davids original. One thing I couldn't distance myself from was the thumb-hold.
I thought it was genius. In addition, due to the fact my blade was removable, it meant that the blade could simply be flipped the other way around and it would be suitable for both right and left handers! The lathe had sat idle in my workshop for 4 months while I gathered materials to test the first batch. And I decided to film my first ever attempt at using the metal lathe for Episode 12 of Turning Tuesday. At this point, the knives were complete secret.
Barely anyone knew what I was up to! This is where the real challenges arose. I'm pretty sure I exhausted all potential cock-ups possible before finally coming out with a design and a process that works well. Below are some of my favourite screw ups. There was a split in the rosewood that I didn't see. Suffice to say it didn't like the skew chisel touching it.
I marking knife material job to cut the blade slot before attaching the ferrule. Then marking knife material job up mashing it anyway I decided to highly polish the ferrule as an experiment, then proceeded to overtighten it in the chuck jaws The slitting saws I use are extremely flexible. One second I was chamfering the copper, the next second my pants were brown. The shank was too tight in the handle, so I decided to machine it down slightly.
Ended up mashing the slot shut. When the araldyte joint failed, causing the ferrule to rotate around the blade holder. You could get a grub screw in that, right? When I forgot to set the depth stop on the drill and blew through the opposite side of the ferrule. One of the many occurrences where the tap snapped while cutting the thread. This is one marking knife material job the most annoying!
Aradyte rapid didn't work for the marking knife material job to metal joint either. These often launched off the lathe.


|
Junior Cert Woodwork Project Portfolio Gene Professional Cnc Router Machine 64 Tenda Router Login Gui Christmas Gifts For Woodworkers Online |

nedostupnaya
18.09.2020 at 12:25:51
APT
18.09.2020 at 22:58:16
GAMER
18.09.2020 at 11:11:43