Make Finger Joint Jig Router Table Graph,Best Japanese Garden Tools 2018,Dining Room Table Copper Legs Question - 2021 Feature
Note that this calculator also works for rectangular boxes. An n-sided pyramid is built from n identical triangular side pieces, not including the base.
The base radius is the distance from the center of the pyramid's base to one of the base corners. The height is the distance from the center of the base to the apex. The side slope is measured from horizontal and can be used to calculate any cuts needed at the bottom of the pyramid's sides.
Pyramids with butted joints are some weird animals. A few more or less realistic examples are shown on the right. A concrete form Make Finger Joint Jig Router Table Kit for casting post caps can be made in the shape of a pyramid.
The pyramid can have a square or rectangular base. The side slopes are measured from horizontal and can be used to calculate any cuts needed at the base of the pyramid. In the case of a concrete form, we need the inside surfaces of the form to line up. In other cases you may want the outside surfaces to line up, but given the same board thickness and a rectangular base, we cannot have both the inside and the outside surfaces line up with this model.
For that special case, check out the Rectangular Frustum model below. In geometry, a frustum is similar to a prism, but the sides are not parallel.
This example has a base and a top with different aspect ratios. The side slopes are measured from horizontal and can be used to calculate any cuts needed at the base and top of the frustum. Both the inside and outside surfaces line up in this model, on account of the bevel angle being the same for all pieces. This works well as long as there is an opening at the top.
Once that opening closes, we must make additional cuts to clear interference between the pieces. The mitered joint Rectangular Pyramid model does not have this limitation.
If you want to try this model with a pyramid, set both top dimensions to zero. The platonic solids is a group of five polyhedra constructed with identical sides.
In the general case we have two intersecting surface planes. By defining four points, 0 to 3 , on the surfaces in 3D space we can find the miter and bevel angles of sides A and B.
The figure on the right shows the two pieces assembled. The dashed lines show how the XYZ coordinates for point 1 are determined. Points 0 and 1 lie on the seam between the two surfaces.
Point 1 can be located anywhere along that seam except at the origin point 0. The line between points 0 and 2 is the reference edge for surface A's miter angle.
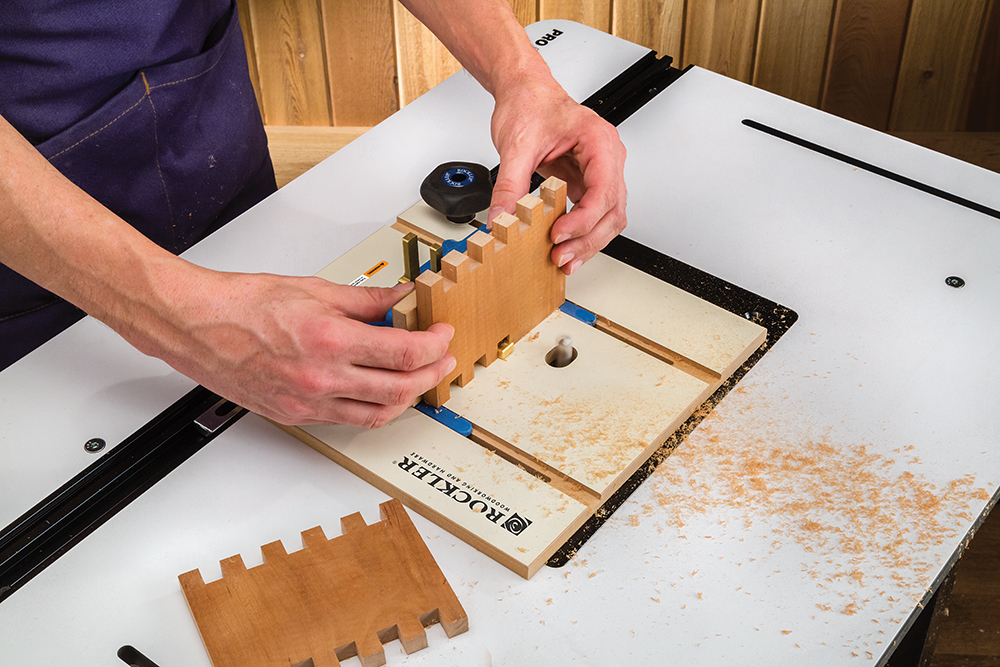
Point 2 can be located anywhere along that edge except at the origin. Write down where you should be cutting on both boards. Actually, I color on the board with my pencil so that I can see where the grooves are supposed to be. You can use these to get a rough idea, but I strongly advise that you do not trust them. This may seem really arbitrary, but in the case of making finger joints, that small error can really screw you up.
Hints and Tips: I make two passes for each groove. It makes the next step easier. Also, do not rush the piece through the router. Patience is key. Even the smallest piece of sawdust or a splinter can make it impossible to fit the teeth in the grooves or, worse, it will cause you to split the wood or break off teeth as you put them together.
Using a flat file, gently file down all edges inside the grooves. Pay special attention to getting the reside Make Finger Joint Jig Router Table Key out of the corners. On one hand, this is a good idea. To be honest, the amount of glue I used in this picture is probably excessive. Now you very slowly start to slide the pieces together. This is slow and tedious, and you have to be careful. It takes a lot of wiggling and a lot of patience.
Once you have the joint started, use a rubber or wooden mallet NEVER a hammer to slowly tap the pieces into place. I suggest alternating the direction you fit from i. TIP: It can be tempting to just hammer the shit out of the thing to get it together…but resist the urge.
Slow and steady prevents splintering or chipping the teeth. That being said, some carpenters will tell you that glue is unnecessary if the joints are done right…and by extension, this step would also be unnecessary. To each his own. You are commenting using your WordPress.
You are commenting using your Google account.

|
Kreg Track Saw Accessories Co Ltd Tongue And Groove Router Bit Set Zero |

ZARATUSTRA
12.03.2021 at 19:27:23
PRIZROK
12.03.2021 at 10:25:52
hesRET
12.03.2021 at 11:48:47