Kreg Mitre Stop 300,Popular Woodworking Bench Plans 73,Carving Kitchen Washington Dc 64 - Tips For You
More Filters. Scores filter All Score all. Images filter All All reviews. Show 5 Reviews. Clear All. Updating Results. Verified Reviewer. Review by Anonymous User. Was this review helpful? J James B. Verified Buyer. Projects Completed Annually: projects per year. Product Recommended: Yes. Review by James B. Great product. J Jon A. Builder Skill Level: Expert Builder. Projects Completed Annually: More than 12 projects per year.
Just what I needed. Review by Jon A. A Art H. Review by Art H. Saves time over using the old method of clamping a stop-block to the rear fence. Level of instruction needs improvement. Quality of metal parts are excellent but there are too m Review by Wl B. Quality of metal parts are excellent but there are too many plastic parts to save money.
The result is less than perfect instrument that could have been ideal. The overall result will be an tool that doesn't last under production usage. R Robb C. This is decently priced flipstop arm to make repeated cuts easier with your fence setup. I purcha Review by Robb C.
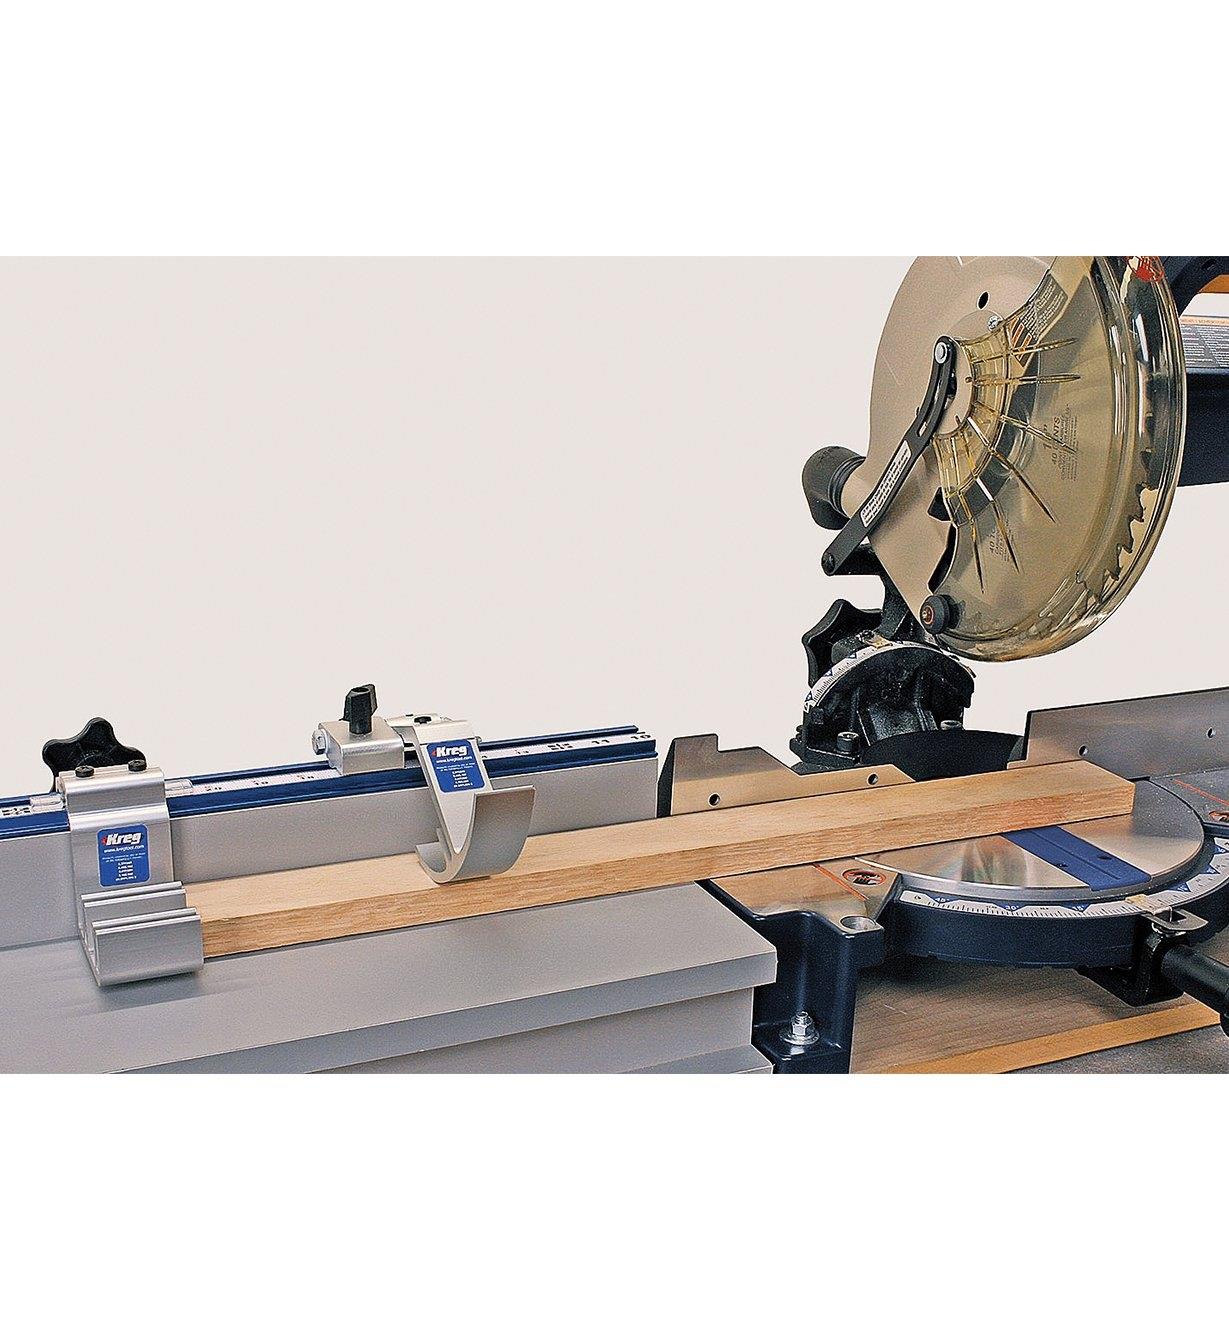
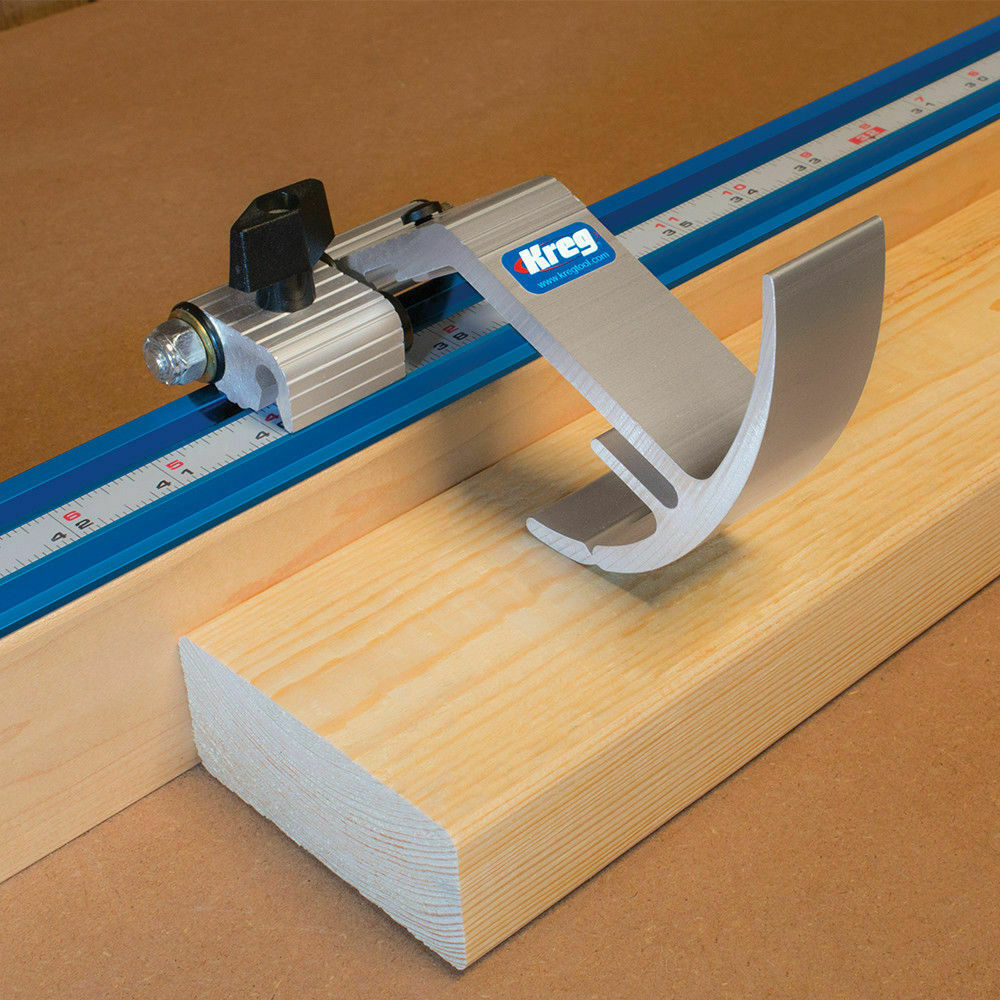
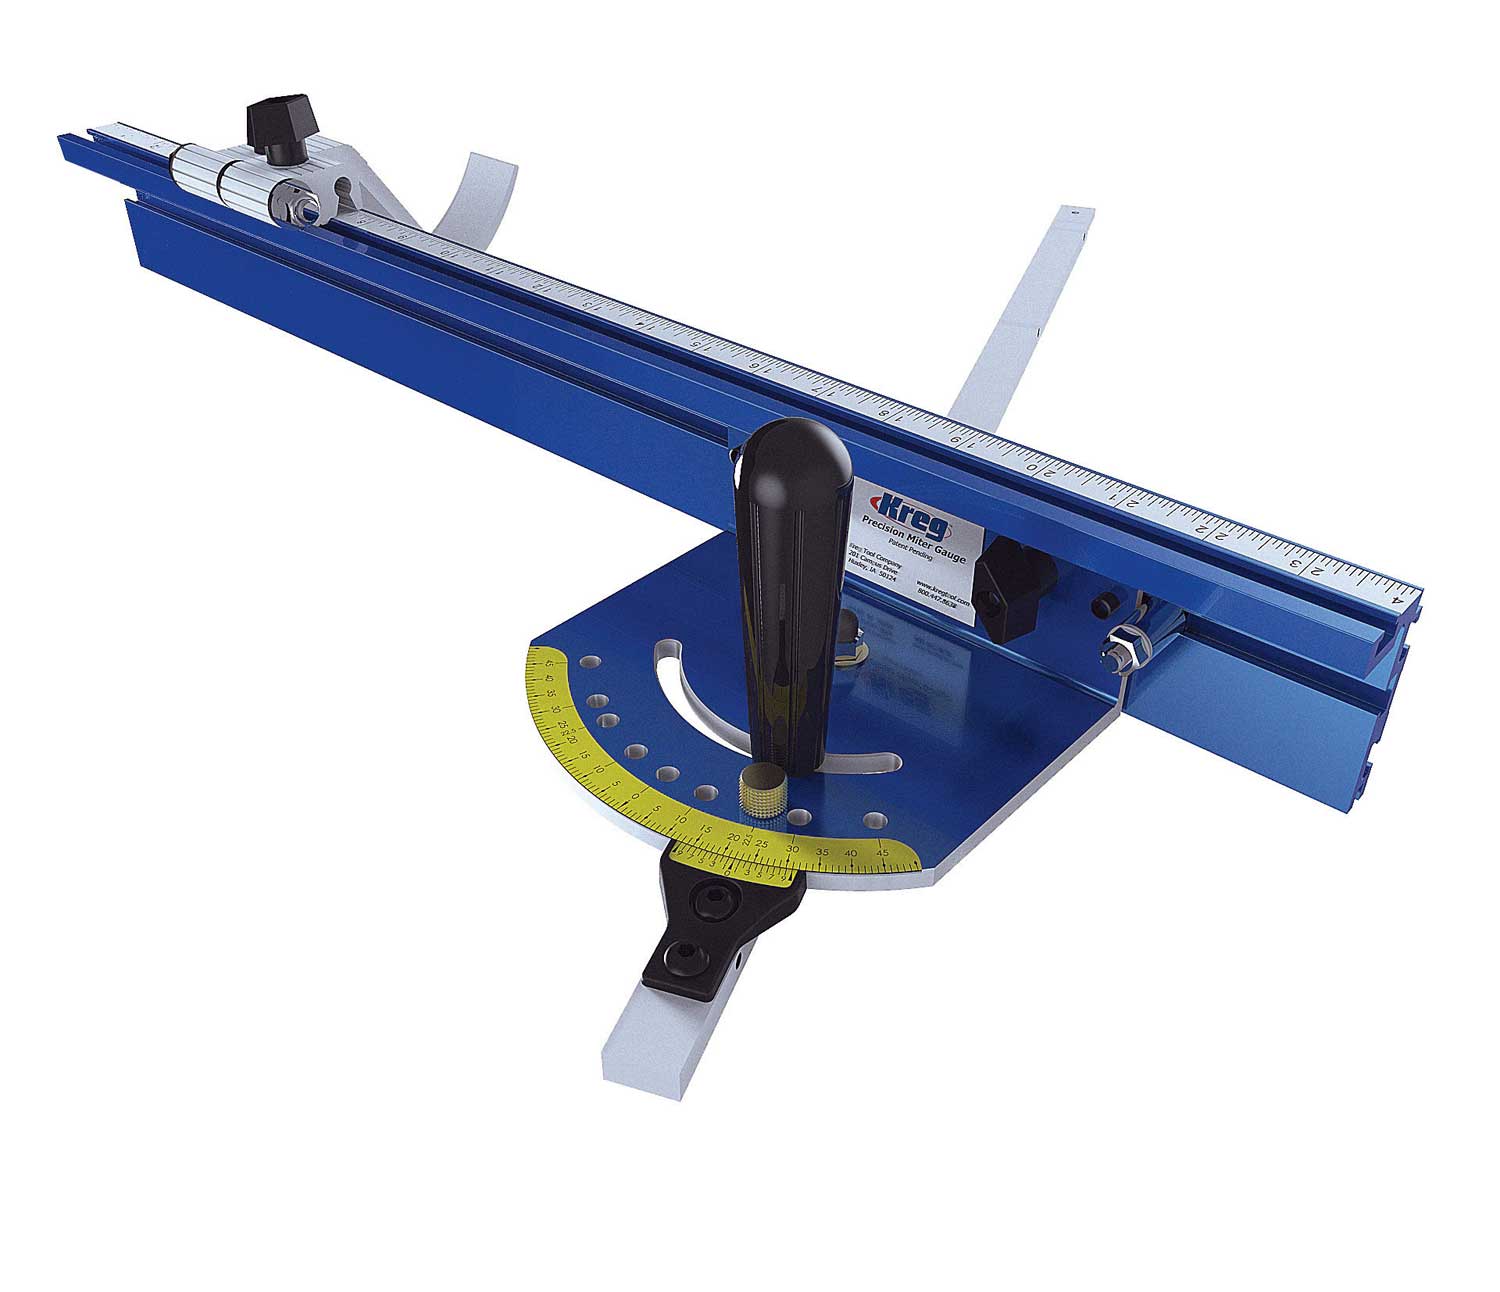
I purchased this with plans to add it to my miter saw setup, but didn't realize that it was really designed to work best with a Kreg specific track. Although it will work with other track, the Kreg top track was what this was intended for.
I plan to install it on my drill press now so that I can drill a hole in multiple workpieces in the same place. It will also save me a bit on the cost of the track. Kreg says you should have a fence height of 2.
T Thomas v. Answers 1. Kreg Tool. Was this answer helpful? Plus, this miter saw stand rolls easily to work where you want to, and then tuck compactly away. Start by cutting the two Front Legs to length from a 2x4, as shown in the cutting diagram. Drill pocket holes at the locations shown. Cut the two Back Legs to size from a 2x4, as shown in the cutting diagram.
Now clamp one Back Leg on top of the first so that the ends are aligned. Then drill a hole through both Legs, where shown, for the wheel bolts. Cut two Handle Rails to length from a 2x4, as shown in the cutting diagram.
Clamp the Handle Rails together, mark the location of the handle hole, and drill a 1" hole through both Handle Rails. Next, cut two Leg Rails to length from a 2x4, as shown in the cutting diagram. Now, drill pocket holes on the inside faces of each Leg Rail, as shown. Finally, bring the Back Leg into final position, and then attach it to the Front and Back Legs as shown. Repeat the process for the other side. Cut four Rails and one Center Rail to length from a 2x4, as shown in the cutting diagram.
Drill pocket holes in each part at the locations shown. Position the four Rails against a side assembly, as shown. Next, attach the Center Rail in between the two Lower Rails, as shown. Slip the Handle into its hole in the Handle Rail. Position the second side assembly, and then attach it to complete the base. Place one fender washer over a wheel bolt, add a wheel, and then add a second fender washer.
Slide the wheel and bolt through the hole in the Back Leg, as shown. Repeat the process for the second wheel. Countersink the holes so the screw heads will sit flush when you attach the Top and Shelf to the Base in the next step. Position the Top on the Base so it is flush on each side, as shown. Then position the Shelf, and attach it, as well. Every miter saw is different in both size and shape.
These next steps will have to be adjusted to fit your saw. Place your saw on the base and center it side to side. Adjust the position front to back to where it feels comfortable for you. With a pencil, mark the location of each mounting hole in the base of the saw. Place the saw back on the base, and then secure it with bolts and washers.
We used wing nuts so we can easily remove the saw if we need to. The challenge here is that every miter saw is different—some are wider than others, and the saw tables often sit at different heights.
That means you need to customize the wings. Our design makes that possible, by letting you cut the parts, and then adjust their mounting positions to set the placement and overall height of the wings.
Just be sure to take your time and measure carefully as you cut and fit your wing parts. Next, hold or clamp the Angle Brace in position. Repeat this process to create the other wing base assembly.
From a 1x6 board, cut two Fence Backs to length, as shown in the cutting diagram. Drill pilot holes in the Fence Back, as shown.

|
Fighter Jet Plane Drawing Free Aesthetic Planner 2021 2 Connected Planar Graph Example |

HiKi
22.05.2021 at 22:11:53
K_E_N_Z_O
22.05.2021 at 14:11:37
NaRkAmAn_789
22.05.2021 at 18:53:54
562
22.05.2021 at 17:35:49