Drafting Table Hinges Hardware 10,Using Miter Gauge Table Saw Java,Delta Woodworking Sanders Vessel - Reviews
At first, I tested it out by just putting a shelf on my lap and adjusting my knees to get the angle Drafting table hinges hardware 10 want.
It was a fully functional prototype, but perhaps not that comfortable. And so I thought "Fine, I'll make one myself then!
After drawing a bunch of different versions, I finally ended up with something that I liked: - You can adjust the angle quickly and easily. The angled surface is held in place in the middle by a simple metal rod, so you only need to move that one rod to change the angle.
Have a look at the third picture to see how that works. I also used a piece of left-over laminate flooring to make the angled surface, so I know it matches my floor at least.
There's nothing fancy in there though: just some pieces of wood, wood glue, screws and a pair drafting table hinges hardware 10 hinges. However, you can fairly easily alter the design to add additional features like top drawers, a gutter in the angled surface or an adjustable table height. Overview: - First build a table frame, just like a regular table.
Just a few notes before I continue with the materials and tools: I won't be bothering you with any measurements and let drafting table hinges hardware 10 pictures do most of the talking. You probably weren't going to use the exact same measurements anyway. Look for it at the bottom of this page. All the different parts of the table are modelled separately, so you can easily take it apart and use Sketchup's tape measuring tool.
This instructable's title says that I use "basic tools". However, I'm sure you can gain a lot of time and precision if you have slightly more advanced tools like a drill press and a table saw. The materials as well are very basic things that you can find in just about any hardware store. In my case, I just used whatever scrap materials I had laying around.
I'm sure there are better choices out there, but I'm quite happy with the result. Materials used: - Wood for the square table legs - Some Feet to stick onto the table legs - Wood for the sides, the top surface and some small drafting table hinges hardware 10 for strengthening I used MDF for these parts. You can of course choose whatever wood you like, but definitely make sure that it's sturdy enough, as you'll constantly rest your arms on this surface.
Drafting table hinges hardware 10 first step is to build a frame for the drafting table, which is just the same as a frame for a regular table. There are several different ways to go about this, but I wanted to try making some mortise and tenon joints.
That is, to join two pieces of wood together by making a rectangular socket or "mortise" in one piece and making a corresponding plug or "tenon" drafting table hinges hardware 10 the other. There are no screws involved and, according to this experimentthese joints can take more force than dowel joints and drafting table hinges hardware 10 joints.
If you've never made any mortises before, which was the case for me, it can be quite time-consuming if you only have a drill, a mallet and some chisels. There are several great tutorials such as this one or this one to help you make mortises, but the basic idea is this: - Draw the outline of the mortise.
It's a huge plus to have a drill press here, as the drill tends to slip if you drill the holes too close together. So if you don't have a drill press and the drill is slipping, increase the distance between the holes. You'll spend more time cleaning drafting table hinges hardware 10 the mortise with chisels, but you'll reduce the risk of making your mortises too big, which is worse.
No need to worry if you make your mortises a bit too deep though; it's fine as long as the tenons fit snugly into the mortises. To test the depth and width of the mortise, I made a tiny "measuring stick" from scrap wood, which has the right width, and has the right depth marked on it.
You can drafting table hinges hardware 10 this to figure out where you need to do some more tweaking. If done right, it shouldn't take too much force to insert the tenon into the mortise, but the pieces shouldn't fall apart either if you let gravity do its thing.
Making the tenons was a lot easier: Just use the jigsaw to cut away two small rectangles and voila, you've got yourself a simple tenon. To make a proper tenon, you should cut away 4 sides though. As you can see in the second picture, I made all the mortises in the table legs, and the tenons in the side pieces holding the legs together. You can see I haven't made anything that joins the front two legs together.
While this makes the table less sturdy when you want to move it around, I chose to do this so I don't have anything in the way of my own legs while using the table. If you want, you could also attach some wheels instead and make the table a little more mobile.
You should also note that the mortises in the front legs have taller mortises in them than ones in the back legs. Because each back leg has mortises on two sides, I made them smaller such that drafting table hinges hardware 10 mortise from one side would not overlap, or be very close to, the mortise on drafting table hinges hardware 10 other side.
Once you're done making mortises and tenons, stick it all together with some wood glue. Add a bunch of weight to the frame, as you can see in the third picture, and let the glue dry. You can let it dry for as long as you want, since you can already continue with the next step, which is to make the surface that goes on top of this frame. After making the table frame, it's time to make the surface that goes on top of it, i. I used the same MDF wood 1.
The angle adjustment mechanism needs to slide through this surface, so we'll need to make some room for it by cutting out the shape that is shown in the first drafting table hinges hardware 10. I made that shape much larger than is strictly necessary, but it does allow you to easily reach for the metal rod to adjust the table's angle while you're sitting down.
This makes it easier on the drafting table hinges hardware 10 as it can start from a straight edge. You may need more of them if you're going for something wider. Just flip over the table and attach the blocks with a few screws, as shown in the last picture.
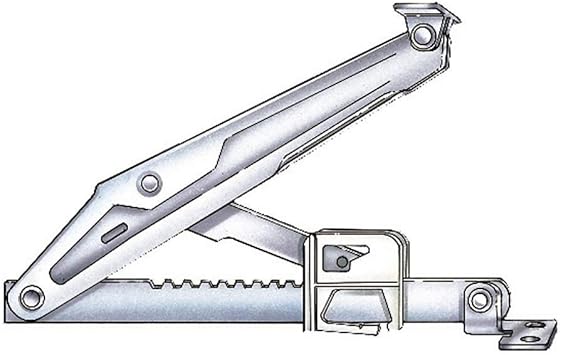
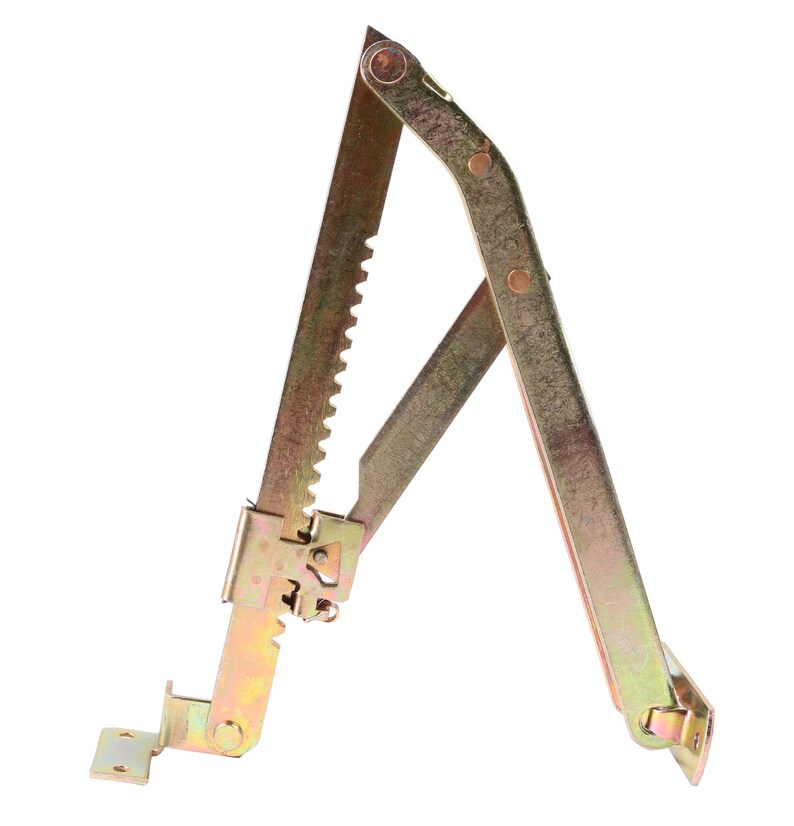
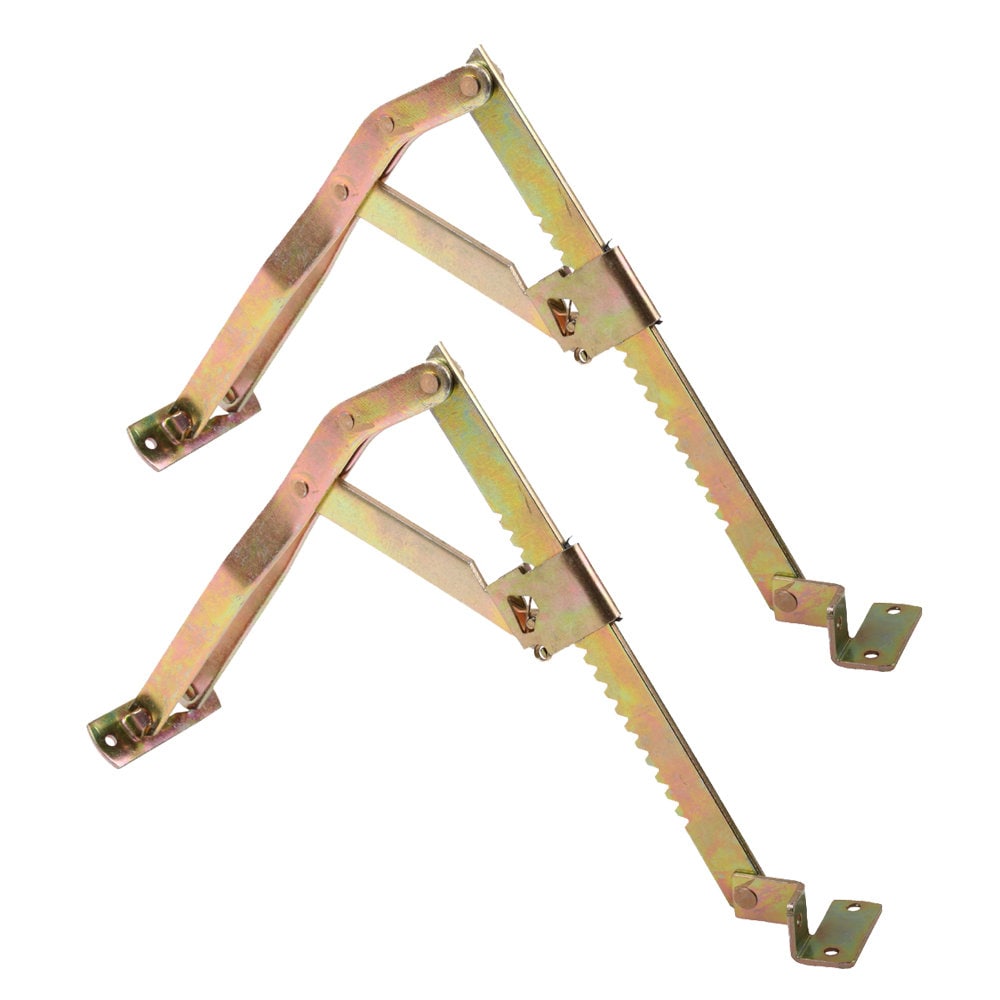
At this point, you've just made a plain old table with a big hole in it; hurray. In the final step, the angled surface is added to the table. The first step is to make the angle adjustment mechanism, which is the darker drafting table hinges hardware 10 piece of wood shown in the first picture.
You'll be able to adjust the table's angle by inserting a metal rod in one of the drafting table hinges hardware 10 of this piece of wood. As mentioned in the materials listing, make sure you're using a thicker piece of wood here, as it's the key part that will support the angled surface. Then you essentially only need a long nut and two bolts to hold the mechanism in place.
I chose not to do this because the bolts holding the surface in place use friction, which might lose their grip at some point. Using the metal rod method simply blocks the Drafting Table Hinges Hardware Zero angled surface on its way falling down, which is more reliable. Then again, car brakes use friction, which probably works better than trying to put a stick in there to jam the wheels.
The key idea is that it's a slice of a circle, such that the center of the circle is the point where the angled surface pivots around. The larger the slice, the higher you can adjust your table. I made one of 30 degrees. I used a protractor-esque tool to draw the angle I wanted. If you don't have one, use math! Remember this? To mark where to drill the holes in the angle adjustment mechanism, I used a tape measure to be able to space these markers evenly.
After drawing the mechanism, you can use the jigsaw to cut out the mechanism and use the drill to drafting table hinges hardware 10 the holes. You can turn ever so slightly with a jigsaw, so it should work fine drafting table hinges hardware 10 cutting slightly curved lines. It didn't work so well for cutting away the smaller circle slice, as it was a little too curvy, so I turned drafting table hinges hardware 10 side into something slightly different, as you can see in the third picture.
After making the basic adjustment mechanism, let's focus on the angled surface itself. As mentioned in the materials list, I wanted to use left-over laminate flooring to make the angled surface. Note that I used two pieces of flooring glued together. I did this because only one piece would be a little too thin to be able to attach the adjustment mechanism with screws.
Laminate flooring is a sturdy material, can easily deal with spills and doesn't leave stains. It's not very likely that you have any left-over flooring laying around yourself, but you may want to look for something with similar properties, or add a protective coating afterwards.
After making the adjustment mechanism and the angled surface, screw the mechanism onto the angled surface with some small wood blocks, as shown in the fourth picture. The drafting table hinges hardware 10 thing to be careful about here is to drill very slowly or use a screwdriver ; do it too fast and the blocks can split easily. The final step is to attach the angled surface to top surface's hinges with some screws.
Once that is done, find yourself a metal rod of some sort and you can give the adjustment mechanism a whirl. And that's about all there is to it; your shiny new drafting table now is done and ready for action; have fun!
Reply 5 years ago. I think the free version is now called "SketchUp Make". I used it to make a 3D model of the table, so it's not quite a schematic, but it's pretty convenient to get the measurements of all the different parts. It would have been nice if you hinged the sides. That way you could have folded it all up when not in use. The one I have doesn't so I keep it under my table saw out feed table when I am not using it.
It is a store bought one. Although I didn't buy it in a store. It has one of those big tops you don't like. Reply 9 years ago on Introduction. True, that would be a nice addition. While I keep the table permanently in front of my computer desk so it's basically always in useit would be cool if you could drafting table hinges hardware 10 the table foldable and height-adjustable with the same mechanism.
So you could not just fold it up entirely, or set it up to its maximum height, but also lock it at any position in between. Hmm, I'll have to give that some more thought; maybe I'll post a follow-up instructable some day. In any case, thanks for triggering the idea :.
Ah no, I had another mechanism in mind; see the crude drawing I just made : It basically replaces my current table frame with something completely different. Perhaps a little finnicky to set the table height like this, but it is foldable, height-adjustable and it works at least in my head it does.


|
Rikon Slow Speed Grinder Review Kit Delta Radial Arm Saw Parts 21 |

nice_boy
06.02.2021 at 13:56:32
Koketka
06.02.2021 at 10:44:19
TIGER85
06.02.2021 at 17:45:31
seker_kiz
06.02.2021 at 15:59:52