Diy Wood Advent Calendar Free,Cabinets Door Knobs And Pulls Video,How To Set Up Kreg Jig R3 - And More
Write a list of 25 things that will make you smile each day in December on separate pieces of paper and put them into each envelope — it's a lovely countdown to Christmas Day. You could also follow the same idea here but place them in a box instead of hanging or pegging to a board, or pop them into a large jar. Print off your favourite or most treasured photos try Bonusprint , Snapfish or Photobox for online services in a retro Polaroid-style format.
The photos you choose could be themed or part of an event, but as long as they all mean something to you that's the most important thing. Once printed, turn each photo on the back and number each one, then pin these onto either cardboard or thick paper aim for A2 or A1 size. As you turn over a photo each day you'll end up with a lovely photo collage capturing special memories, perfect for this time of year.
Have you got an unused wall rack? Build excitement with an advent calendar of treat-filled red and white paper bags. Accessorise with ribbons and mini decorations. You could use an old pallet or apple crate to create your own. Cut the ends at an angle so they have a nice slope for the tree shape: you can use a mitre block or just make a pencil mark to cut along using a square.
Either screw them Diy Wood Project Plans Free Trial together at the back using flat brackets, or fix them to a long strip of wood. When you have your tree shape, hammer in small nails to hang your advent treats on.
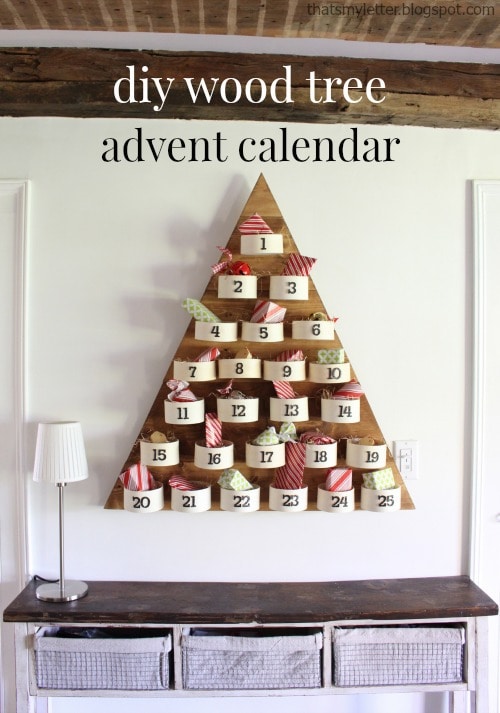
A star at the top will add a Christmas touch. Each year you can customise your treats either by hanging them directly or in little parcels attached to the pegs. All you need to do is save up 12 cardboard tubes from kitchen rolls and use leftover wrapping paper, plus some numbered stickers. Cut the tubes in half and fill the holes with your favourite sweets or mini chocolate bars. Follow this video tutorial on Pinterest below.
Keep things really simple and fuss-free by using wooden pegs, which you can paint in festive colours, to hang envelopes or little pouches like burlap bags containing small gifts. String with jute twine. We love this idea. Just use your old present sack from last year, or you can buy a new Christmas sack , and fill with small pillow boxes buy from Amazon which you can number for each day in December up until Christmas Day.
Fill the pillow boxes with whatever you like, whether that's chocolates, trinkets, tree decorations or mini alcohol bottles. Like this article? Sign up to our newsletter to get more articles like this delivered straight to your inbox. This 4ft tree made from birch plywood features charming festive cut-out stars. It looks wonderful once draped with fairy lights. This festive wooden wall tree is a great low maintenance alternative to a real or artificial Christmas tree.
Strung together on eco friendly jute rope, the natural grain wood branches are decked with forest green mistletoe leaves and copper and gold berries for a sparkly touch.
Simply display on your wall or door with with the handy loop. Here's another wooden ladder tree, this time from John Lewis. Made from twigs and string, it's decorated with berries, pine cones, baubles and painted wooden stars. This set of nine versatile apple crates transforms into a 8m high arrangement for a lovely Christmas tree alternative.
Each crate gives you storage for gifts and decorations, so you can make it as festive as you wish. The crate tree is available in six different colours and it's also available in a smaller size. This Scandi-inspired wooden Christmas tree, crafted from blonde wood, boasts a fabulous, minimal silhouette.
With a simple slatted design, a star detail is added to the top for an extra festive touch. These might be small but we love the delicate fir and pine cone design on these hand-painted, laser etched wooden Christmas trees. Pop these on the table or mantelpiece and weave some fairy lights in between for a truly festive look. This handmade wooden Christmas tree has been assembled from driftwood on Suffolk beaches.
Each tree is made from sustainable materials and is unique in style and size. At 30cm in height it's also available in a larger size , it's definitely pared-back and far from a traditional Christmas tree, but it's perfect for a coastal home by the seaside.
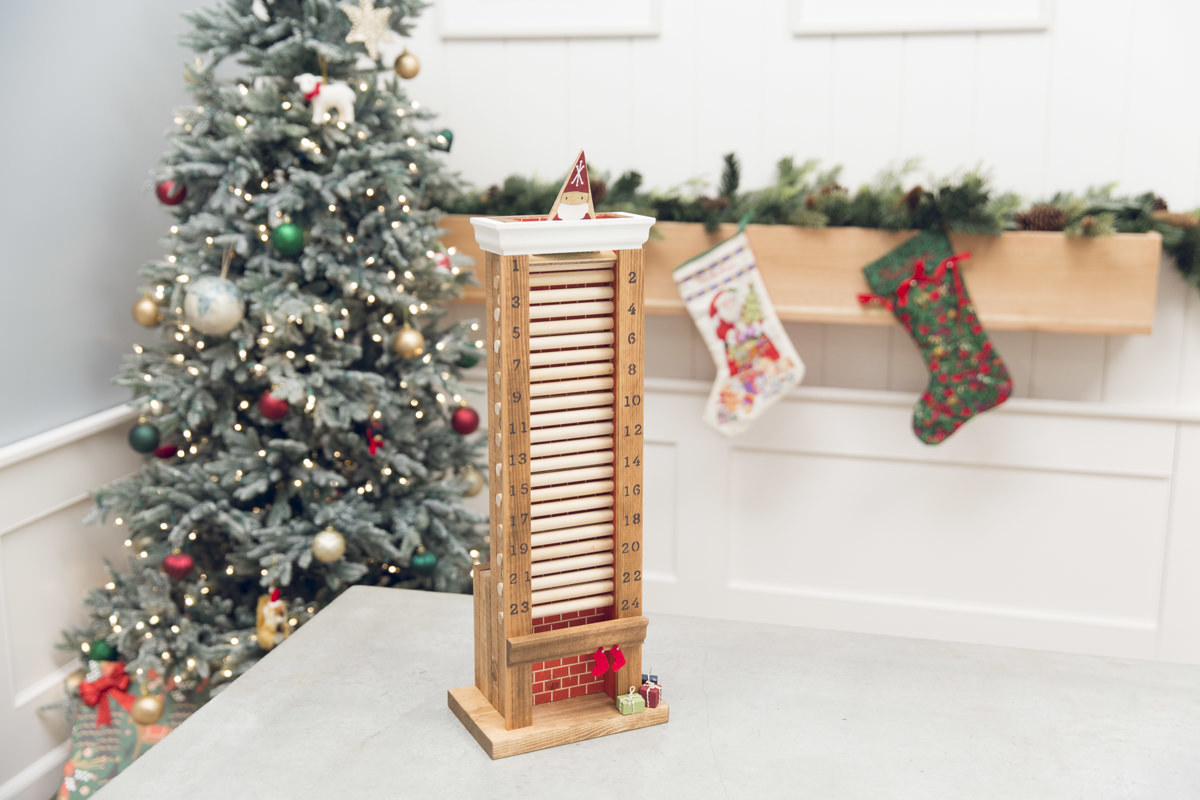
Flip over and mark the back sides. Since the dadoes are on reverse edges for the horizontal and vertical dividers, it will make it easier for cutting the proper side on the table saw. I prefer using my dado set on the table saw as each groove can be done in one pass. Alternately, if you don't have a dado set for your table saw, you can use a full kerf TCG blade and make the dadoes in two passes, adjusting your fence for each pass.
These will be done on the horizontal dividers only and the top and bottom pieces. Placement of these holes is key and must be accurate to ensure the rods go straight through the case. I go to my drill press for this job and utilize my fence and a stop block. If you plan on making more than one you may want to make a template or a jig to speed up this process.
I drill each divider individually so the bit doesn't move or bend making the lower board holes crooked. You can mark and drill one, then use that piece as the template for marking the other dividers and top and bottom pieces.
You can mark with a pencil, but I like to use the same size brad point drill bit and tap it lightly with the hammer through my template holes to give an indentation for the center.
Another method I have done is by using my stop block. I mark one divider only, set my stop for the first hole and drill all the dividers and top and bottom pieces individually, then set the stop block for the second hole and repeat until all holes are drilled.
This ensures ever hole is identical. Once the holes are drilled it would be a good time to do a dry fit. Assemble the dividers together. When assembling you will need to clamp the dividers within the side pieces and clamp the top case piece in place, leaving the bottom off. Once you are satisfied you can glue up the case.
It needs to stay off to install the doors. Glue your dividers together first if required. Apply glue to the top edges of the divider assembly and clamp on the case top ensure front is flush. Let dry for about half an hour. Then repeat this process to attach both sides, applying glue to the dividers and end dadoes of the sides. Make sure front side is flush and the entire case is square.
This is going to require a lot of clamps. When dry, remove from clamps and clean up any glue squeeze out. Sand joints and front of case with grit paper as required.
For the roof parts, cut a 45 degree angle on both inside ends of both roof pieces. At this point I like to glue my roof pieces together so they have ample time to dry before final assembly. I use a 45 degree angle clamp and glue the roof pieces together at one end before gluing in the gable. Remember to remove the painter's tape before this step. Set aside for attaching to gable and case later. I wait until my back panel has been attached to the case to cut the gable, this ensures the gable is cut to the exact measurement.
This is the step where patience is a virtue. Holes need to be drilled through the entire height of the hinge side of each door. This must be done on a drill press. This will help keep the bit straight while drilling. Also ensure your drill press bed is square to your bit and fence.
Set up your fence on your drill press so the bit is lined up in the exact center of the door thickness. Make sure you have a few pieces cut the same size as your doors to run some test drilling. When you are perfectly lined up put your first door against the fence with the outside of the door facing out.
You can only drill about halfway through the door at a time then you will need to flip it over and drill from the opposite end. If you try to go through the entire height of the door, the bit will usually go off on a bit of an angle.
Drill the hole in increments. Trying to do too much at once causes the bit to heat up too much and can crack the wood. I like to keep a stiff paint brush handy for cleaning the bit. Now you need to flip your door over ensuring you are keeping the bit on the hinge side of the door. The inside of the door should now be facing you. Repeat the process as you did on the other side only drilling small amounts at a time.
Continue until all 25 doors are drilled. To ensure the holes are straight and cleaned out well, I like to put the drill bit into my 12v cordless hand drill and ream the holes running the bit through the entirety of the hole.
If you are slightly off angle with the holes you can use the bit to lightly ream them. But if you did this process slowly and carefully everything should line up nicely. This can be done on a band saw, miter saw or by hand. The easiest for me was on my band saw. Put 5 axel pegs through the holes with the button side away from the blade and the excess part of the peg sticking out.
Slide the MDF board along the fence through the saw cutting off the excess. Your blade should lightly skim along the MDF board. This was just my quick easy way of doing this that was a lot safer than cutting on a miter saw. Alternatively, you can purchase small brass or silver finish turned knobs from Lee Valley if you want something a bit fancier.
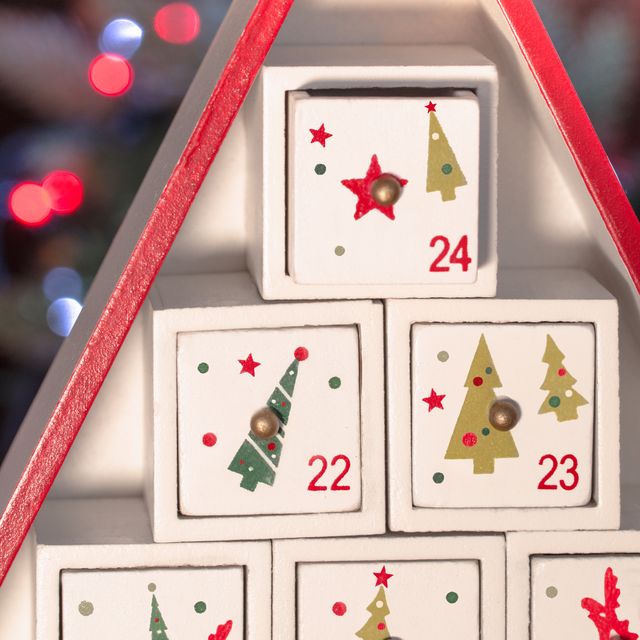
However, since you need 25 of these, it can get a bit costly. Using the drill press with the fence and stop makes this step simple and quick as you only have to mark one door for the setup. For the door numbers, I purchase them online from Stockade. If you own a laser engraver cutter, you can make your own. The material list in the attached plans tells you how many you need of each number. This way you can always get the numbers in the center of the door.
I also cut an area for the knob so I can do all the work on the doors at once. Glue on the numbers and the door knobs with Gorilla Super Glue. You only need a small amount, too much and you will have squeeze out that is difficult to remove.
Finally, glue a 4 washer around the hole for the rod hinge on the bottom only. This will keep an even space underneath the door when it's upright. It's not necessary to put on on the top.
I glue them in at this stage to make the door installation easier. I find this easiest to do before installing the doors. I cut thin strips of maple that match the case wood. Place the case upside down with the back facing you. Glue each piece on the top side of each compartment opposite of the hole for the hinge rod with Gorilla Super Glue.
Make sure each piece is flush with the back. Assembly is always a bit of a trial process. Remember they have to be installed in order. Test each door to ensure they open and close properly. Sometimes you may need to either do some fine sanding of the doors or ream the hinge rod hole slightly. Repeat this process for each column of doors. Once all the inner doors fit well, test for the bottom row of doors to ensure they will work will.
You will want to do a dry fit of the bottom piece as well. You may need to slightly tap the steel rods to go into the holes of the top and bottom of the case. Glue and clamp the bottom piece in place.
One final touch still needs to be done. Once the case frame is dry, remove from clamps and scrape any excess glue. You may notice that the doors tend to flop open. The difficult time I have had was getting the doors to stay closed. I had one customer say that I should put in little magnets. However, this would be a tedious task as well it would increase the cost of the calendar quite a bit.
As a solution, I put a dab of clear hot melt glue on bottom outside corner of each door. Let it cool slightly and push it down with your finger to flatten it out so that the door has just enough friction to keep it closed.
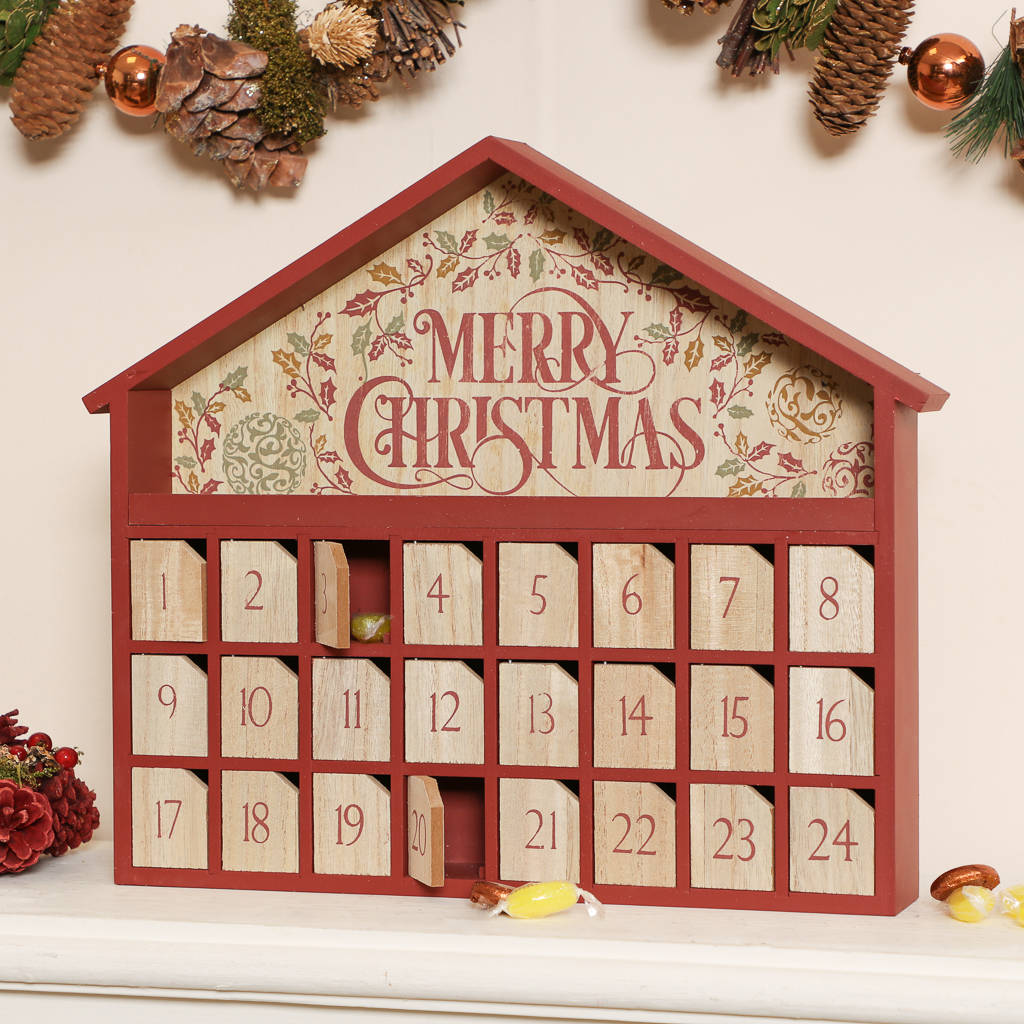
Test your door, If you make a mistake just peel it off and try again. See the drawings for the exact dimensions and verify with complete case assembly. The 45 degree angle for the roof gable can be cut on your miter saw or table saw using the miter gauge. Mark your cut line with an angle square on both sides of the board before cutting to ensure you get your cut accurate.
I use my miter saw, I set my stop at the height of the back of the case area, then cut as far as I can at a 45 angle for one half of the roof. Then I flip it over and cut the other side. Lightly sand the cut edges for a clean edge. Apply glue to all rabbit areas and a thin bead on the backs of the dividers. I like to brush out the glue before applying back panel to ensure an even thin layer of glue and to prevent any major glue squeeze-out.
Clamp and set aside. This step was one of my additions that I started doing after having some issues of the roof assembly coming off.
This has proven to really assist in the stability of the calendar as well as giving a cleaner look on the back. I cut the roof gable on my miter saw or you can use your table saw with miter gauge set at a 45 degree angle.
Verify the length required for the bottom side of the gable by measuring the top of the case between the inside edge of the 45 degree chamfer on the top of the case. The gable must sit in that area evenly so the roof parts don't have any gaps. An easy way, now that you have your back panel glued in place, is to trace the back panel onto your gable piece. The back panel and gable must be flush on the outer angled edges. Dry fit the pre-glued roof section, gable and case and sand as required to give a tight fit.
Before attaching the gable to the back panel, you will need to sand off the finish on the back side of the gable. Since only one coat was put on, roughing up the back with grit paper will remove the finish to allow the glue to adhere properly. To attach the gable to the back panel and case, spread a thin layer of wood glue on the back and bottom edge of the gable and clamp. I usually leave this clamped for about half an hour.
Remove from the clamps and scrape out any glue squeeze-out before it dries too hard. You may need to do a light sand of the case 45 angles at the top, and the outer gable edges and back panel to ensure they are smooth.
Now you can glue on the roof assembly. Make sure the front of the roof is flush with the case front the the area that was taped during spray finishing is at the back. Apply glue along the angled edges of the gable and the angled corners on the top outside edges of the case. Clamp together making sure the entire assembly stays flat.
Because the roof gable wants to pull up, make sure you clamp the gable and calendar case to your work bench to hold it down and keep it flat.
|
Simple Woodwork Projects Beginners Lyrics Woodriver 6 Woodworking Vise Cell |

VUSAL
05.09.2020 at 12:47:32
Rockline666
05.09.2020 at 16:17:44
GOLDEN
05.09.2020 at 18:20:22
Kamilla_15
05.09.2020 at 16:55:36
SEKS_POTOLOQ
05.09.2020 at 16:55:15