Carpentry Marking Tools Tutorial,Woodcraft Woodworking Off,Woodwork Ideas Easy Questions - Easy Way
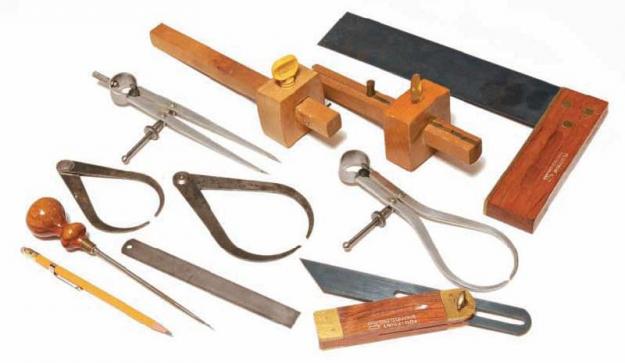
It is able to scribble two lines simultaneously including different widths. Normally it is used in mortise and tenon joinery project. Sometimes this gauge may contains a third pin on the opposite side so that it can be used a regular marking gauge. Therefore it is also known as combination gauge. These gauges are available in different stem length from 6 inches to The marking gauge with a knife instead of a pin is known as cutting gauge.
It is able to mark wood against the grain with accuracy. It can cut clean and precise deep lines in the timber. You can also use this gauge to cut through thin materials like veneer.
Wheel gauge contains a round blade instead of a pin to mark a surface. As like cutting gauge it can also Carpentry Marking Tools Quality mark across the wood grain. For mark out mortises the wheel gauge may also contains two round blades. Then it is known as wheel mortise gauge. The round blade contains in two separate stems. As a result they can be adjusted according to each other. The marking gauge which has a longer stem is called panel gauge.
The carpenters use these tools to mark large boards to the correct width; even in center of a board. The stem length can be 12 inches to 26 inches. Joiners use marking knife to scribe a line so that they can accurately run a hand saw or chisel during making joints or other operations. It is constructed with steel blade and wood or plastic handle. They can able to mark across the grain and the line is accurate than pencils.
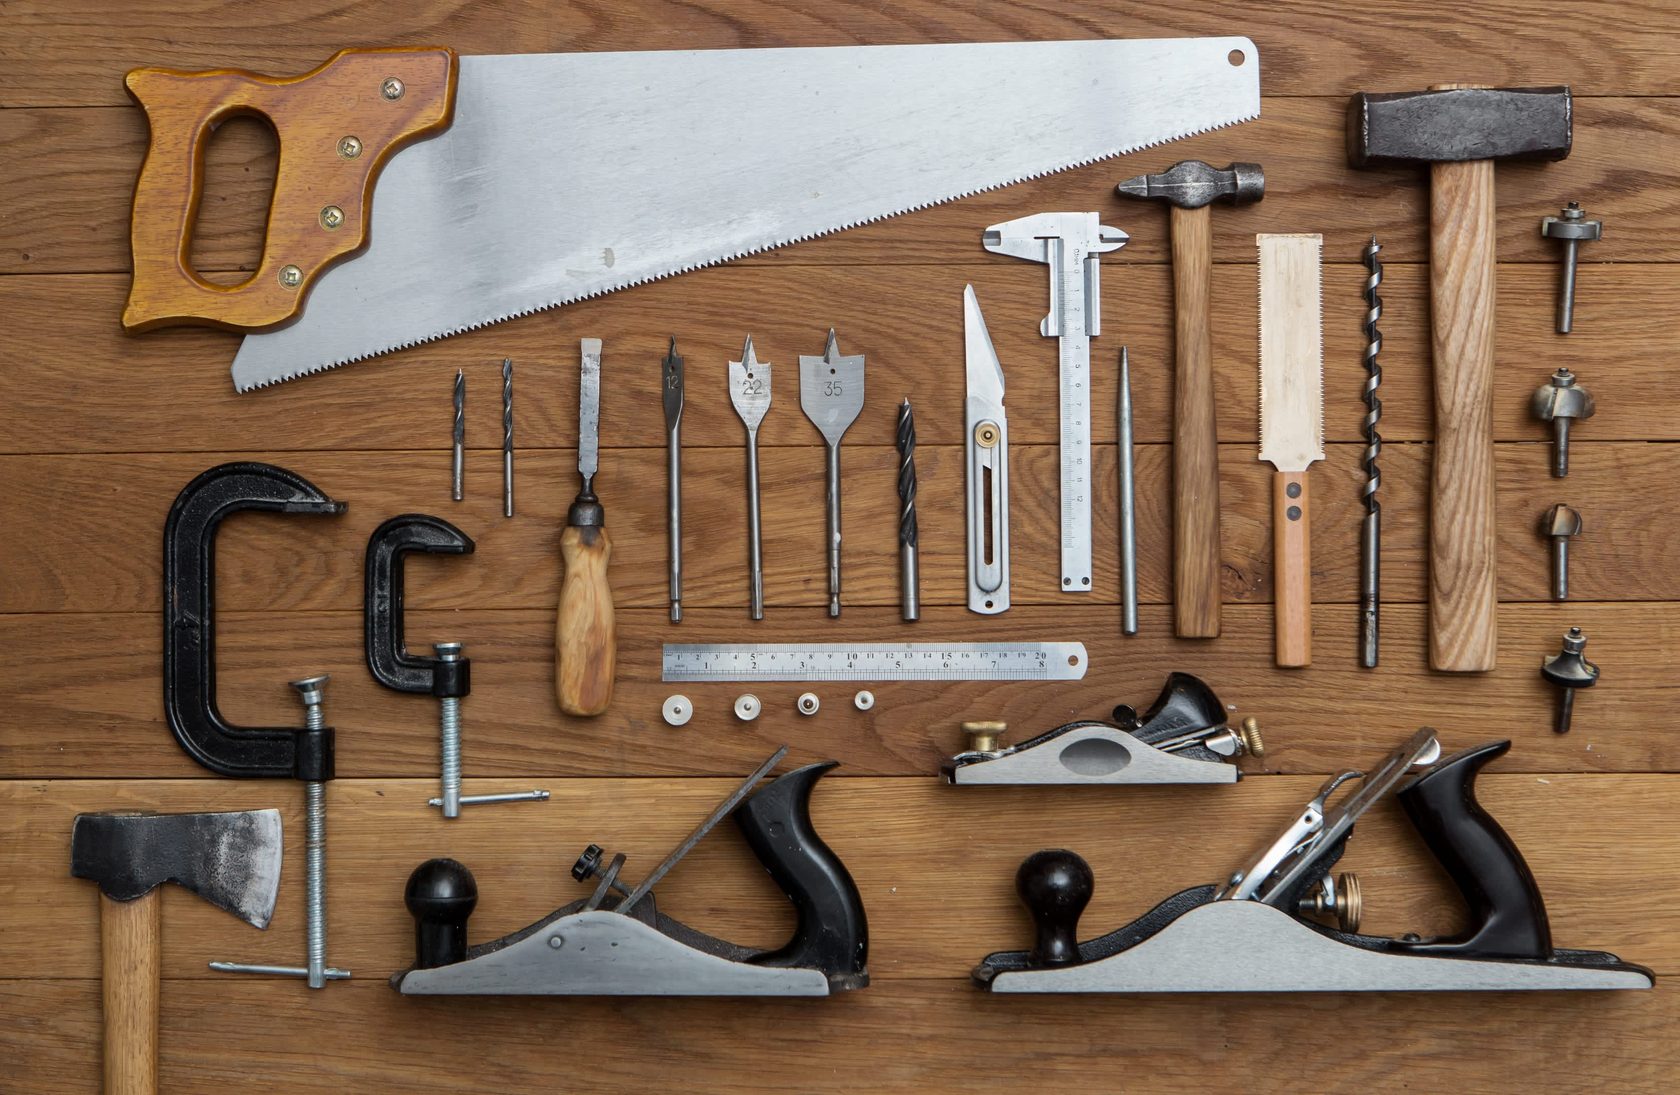
Some tools are not directly used as scribing but they Carpentry Marking And Measuring Tools are also known as woodworking marking tools. They are used as a guide of above marking tools. Try square, miter square, steel rule, t-bevel are such type of tools; actually they are known as measuring tools.
Joiners use the try square to mark out a line at right angles to an edge. Steel rules can be used with marking knife or pencils. They are available in different lengths. Miter square is used to mark at any angles. Pencils Pencils are essential marking tool to woodworkers.
Scriber marking tool In woodworking project a scriber which is a hand tool is used to mark lines on workpieces. Scratch awl The scratch awl looks like a spike which contains a tip.
Gauge The marking gauge is a significant tool among the woodworking marking tools. Marking gauge It is a most common type gauge as Carpentry Marking Tools For Sale well as woodworking marking tools. Mortise gauge A mortise gauge has two pins where one of them is adjustable relative to each other. Cutting gauge The marking gauge with a knife instead of a pin is known as cutting gauge.
Wheel gauges Wheel Carpentry Marking Tools 2020 gauge contains a round blade instead of a pin to mark a surface. As previously mentioned, accuracy in measuring is foundational to all building construction.
This tutorial requires lumber, a measuring tape, speed square, pencil, and a cutting device. If you have never cut lumber prior to this exercise, I advise starting with a handsaw before using a power saw. In that, I want to express that learning how to properly handsaw is still an important aspect of the craft and often overlooked.
It is necessary to complete a variety of cutting tasks throughout the trade. Mastering the handsaw will in no way limit your development as a carpenter. It will be an asset to your building skillset. Square, in this application, means that the end of the material is a nearly perfect ninety degrees. Sometimes purchased lumber does not come sold square on its butt ends. Additionally, whatever lumber you happen to be using could have been cut before it ended up in your hands, creating a butt end that might not be ninety degrees.
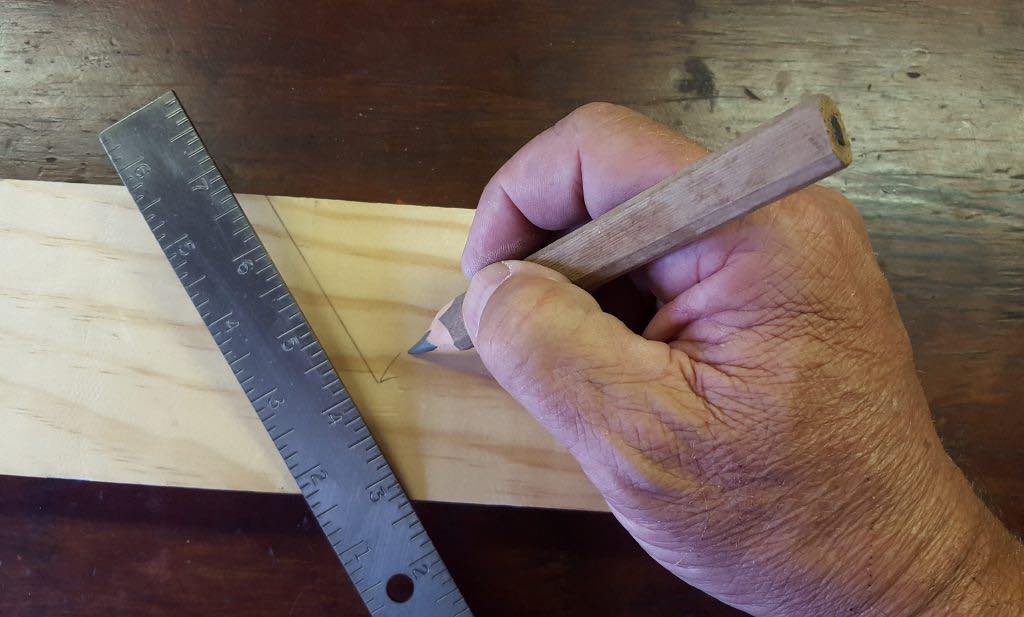
Make it a habit to check how square the end of your material is prior to pulling a measurement. To do so, place the lip of your speed square on the bottom or top edge of your lumber and follow its straight edge along the butt end of the material. To practice squaring up the butt end of your lumber, hook the lip of your speed square on the bottom or top edge of your material. The line marked should be ninety-degrees, or perpendicular to the edge of your material.
Cut this line to provide a square butt end for to the lumber. While tape measures seem like fairly simple tools to use, they can lead you astray if you deviate away from some important rules. Properly pulling measurements is instrumental to all basic carpentry training. Accurately pulling measurements requires that a tape is pulled in a straight line, rather than diagonally. Run the tape along the top or bottom edge of the wood, whichever is consistent with where the blade of your tape is hooked.
So long as your tape runs parallel to the material, it is being pulled fairly straight. This ensures that your measurement is accurate. Pulling a tape at a diagonal can result in inaccurate measurements. Understanding how to properly pull a measurement from the the square end of lumber allows for the accurate marking of a measurement. There are several methods that can be used to mark a measurement.
This way, you have a reference point that covers the face of your material, rather than just an individual mark. They can easily be miss-marked! The lumber can be cut when after a measurement has been marked.
When a cut is made with a saw blade, the width of the cut itself impacts the measurement of the material. After your cut has been made, take your speed square to the cut — did it come out square? Pull your measurement again.

|
Turning Stock Bed Into Flatbed Model Cheap Mini Cnc Machines Kit Wood Workshop South London Vietnam |

GTA_BAKI
29.03.2021 at 18:54:13
PREZIDENT
29.03.2021 at 11:28:31
naxuy
29.03.2021 at 21:59:33
Pishik
29.03.2021 at 17:43:29
Gruzinicka
29.03.2021 at 19:27:19