Building A Work Table Generator,Farmhouse Dining Table Turned Legs Zip,Woodwork Finishing Level,Kreg Drill Guide 10 - New On 2021
I am like Mark. I wedge on a small plaster topped table 2' x 3' next to my wheel can recycle most thrown scraps immediately as I work. My work tables are formica. One is from the School of business garage sale. The other I built to match the height and is on wheels. Easy to clean. I taught in a studio with canvas covered tables. I soaked and sponged them down regularly.
The canvas does generate dust. Another concern would be the height of the table. I am a short person. My wedging table is for my height. My work tables are a good height for what I am using them for. Glazing am decorating. I built a storage shelf underneath the 4 x Building A Work Table In Sap 6' table and store plaster molds under there. Then 5 gallon buckets on wheels are on the floor under that. I recently added a larger birch plywood top for my wheel and painted it.
Part of Spring cleaning. Organized tools and brushes in 3 work stations using sections of a shoe storage. I use wooden banquet tables with formica tops. I then use drywall wareboards Building A Work Table Join with the edges taped off to build on. Wedging table has canvas top and is outside. Some day I will weld up a table and pour in a plaster top for a nice wedging table. I've had them in my studio for 12 years, with a couple dozen students using them every week. You shouldn't leave puddles of water on them, but if you do and get a rough spot you can just sand it down and re-oil it.
They're hard as a rock, but still porous so clay doesn't stick too badly. I'll throw in with Neil, hardboard is a great surface for working with clay.
Also I would recommend a separate wedging table with a thick plaster surface. Mine is 3 inches thick and 24x24 inches wide.
I have 2 inches of concrete on the bottom and an inch of plaster on the top. I built it at just the height I need to be able to put my full weight downward into the wedge, rather than work only from the shoulders. Since the wedging table is separate, you can really slam the clay down without shaking up everything else. I can also use it to roll slabs, using my trusty rolling pin.
I place mine on a non-skid drawer liner matt and store the stone on a rack under the table when not it use. The table should be sturdy and should not "bounce" when you throw a slab down on the table. The surface can be raw wood, concrete, metal, plywood, HardiePlank, or steel. I prefer raw wood. Beware of home center MFD, as most is not water resistant. Wheels are good, if they are sturdy.
One table is made from pine 2x4 uprights and 2x8 planks glued together for a top. The other table is made from a kitchen cabinet leftover from a house renovation with a plywood top bolted on.
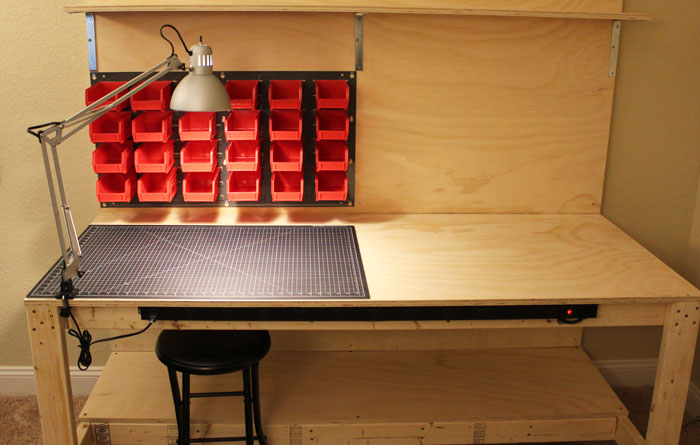
If I want to roll clay I spread out a small table cloth of heavy fabric or a thin sheet of craft foam. I mostly work directly on the wood table top or on newsprint or kraft paper. Canvas is a mess to clean. Paper is recycled, or becomes fuel. This is what my work table looks like. It has a table top which I stand at. I sit down to throw so I enjoy standing up to do everything else. If I get tired of standing I can always use a stool to sit at the same height. There are 2 different height of wedging tables.
One is for small stuff which is the higher one, and the lower one is for wedging large amounts of clay. It is much lower so I can put my back into leaning into the clay. There is also a table below the table to make it more sturdy and to store bags of clay. I just ripped off my canvas as I am going to replace it with something better, tired of cleaning it all the time. I have found this table to be the center of everything I do. It is right beside my wheel so I can literally reach for balls of clay from my wheel sitting down, it is also about 2 feet away from my kiln so when I am unloading pots they get placed on top of the table for examination.
Just an idea to go off of. I don't know what you plan on doing but you asked about a table so here is a table to ponder. I built mine using cement board for the top. It works quite well as it absorbs and dries without issues. But it needs to be supported or it can crack if you do slam wedging like I do; if you don't slam wedge no need to heavily web. I then cover this with canvas. When building your bench take care to pay attention to the final height and depth of the top as too high, too low, too deep or too shallow will cause you ergonomic issues.
Also, design it so that you can use the space underneath. I am in the process of building a insert cabinet that will hold kiln shelves when not is use and drawers for chemicals and tools. Also figure out your lighting as the best bench in the dark is not much use; add a power strip as well and you good to go.
I only have room for this one work table. It's the perfect height to stand at and work but too high to wedge so I have a thick wooden step I pull out and stand on to get me to the right height to wedge. I currently use Building A Wooden Work Table Year canvas on half the table for wedging, quickly firming slabs and rolling coils.
I hang it out in the rain every couple of weeks and inbetween pray it down with water and use a paint scraper to remove any build up and there is but there's not much most of the time.
I do want to try tyvek instead just need to find some wide enough. Since it stands in the middle of the floor I did add shelves under the table for my plastic shoe boxes full of tools and supplies, as well as narrow shelves on 3 sides for Underglazes, slips, Engobes and glazes. I added a lip on the far side and placed my tools in pencil boxes along it so I can't accidentally knock them off.
Yes, make sure your table s are for your height. Love the concrete step idea!! I ditched my canvas a few years ago, just way too much dust in the air, even with constant cleaning. I use ware boards for creating work, or the formica table top easy to clean but now Old Lady has me hooked on printers blankets.
She was right about getting them for free. The clay does not stick to that material and wipes off easily and is easy to take outside and hose off as well. Porous, non-stick, and works great. Stands up to repeated use and abuse well. In my personal studio I replace the sheets of Masonite every couple of years. Separate plaster slab wedging table with soil heating elements imbedded in the plaster cast for low-temp drying. I've used melamine as a top for an outfeed table for my tablesaw and a top for my router table which seconds as a side table for my table saw.
Works really well. You can post now and register later. If you have an account, sign in now to post with your account. Paste as plain text instead. Only 75 emoji are allowed. Plumb the legs of the table with a spirit level before attaching the components into place.
Drill pilot holes through the components before inserting the screws, in order to prevent the wood from splitting. Continue the project by attaching the components to the top of the bench, as shown in the image. Place a spirit level on top of the frame, to check i fit is perfectly horizontal. In addition, use a carpentry square to check if the corners are right-angled. Make sure you create several notches to each corner of the plywood sheet before fitting it into Building A Wooden Work Table 65 place.
Drill several pilot holes through the plywood sheet and insert the screws into the frame of the work table. Make sure the components are aligned at both ends, before inserting the screws and nails. One of the last steps of the project is to attach the piece of plywood to the top of the work bench. Align the tabletop and make sure the edges are flush with the frame.
Pre-drill the plywood sheet before inserting the screws, to prevent the wood from splitting. Last but not least, we recommend you to take care of the finishing touches.
Fill the holes with wood filler and let it to dry out for several hours. Afterwards, smooth the wooden surface with fine-grit sandpaper and vacuum the residues. Get PDF Plans. Thank you for reading our project about how to build a work table and we recommend you to check out the rest of the projects. Work Bench.


|
24 Inch Euro Drawer Slides Review Projects To Build With Scrap Wood 40 Under Vanity Storage Drawer Yoga |

Narkaman_Lubvi
04.03.2021 at 10:10:14
KK_5_NIK
04.03.2021 at 11:19:27
EmiLien
04.03.2021 at 23:32:10