Build A Frame Brackets Pdf,Woodworking Projects For 4 Year Olds Singapore,Laguna 18bx Bandsaw Review Reddit - Plans On 2021
Frame brackets may need slight trimming to fit flush. B Rear axis brackets are located 36" apart measured from center to center at the coil-over mounting holes. Make sure that both brackets are the same distance from the and of the axle housing. Position the front face of the axis housing parallel to the back face of the axle brackets. Check to be sure housing is centered in wheal well before final welding.
Bars are assembled with adjusters at front Brackets should be tack welded and the assembly should be checked for square and alignment before final welding. Bracket is positioned on inside of boxed frame rail flush with the bottom with the ears facing up. B Rear axle brackets are located Build A Frame Brackets Bunnings Mac 38" apart measured from center to cents at the coil-over mounting holes. Position the front face of the axle housing parallel to the back face of the axle brackets C Install angle brackets on adjuster end of short bar and housing tabs on opposite end.
Coil-Over shocks and mounting hardware are optional Bars are assembled with adjusters at front Brackets should be tack welded and the assembly should be checked for square and alignment before final welding. B Rear axis brackets are located 37" apart measured from center to center at the coil-over mounting holes. Set pinion angle before welding brackets to housing. Brackets should be mounted parallel to the upper shock mount to eliminate bind on shocks.
C Frame brackets slip into x-member. Install bars to properly position the frame brackets at the correct angle. Brackets may require minor trimming for correct fit. Coil-Over shocks and mounting hardware are optional. Frame should be boxed at least 4" on either side of the front frame bracket mounting area.
Rear axle brackets are located 38" apart measured from center to center at the coil-over mounting holes. Rear axis brackets are located 36" apart measured from center to center at the coil-over mounting holes. Rear axle brackets are located 38" apart measured from center to cents at the coil-over mounting holes.
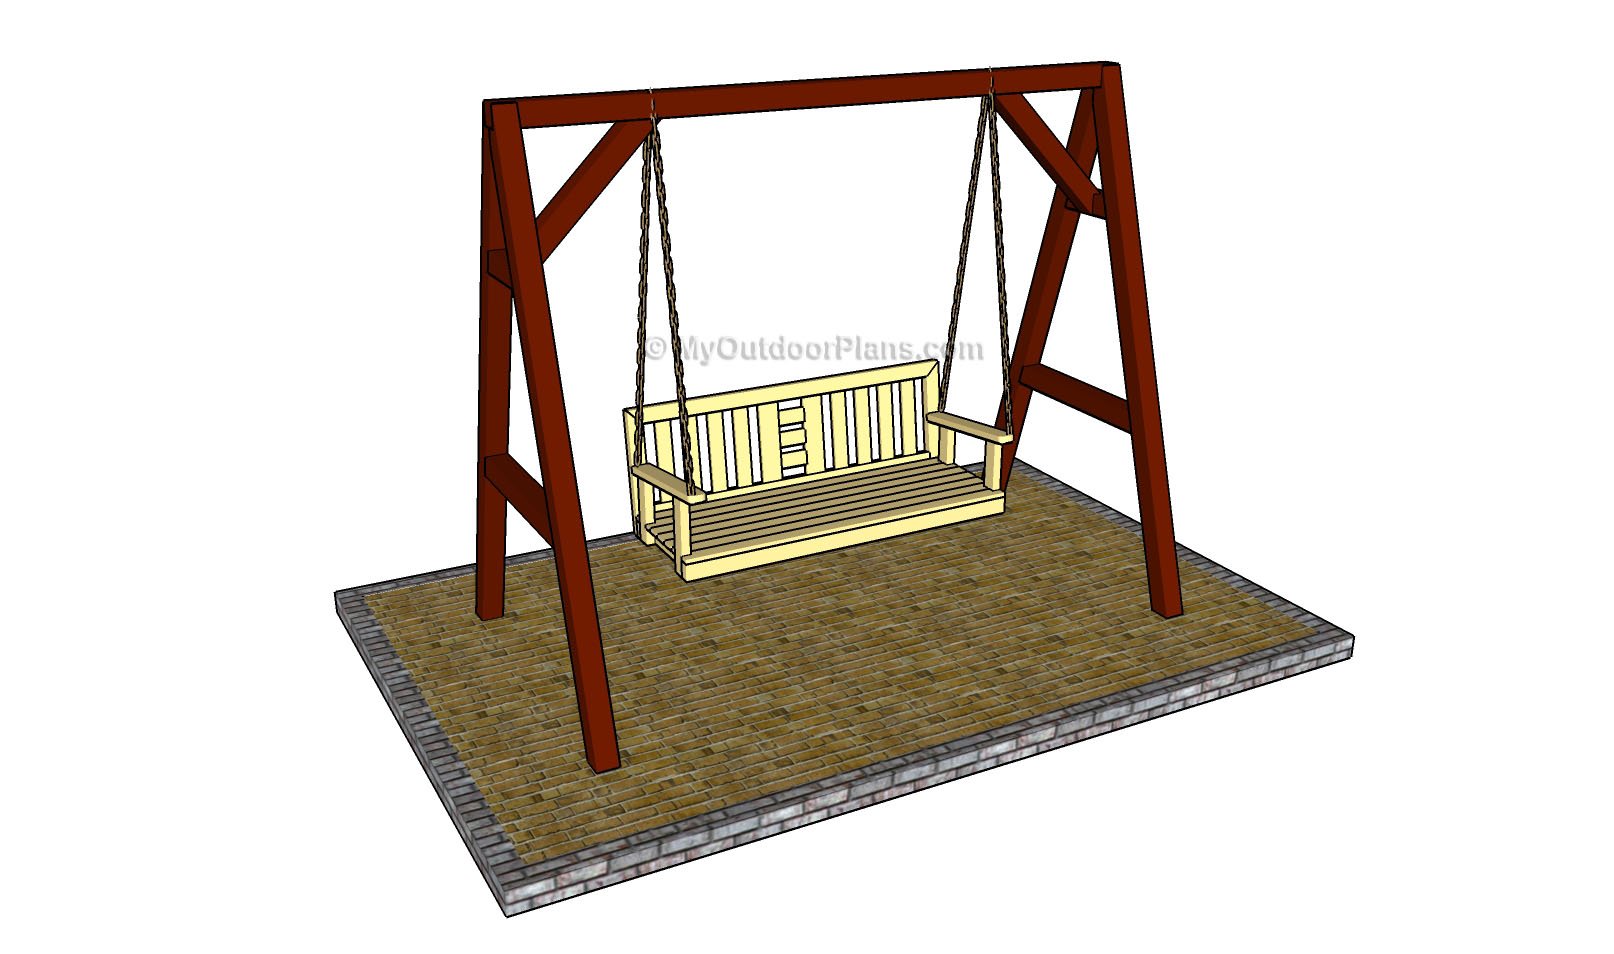
Really appreciate the plan onto the new project. What a plan! I was told to get a hobby by the VA…. Thanks for the plans…. I am going to build everything you post! I just finished building this for my 12 year old who loves to swing. The only problem we had was the swing wanting to move side to side. There are no braces to prevent lateral movement. The only thing that keeps it moving sideways is the four twelve inch bolts at the top. If you have any other suggestions please let me know.
Thanks for the plans. They really helped! In one of the earlier comments we were chatting about bracing that runs between the front and back lower part of the legs. This would form something of a triangle on each side and would help with stability and movement.
BUT, something to keep in mind is that unless you build out of metal and secure with concrete.. I did stake the legs into the ground. This prevents front to back movement when more than one kid is swinging in the same direction at the same time. After my kid had used the swing a short while it started to look like a parallelogram with the legs angled in once direction.
I just wish there was another way that looked a little better. This might help prevent side to side movement without angle braces. Let me know your thoughts. I definitely like the notching idea. Seems like it might do a great job at keeping those legs vertical. I am also wondering if it would help in future builds to slide the legs down to the very end of the stretcher then cap the stretcher with an additional bracing piece that sits directly on top of the upper bracing that would function much like traditional hardware would.
Truss pieces that run from the original upper lower of the 2 upper bracing piece to the stretcher making little triangles in the upper corners will also help pull things in tight and stop some of that movement. Actually, I do have my legs at the very end of the stretcher. I used the whole 96 inches as I wanted to put two kids swings and a small kids glider on it. Just something for others to think about if they are building one for kids. Thanks for the plans! I am building a large wooden airplane swing for my grandson based on his favorite cartoon character and this should be just the thing on which to hang it!
A couple of questions before I start building: 1. Are you putting 2 into each end of the stretcher? Any chance you could post a diagram or photo from one of the builds that further describes the alterations suggested to limit side to Build A Frame For A Hammock Pdf side movement?
Thanks for the great plans! I am going to try to use your plans to create a dual function structure. I am going to install a hook with gambrel in the middle to be able to use this to hoist and hang game and medium-sized meat animals deer and hogs primarily for dressing, aging and butchering.
I will also install wider hooks so that during the summer it can hold a swing. You can do either, for an outdoor swing frame, but in an ideal world you would use something like Cedar or Redwood. Gday, I really like your plans for the swing frame. Does this sound OK to you? I will be modifying these plans in the next couple of weeks to work as a more traditional swing-set frame. This plan was originally designed for a specific reader and their special requirements, but the modified plan should be more universal and hopefully allow for more swinging fun!
I am looking to try and build this for indoors in my basement. Do you think it can be safely made for one swing and would you keep the angle of the side supports the same?
I am trying to figure out how to cut an 18 degree angle on the top of the legs. The plans, the angle shown looks like it is closer to a 45 degree angle on the right side of the drawing rather than 18 degree angle. Honestly this is my first time using a square so I could be all wrong so any insight on how to measure this before I cut it would be very helpful. Any other tips and tricks on how to measure these angles would be awesome. Your email address will not be published.
Notify me of follow-up comments by email. Notify me of new posts by email. This site uses Akismet to reduce spam.
Learn how your comment data is processed. Skip to content Plans. Nail Gun — optional Router with Patterning bit — or bit set — optional. Cut the pieces for the legs. Cut the angles as shown — all angles are 18 degrees. The nut on each bolt will face out Also, pre-drill the holes through the sides of the legs to secure the stretcher.


|
Laguna 14 Suv Bandsaw Firmware Big Jet Planes Inc |

BoneS
12.09.2020 at 12:26:54
Princessa_Girl
12.09.2020 at 11:29:28
Gentlemen
12.09.2020 at 11:11:59
God_IS_Love
12.09.2020 at 21:15:56
Olmez_Sevgimiz
12.09.2020 at 12:20:32