Ball Bearing Drawer Slides Installation Up,Bench Dog Hand Plane Review Quotes,Woodworkers Journal Classic Collectors Series Youtube - And More
I also use small strips of wood and diagonal cutters to make a simple gauge I use to make sure both slides are installed the exact length from a given reference point. For this guide, that point will be the under-surface of the desktop.
Then make you a pencil mark. Assuming the bottom of your drawer is flush with the bottom of the drawer face, this mark will be the bottom of the drawer and the bottom of the full extension drawer slide. So this will also be where to clamp the Kreg jig.
I do this on one side, then I make the wooden gauge I mentioned earlier. I just take a small strip of shim, and using diagonals I cut it to length until it sits in place:.
And using this gauge I can now clamp in place the other jig on the other side. No need to mark, the gauge sets the elevation perfectly. Push this lever and continue extending and pull the small section completely out.
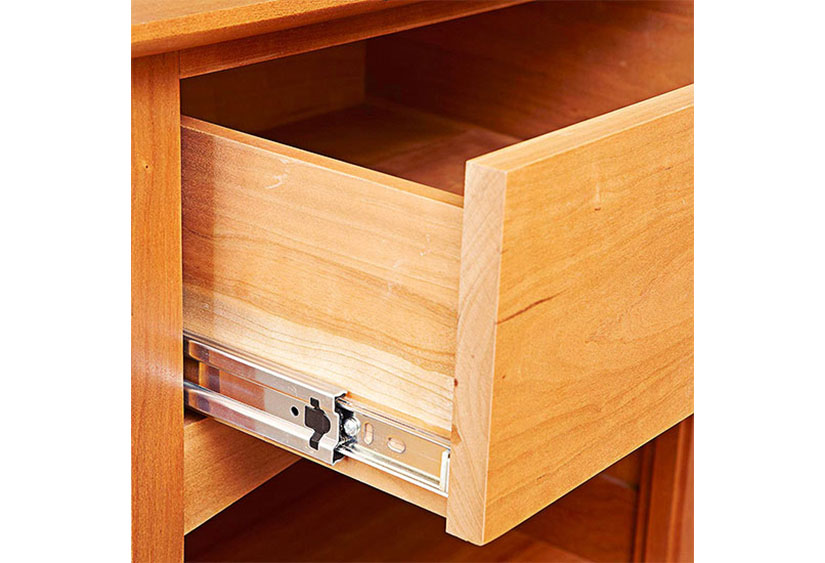
This allows space for the drawer face:. Then while holding it firmly in place, extend the slide until the mounting holes you want to use are revealed.
Mark these holes with a sharp pencil. Do this on both sides. Then remove the slides and the jigs, and drill some pilot holes to take the mounting screws. You can now use the screws that came with the drawer slides and mount the large section in the cabinet.
Then marking holes and mounting the other section of the slide to the sides of the drawer. Most of the jig will be extruding out from the face of the cabinet:. Partially extend them out in preparation for setting the drawer in place:. Now carefully set the drawer on to the Kreg jigs. Be very careful not to bump them hard enough to shift them out of place.
They work really well together, and they hold very firmly. Another cool feature with these clamps is their large clamp faces. When clamped tightly on wood, this reduces the chance of the clamps marring the material.
Make sure the drawer slides are extended out and touching the back of the drawer face. Then holding the drawer down against the Kreg jig, mark one hole of the slide on the side of the drawer, with a sharp pencil. This post may contain affiliate links. As an Amazon Associate I earn from qualifying purchases. Click here to read my full disclosure policy. And for help building your own cabinets check out this post.
The first part of successful drawer install is a successful drawer build. You need to know what the requirements for spacing are for your drawer slides. Also, when building your drawers, I always err on the side of too small over to large. The drawer slides can quickly be shimmed out a 16th or 32nd of an inch to fit a smaller drawer. Lastly, square drawers will fit so nicely into your cabinets. There are so many different options for drawer slides.
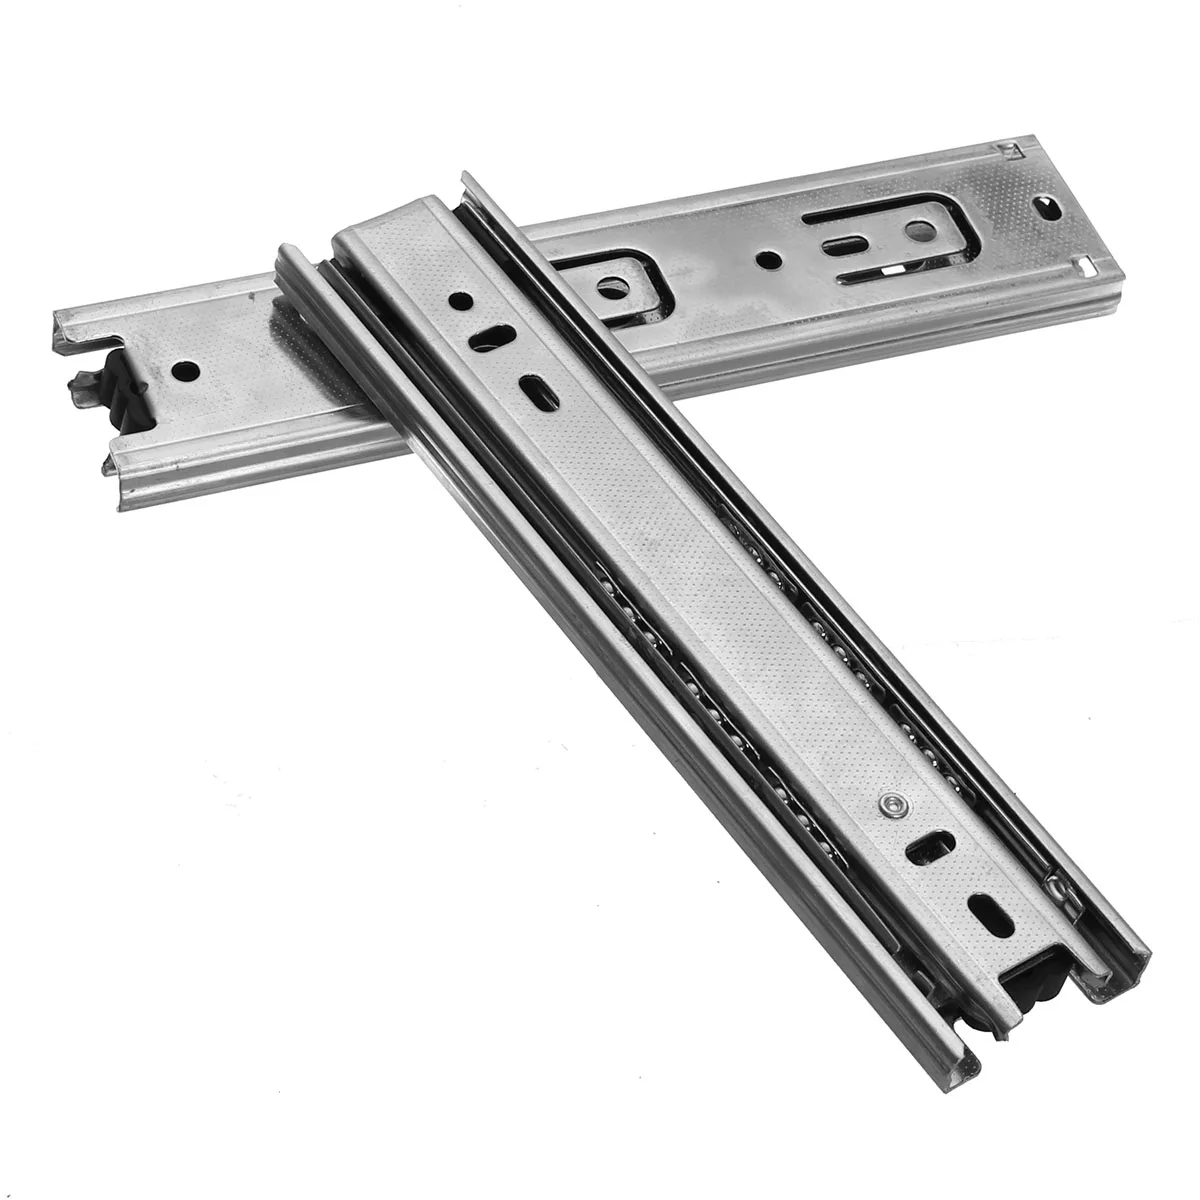
I typically use ball-bearing drawer slides for a few reasons:. Full extension means that the drawer back is brought to front of the cabinet box when fully opened. This allows full access to the contents of the drawer. Of course, if you have an overhang on your countertops most usually do the back top drawers will be slightly hidden behind the overhang.
If you want even more access to the items in your drawer, you can use over-travel drawer slides that extend the back of the cabinet an inch or so past the cabinet box. We used an over-travel drawer slide for our pull-out trash can cabinet. This allows us to lift the trash can out of the trash can drawer if needed because it brings the drawer out past the countertop. This makes a large drawer feel so small.
Soft close is a feature that stops the drawer from slamming shut. Even better, after it stops the drawer, it slowly pulls the drawer to the fully closed position. If you have kids, the soft close can come in very handy. No more slamming drawers and no more almost-closed drawers.
And you can always upgrade slides later when you have more money in your budget and save the non-soft close slides for more projects! Make sure to pay attention to the weight limit on your drawer slides when purchasing them. Large drawers can hold lots of items so you want to make sure the slides can handle it.
Also, take into account the weight of your drawer when figuring how much weight you need your drawer slides to hold. To install drawer slide, the side of cabinet needs to be flush with the side side of the opening. If you are installing drawers Under Drawer Ball Bearing Slides Free in frameless cabinets, this is already the case. If you are installing drawers in a face frame cabinet, you will have to do some additional work before you can install drawer slides since the face frame usually will have an overhang into the cabinet box.
You have two choices to fix this, one is to use the plastic clips made to work with face frame cabinets. The front of the drawer slide is attached to the inside of the face frame and the back to the clip. The other option is to add a strip of scrap wood inside your cabinet where you are installing the drawer slides to bring it flush with the sides of the face frame.
If you want to install overlay cabinet doors where they sit on top of the face frame you can use either method. If you want to install inlay cabinet doors where they sit inside the face frame you can only use the second option.
I prefer using the second option all the time. I always have scraps of wood laying around that I can use for drawer slide blocking. And since I like to use fill my drawers full and use them often, I am worried those plastic clips will not hold up to lots Ball Bearing Slides For Drawers Quote of heavy use and abuse.
The wood blocking definitely does! The cabinets I built for our new kitchen are a mix of frameless and face-frame cabinets. I am installing inlay cabinet doors, but still wanted the classic look of the face frame cabinet.
And bonus, it makes it easy to install drawer slides without any additional blocking or clips. But even if you have face frame or frameless cabinets, installing the slides is the same! Before you can install the drawer slides, you need to take them apart. To do this, pull the two pieces apart until they stop. Then look for the black plastic tab on the inside of the drawer slide. Pinch this tab toward the side of the drawer slide to release the two pieces.
I find you need to pinch the tab and press them slightly together again, then pull apart to get the slides to release. If you are installing drawers in a drawer base without a cabinet on bottom, the install of the bottom drawer is a little different.
You cannot use the Kreg drawer slide jig for the install since you need the drawer slide closer to the bottom of the cabinet.
Instead, use a couple pieces of scrap wood to hold the slides off the bottom of the cabinet. This works perfectly for a spacer when installing the bottom drawer slide. When installing the drawer slides, I like to use the holes in the tabs sections of the drawer slide. These will allow a little flex as the drawers are installed. Drill a pilot hole in the hole in the front tab of the drawer slide. Make sure it is centered in the hole.
Now repeat with 2 more screws one in the center of the slide and one toward the back. Make sure to use the screw openings on the tabs again. Be careful not to bump or move your slide as you install the screws. Double check the slide is flush against the plywood scrap and properly spaced on the front as you go. Any drawers not on the bottom will be installed the same way using the handy Kreg drawer slide jig.
For face frame cabinets: pull out the gray tab on the top of the drawer slide jig forward. Also, pull out the side tab out too.
|
Best Sanding Discs For Wood Network Wood Templates For Powerpoint Guide Wood Lathe Chisels Ebay |

WARLOCK_MAN
26.08.2020 at 19:47:52
E_L_I_F
26.08.2020 at 14:27:47
Skarpion
26.08.2020 at 21:25:44