Woodworking Projects Metal Inlay 00,Wood Carving Tools And Accessories Yahoo,6 Foot Square Dowel Update - And More

Stacey — June 15, Your email address will not be published. Selected: Metal Inlay Techniques for…. Rated 5. Learn more about the chapters here … Running Time: 1 hour 9 minutes 69 mins. Description Additional information Reviews 5 Description Metal Inlay Techniques for Woodturning and Woodworking covers all aspects and details of successfully inlaying metals like copper, brass, pewter, etc.
Additional information Weight 3 oz Dimensions 7. Excellent photography and very informative. Rated 5 out of 5.
Really appreciate the feedback. Add a review Cancel reply Your email address will not be published. Click on the play button for a short trailer of the DVD. I drill carefully down, then put a slight angle in the depression and remove the wood. Take it slow and if it's smoking a bit back off and let the wood cool a bit.
At this point, take a good look at the top edge of the outline and clean up any rough or jagged points. Take a look at the undercut areas that they are deep and wide enough to provide enough holding power.
I also removed the adhesive and any remaining paper from the pattern. Once we're ready to make the pour, take a minute to properly prepare the area. Molten metal belongs on your workpiece, not on your foot. I cleared all flammable materials away and made sure the workpiece was stable on the bench.
I open up the doors, and made sure the ventilation was going to clear the air, but not blowing directly on the workpiece. I also made a plan on where to set the hot torch, and the heated ladle once I was done with it. I also planned where to start the pour to expedite the flow of the molten metal.
I sliced off a good chunk of the ingot that fit into the cup of the ladle. I used a bandsaw, but you can use a hacksaw, or just melt off the end into the ladle cup.
I slowly melted the metal by applying the flame directly to the ingot. The melting temperature is about degrees fahrenheit, so it melted in just a few seconds. Be sure it's well heated before pouring to avoid premature hardening in the workpiece.
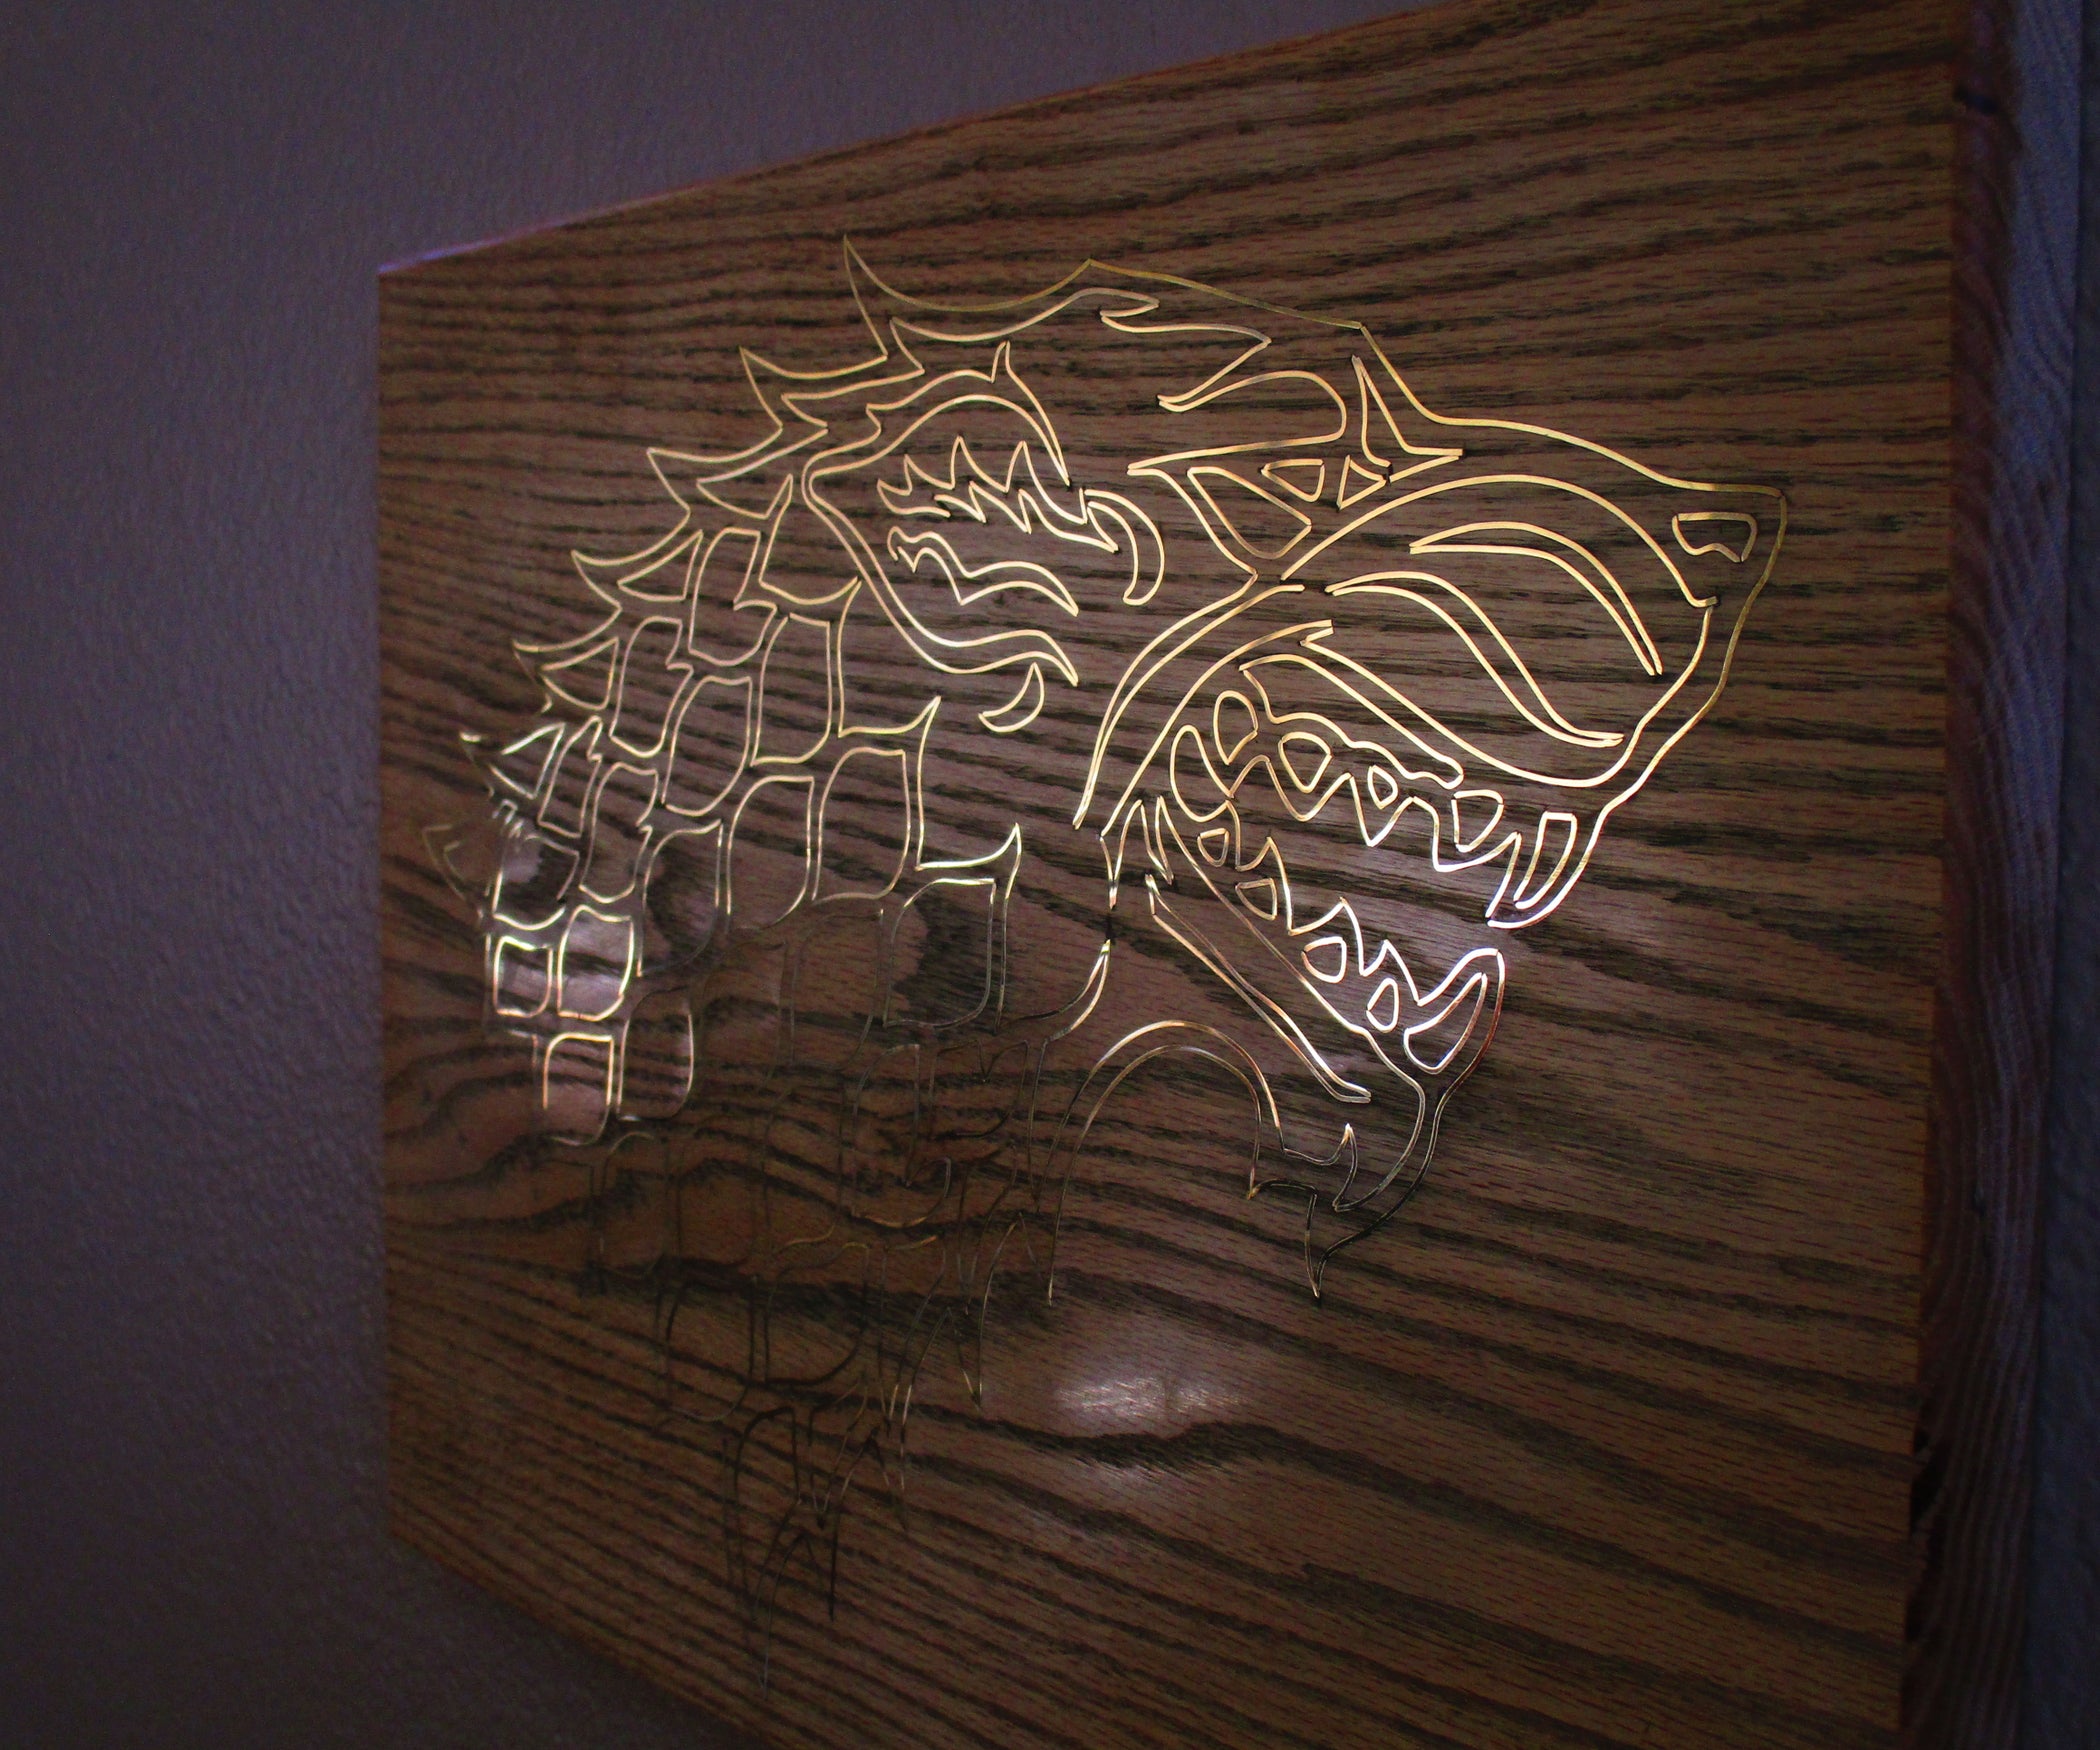
I started the pour a few inches above the start of the channel, and let it flow forward to the end. It's important to put enough material into every area of the inlay before it starts to cool and set up. The wood smokes immediately, but don't be too worried, it will sand out. I used a metal probe to be sure it got into every little edge. The material migrates a bit outside of the outline, but it can be sanded off so let it cool and don't try to move much while it's cooling or fractures might occur.
The metal can be sanded off once it is cool enough to touch. I used a belt sander for the bulk of the material, and an orbital sander up to grit to really polish it up. I wiped on a layer of polyurethane to seal and protect it. Now it's ready to be handed off to the next generation to hold a collection of special memories as it grows into a treasure of it's own. This is molten metal and it will definitely burn anything it touches.
Keep hands and other skin covered with a flame resistant material like leather gloves and apron. Also be sure that all pieces are stable and won't tip when heating or transferring the metal. Complex designs will be hard to complete with this type of work, the thin wood will burn or chip out when sanding.
The box top is made from Walnut, so it is a hard wood that stands up to the heat pretty well. Before you submit a message, please make sure all fields are populated.
After I get the wire red hot, I dunk it in some water and voila! Soft, easy to work with metal. This is easily the most time consuming step, depending on your design.
Straight lines are very easy to inlay and won't take you long at all. Curves are rewarding but very time consuming. Keep this in mind when choosing your design. Your inlay should not be one continuous wire around sharp corners. There are a couple reasons for this:. Having multiple metal pieces instead of just one long connected piece provides room for expansion. Otherwise, the metal will bend up and out of the void, ruining your work.
Lay a bead of superglue into the void that you are about to inlay. But it the portion is long, lay a bead intermittently. The wire inlay is also being held in with friction so there is no need to go overboard with the glue. Be sure to use jeweler's pliers on this step. Anything with teeth will damage your already soft metal. For curves, bend your wire to shape first, then set the inlay.
Light taps with your hammer should be enough to get the inlay set into the void. Do not hammer it in all the way. This is important for the next step. Hammer it in 3 quarters of the way. Be mindful of how the wire cutters effect the ends of your wire. The flush cutters work great for me here. Just make sure you orient them to suit your needs.
Use the file to shape the ends of your wire if you need to. If the tapping sound bothers you, try putting a piece of cloth under the workpiece. This will help dampen the noise. Just to be safe, give the glue a day to set completely before moving on to the next step.
This is where a lot of trial and error comes into play so don't be to hard on yourself. Mistakes are where learning happens. Please don't use a belt sander. You'll probably ruin your piece that way. Use a random orbit sander. It's slower but that is the point here. You need to keep sanding until you get the metal flush with the wood. Use your sense of touch to gauge this.
Once you have it flush, gradually use higher and higher grit sandpaper using a palm sander or just a block and sandpaper. I go all the way up to grit but that is because I like a near mirror finish. Speaking of mirror finishes, rub n brite and a polishing cloth for jewelry is what I use for my final polish. Polishing this way make the pieces look like they're glow-in-the-dark.
You'll see what I mean when you try it. Use my video in the intro as a guide if any of my instructions don't cut it for you. Reply 1 year ago. Reply 2 years ago.
A cnc in theory should work just fine provided you can get a bit the right size for your wire or vice versa. Question 2 years ago on Step 1. Answer 2 years ago.
I got it because it was the cheapest one I could find lol. Mind the weight. The laser cutter I used was very big. Does it need to be that big? I can't answer that. I was able with some playing around to cut through half inch red oak once if that helps. It won't replace your saws, though. Question 2 years ago on Introduction. What is your opinion on copper powered mixed with epoxy to use as an inlay?
|
Fun Easy Woodworking Projects Zoom Dewalt Mbf Radial Arm Saw Zone Cabinet Cam Lock Hardware Limited |

YuventuS
11.04.2021 at 18:40:41
shahrukhkhan
11.04.2021 at 15:53:17