Wood Burning Name Stamp Meaning,Cnc Wood Cutting Tools Pro,Used Woodworking Tools For Sale 5g - Step 2
Statistical Report Subscriptions. Western Lumber Interpreting Grade Stamps. Interpreting Grade Stamps. Western Wood Products Association is one of the largest associations of lumber manufacturers in the United States, representing sawmills in the 12 western states and Alaska.
The Association's Quality Assurance Division supervises lumber grading by maintaining a highly competent staff of lumber inspectors who regularly check the quality of mill production, including visual grade requirements of glued products and machine stress-rated lumber.
The grade marks are stamped on the lumber and appear near the ends of the product: Most grade stamps, except those for rough lumber or heavy timbers, contain 5 basic elements:. WWPA certification mark - This symbol indicates that lumber bearing this trademark has been graded under the supervision of Western Wood Products Association.
Consider using specialty tips. Some wood-burning irons come with specialty tips that are basically brands. These are iron tips that have designs on their surface that can be burned into wood with a simple stamping motion.
In some cases, these specialty tips include letters. If you have letter tips that will work for your project, they will allow you to burn clear, quick letters onto wood. When using specialty tips to stamp letters, you will have to switch out the tip for every separate letter. Be careful when doing this and remember to use pliers, as the tips will be very hot. Heat up your iron.
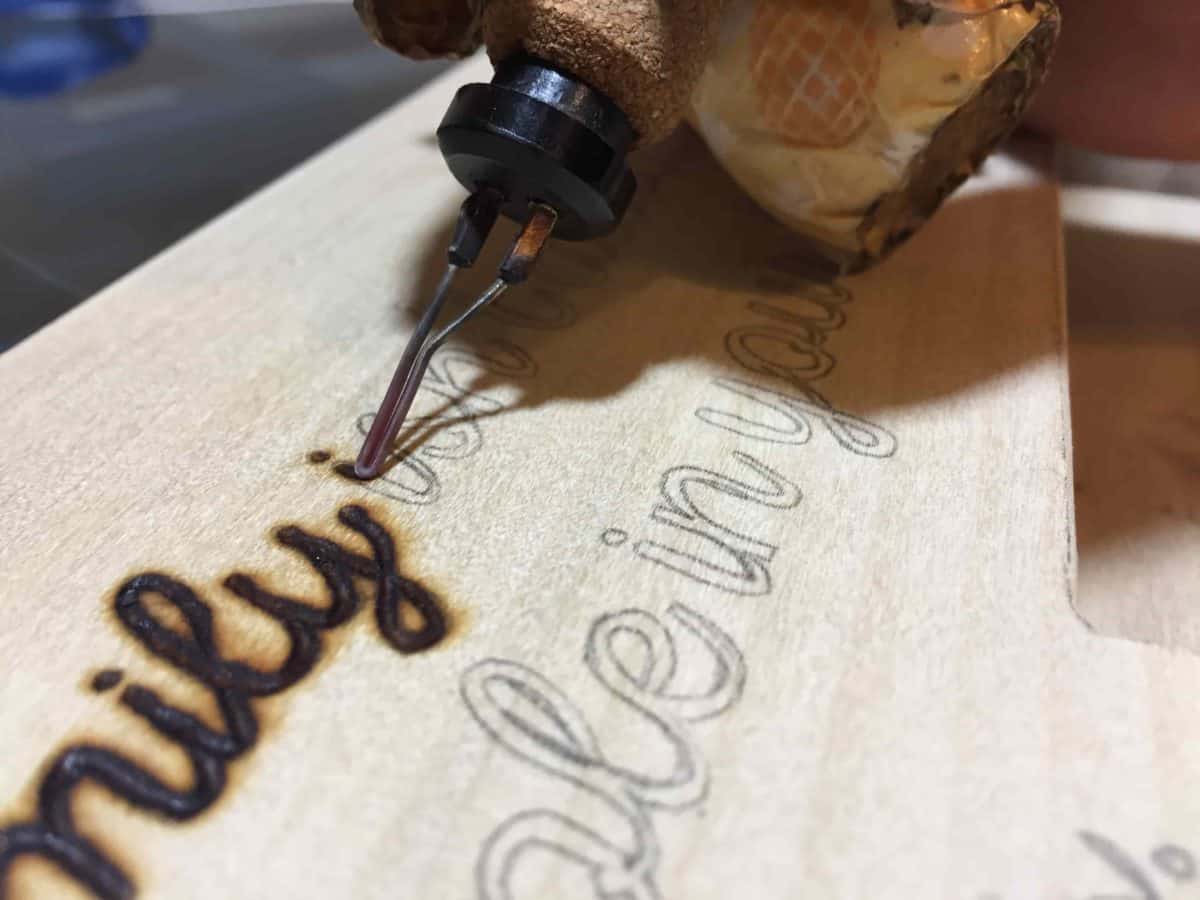
Plug your iron in and let it heat up for a few minutes. The instructions your iron came with will give you a general idea of how long your specific iron takes to heat up. Give your iron time to heat up before you start using it so that the lines you burn are solid and well defined. If you want to do some light shading, then you should set your iron to a more moderate temperature. Part 3 of Hold the wood burner firmly but press on the wood lightly.
When wood burning it is important to have a firm grip on your iron, so that it doesn't slip out of your hands and burn you. However, you do not need to press down on the wood very hard. An iron that is properly heated should easily burn the wood with moderate force. For instance, If you want a darker area of your design, pressing down harder will make the burns deeper and darker.
Move consistently across the surface of the wood. As you begin burning, use a constant speed in order to keep your lines consistent. Varying your speed will make some areas of your lines thicker than others. This is because the slower you go, the more time the iron has to burn down into the wood. Getting consistent lines can take some practice. If you are worried about have smooth lines, take some time to practice your technique on a scrap piece of wood before burning on your project wood.
Trace the letters. Begin the burning process by tracing the outline of your letters. Use smooth motions and don't stop moving in the middle of lines. To get smooth and consistent lines, begin and end your strokes only at the end of lines within your letters. For example, the letter O should be done in one single stroke.
The letter R can be done in three strokes: the upright line, the loop at the top, and the leg on the lower right side. Adjust the temperature of your iron as you go. If you find that your lines are too light or too dark, then you may need to change the temperature of your iron.
The temperature you need will vary depending on your technique and the type of wood you are using, so you may need to play around with it a little bit to get the results you want. With this kind of iron, if it is not hot enough after a few strokes, you simply need to wait for the iron to heat up again before continuing your project. Fill in the letters. If your design includes thick letters, you may have to go back and fill in the centers of the letters after you have outlined them.
Just use the same light pressure and smooth movement as you did with the outlines. Be sure to use a larger tip if you want to fill in large areas. Using a small tip to fill in a large area will take a long time and is likely to create inconsistencies in the color you get.
Add additional details to your design. Once you have burned the letters onto your piece of wood, consider adding additional embellishments.
Adding decorative swirls or little flowers can add a fun little flourish to your work. There may be specialty tips in your tip kit that you can use to stamp designs on your work. For instance, many wood burning irons come with stamping tips that have hearts or flowers on them.
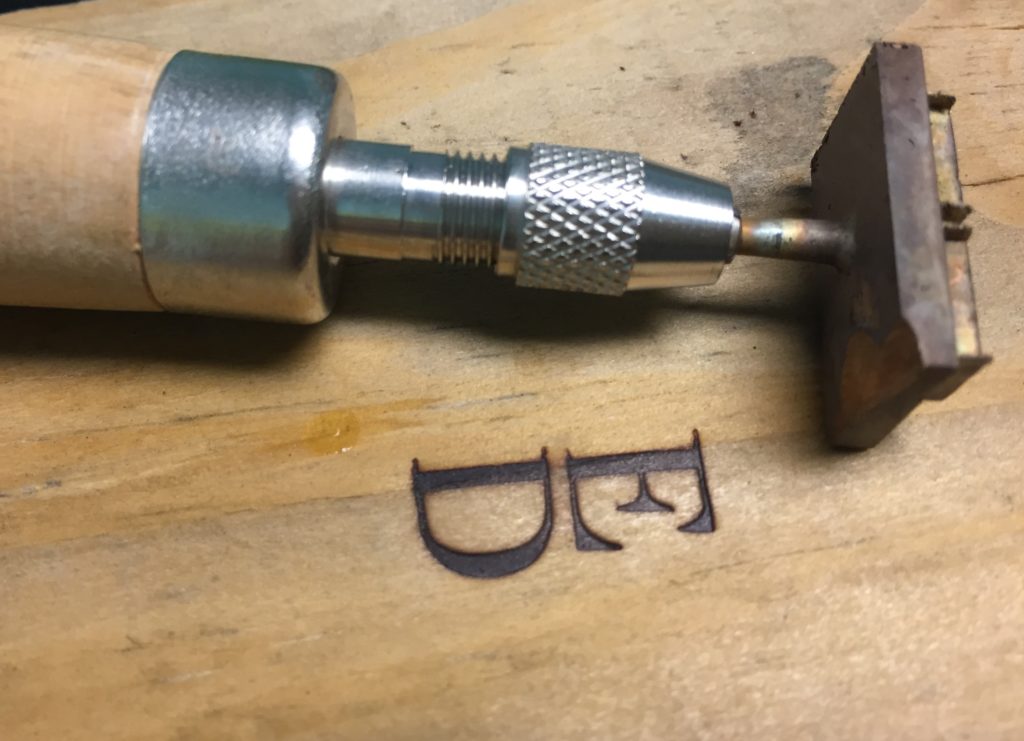
Try using some of these to elevate your design. Not Helpful 45 Helpful 9. Include your email address to get a message when this question is answered. Submit a Tip All tip submissions are carefully reviewed before being published. Related wikiHows How to. How to. About This Article. Co-authored by:. Co-authors: 4. Updated: March 28, The wood will start to burn and the logo will be transferred over the wood.
One of the great benefits of using a wood hot stamp is that it is one of the fastest and most inexpensive methods available. It is very easy to use and does not require high expertise. This tool is very suitable for home woodworkers , personal art creators, and low-income people. See the best woodworking tools for beginners. An embossed stamp is also one of the methods of putting a mark on the wood.
Due to the limitation on the size of the press sealers, it is best to use this method on wooden sheets low thickness. This is not the common case in the wood industry, but it is being widely used in the leather industry. You can use CNC to engrave your logo or brand. Some manufacturing companies are engraving their logo on their products using CNC laser.
This method is like pyrography and hot stamp. The laser burns the surface of the wood as if you carved the wood. On CNC lathe you can also insert a logo on the wood. Of course, this must be done prior to the painting process. The CNC machine is usually less sophisticated and needs to be sanded. This method costs a great deal to insert a logo on wood and is usually suitable for large woodworking companies.
There are, of course, CNC service packages that you can order at a low cost. If you are unable to make a CNC machine and also have a great interest in wood engraving, we recommend using over milling and stencil template. You can engrave your own logo by making a stencil and using over milling. Of course, this requires experiment and making clean stencils, but you only have to create your own logo stencil once.


|
Raccoon Pumpkin Carving Kit Fine Woodworking Simple Sturdy Workbench Inst |

Prinsesa_Wostoka
30.07.2021 at 11:24:54
nazli
30.07.2021 at 20:58:42
EleqantniY
30.07.2021 at 17:42:57
9577
30.07.2021 at 15:10:26
Elik_555
30.07.2021 at 14:37:35