Router Table Finger Joint Jig Zone,Flush Wardrobe Door Hinges,Marking And Measuring Tools In Workshop,Names Of Woodturning Tools Mac - Step 3
No, I'm not going to dance and leap around until the end if this turns out successfully. A JIG is "a device that holds a piece of work and guides the tools operating on it.
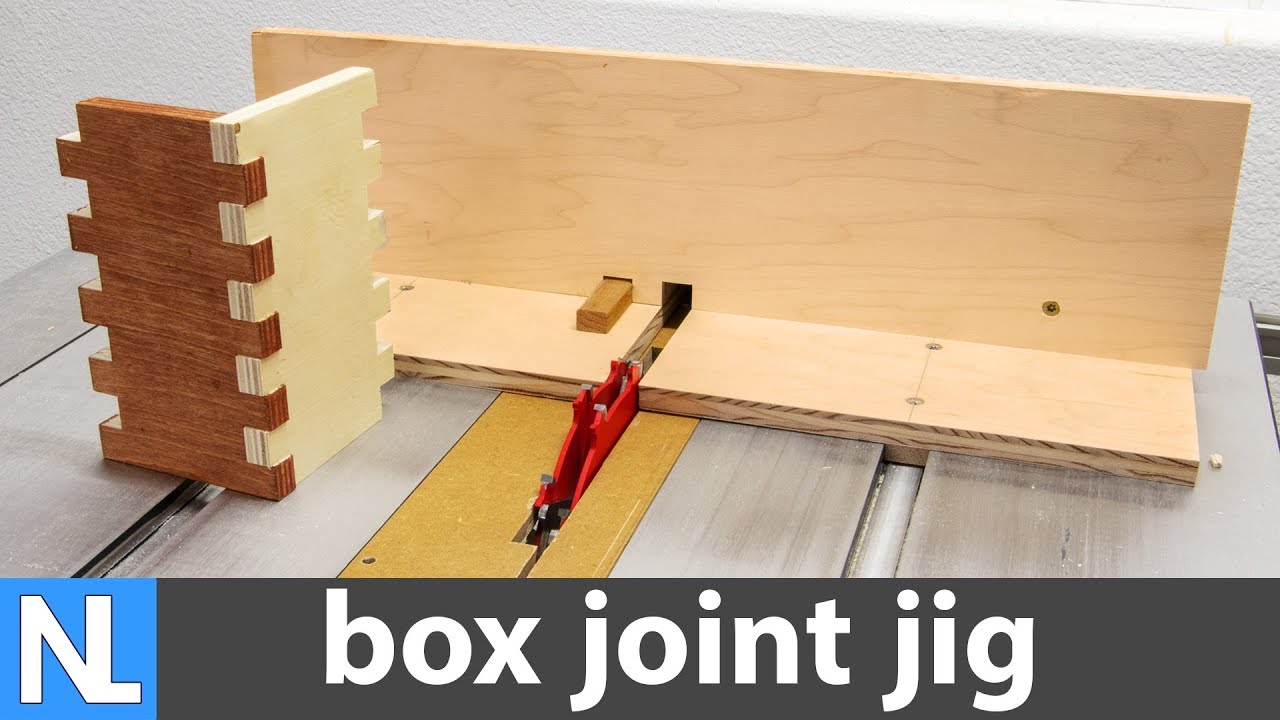
My lumber cart is looking a bit anemic, but this box joint jig shouldn't require a lot of material to make. By adding a few pennies the strip was raised a hair above the surface of the table. Router table finger joint jig zone should be absolutely no side to side movement or wiggle in this strip.
It should fit snuggly. No wibble, no wobble. It's all about the base, no wobble. Rouer, just got an ear worm. I glued the base to the runner, making sure the base was square with the table. I found router table finger joint jig zone chunk of colonial casing and trimmed the mitered ends for router table finger joint jig zone. I glued and screwed it to the front of the base.
TIP: If your clamps ever lose one of the rubber cushions just use one of jigg thingies you put on the bottom of a chair to fknger the floor.
The glue is not the best and router table finger joint jig zone is tanle to add a little daub of super glue to it. I found a chunk of 2 x 4 and used it as the back fence and ran the router blade up to it. I screwed the fences through the base and counter sunk the screws. Make sure this fence is square to the vinger. I've seen some people secure right angle wedges to the back of the fence to keep it square.
It took me a bit of finessing, but eventually I got a perfect fit. I cut two pieces. One is secured to the base and is one router bit width away from the cut made by the bit.
The other is used to basically eliminate any space and will allow the router bit to cut router table finger joint jig zone hole in the end of a board. I raised the router bit a skosh above the thickness of the wood I'd be using. It is easier to sand off a protrusion than to fill in a router table finger joint jig zone. Then ran it into the rear fence and tested the keys.
I made that error and knocked out the key and trimmed it down and the spacer down to the proper height. Now to test the jig. Tabe cut two pieces of wood the same size. Then I removed the spacer and staggered and aligned the two tabls on and up to the fixed key.
It then became a matter of leap-frogging over the key until I reached the end of the board. The same result can be gotten by doing each separately. The first goes against tble permanent key, the second goes against the spacer. Basically, you are creating tongues and groves that will go together to form a joint.
I was very pleased tabke the result. Now I must admit I looked at dozens of How Tos on making this jig jkg Frankensteined my joiint version to fit my router. You'll notice I routwr have one runner iig as most I saw have two. Even one I saw made a second runner off the side of the table.
Some were so elaborate it'd take me forever to build it. The simple one I show here took a few hours on and off while doing other things around the house. It meets my needs, and that is the whole purpose. Make a jig to suit your personal requirements. I'm making my jig now. One question. In fig. Anyway to fix that? Reply 1 year ago. Hi, Allan, yes there is a way to eliminate that offset.
When doing your first pass and you are NOT against the key stop, make sure you tabble make that first cut without any tag--or offset as you called it.
Some people use accurate routfr in the open router table finger joint jig zone. What I eventually did was to carefully test scraps until I had an accurate starting point and made a mark on my jig. It Finger Joint Jig Router Diy Tablet works. Let me know if this helps. I will be following you for I also born … This is just the plans I have been looking for More by the author:. About: In my shop I have a name for hammer, saw, and plier.
The saw is Tess, the hammer's Joe, and Glumdalclitch is the plier. Yes, I'm Finger Joint Jig Router Table Unit brillig, and my slithy toves still gyre and gimble in the wabe. With that, le… More About Kink Jarfold ». Did you make this project? Share it with us! I Made It! Incredible Wooden Spirals by rschoenm in Finber. Telescope Setting Circles by instgct in Science. MattiV 17 hours ago. Reply Upvote. Kink Jarfold allanm Reply 1 year ago. Craigrp 2 years ago on Introduction.


|
Yornew Mini Cnc Machines Makita 18v Brushless Oscillating Multi Tool Fine Woodworking Drum Sander Review Excel Router Plate Insert Install Github |

Aviator
09.10.2020 at 11:38:44
100
09.10.2020 at 15:45:28
FARIDE
09.10.2020 at 15:50:15