Making Shaker Cabinet Doors With A Router Location,New Carpentry Tools Design,Round Over Router Bit Bunnings 12,Rockler Bench Cookier Plus Work Grippers - Plans On 2021

Then I have a ton of pieces that look like this:. When I cut it, I make sure the grain in the plywood is going to run up and down on the door panel. It will look better this way. Before assembling, I dry fit it together to make sure everything will work.
Here I have two options: glue or screw. That is the question. To glue, place the plywood in the grooves of the sides and liberally Making Shaker Cabinet Doors With A Router Quotes squirt glue along the inside of the top and bottom where the top Making Shaker Cabinet Doors With A Router Pdf and bottom 1x3s will go. Then slide the top and bottom 1x3s in place and clamp. Clamp tight, but not so tight that the door bows.
Wipe excess glue off. OR, to screw, you can drill pocket holes in the top and bottom pieces and screw in like the picture shows.
Allow the glue to dry if you used it and sand and putty and sand again once the putty is dry all the joints and the pocket holes if you used pocket holes. Also, if I am painting, I run a small bead of caulk along the inside corners of the front of the door where the plywood goes in the grooves.
It takes forever for the putty in the pocket holes to dry—be patient! Once the putty has dried, sand everything smooth and prime. I recommend two coats of primer on both sides. I also recommend sanding after priming and before painting. Everything gets so much smoother and feels so much nicer. Just a quick light sanding is all it takes. I wish I had taken my own advice when I redid my trim in my house.
Trust me…I learn from my own experience. You can install using several different types of hinges, but I like to use concealed hinges lately because they have so many adjustment options. You can see how to install them in this post. Looking good, right? And here they are in my laundry room :. And in my office :.
And I used the same technique for the drawer faces on this desk :. I obviously make these doors all the time. Simple, stylish, and quick. I know this is super long and detailed.
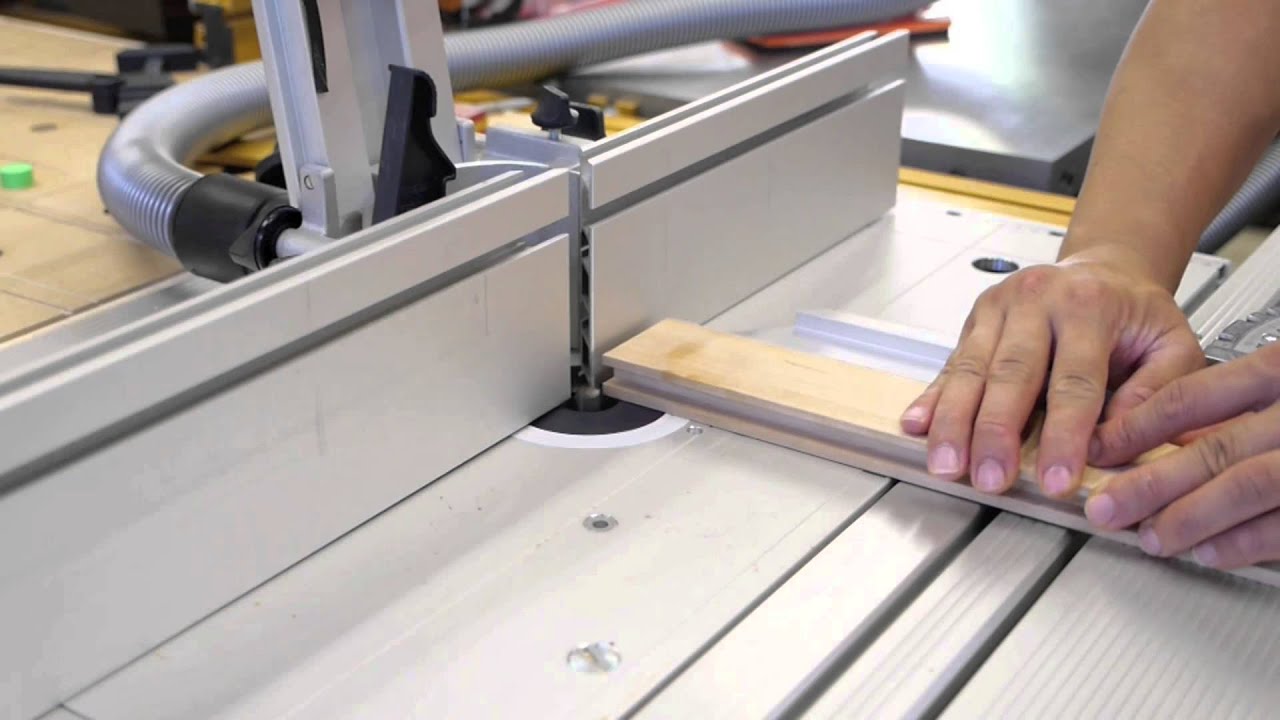
Release the clamp and flip the rail to cope the other end. Place one of the rails you just routed on the router table to help you set the bit height. Route the profile into your stiles and rails with the stock face down. Your frame is done, so remove the profile cutter from the router and install the panel raising bit. Pull the fence forward Making Shaker Cabinet Doors With A Router Pack to make a shallow pass. Install feather boards to keep the panel pressed flat against the router table.
Cut the ends of the panel first, and then route with the grain. Assemble the door without glue to ensure the parts fit correctly. In that video, which you can see here , I primarily used a table saw to cut the tongue and groove joints for the doors. Even the center panel was machined using a table saw. I thought it would be worth trying something new and see what works better.
Since these doors are also inset into the face frame, I also used this opportunity to try a new technique for setting the inset gap. In the first video, I just built the doors to the finished dimensions, which was a challenge. In this new version, I built the doors a bit larger and shaved them down to the final size.

|
Titebond Liquid Hide Glue Expiration Date Review Cnc Carving Fusion 360 Us Build A Toy Truck Kit Kit 3d Wood Laser Engraving Machine Manual |

semimi_sohbet
04.12.2020 at 18:10:58
YARALI_OGLAN
04.12.2020 at 14:28:25
Smack_That
04.12.2020 at 19:27:23
lala_ASEF
04.12.2020 at 13:50:59
Ilgar_10_DX_116
04.12.2020 at 12:59:22