How To Build Wood Table With Resin Water,Table Top Cnc Milling Machine Youtube,Wood Sanding Machine Malaysia - Tips For You
This epoxy resin is formulated with top-grade UV-resistance, making it far less likely to fade or become yellow over time. You are likely to incorporate color to this resin if you are creating a river table, which you will be able to do with ease.
This resin can be mixed with color pigments such as mica powders, liquid dyes, and alcohol inks. However, you should not use paint with this resin, especially acrylic- and oil-based paints.
Once your epoxy river table has been cast and cured, it is in your best interest to apply a final transparent coating to your tabletop as a protective layer. This will seal the epoxy and increase its durability. We suggest choosing a UV-resistant topcoat so as to prevent this clear layer from yellowing over time. This tabletop epoxy provides a premium product that will cure to a finish that is shiny, as clear as crystal, and durable against the elements and other forms of damage.
The application process is easy when using this resin, as it has a simple mixing ratio and will level itself out automatically once poured. Your finish will be resistant to impact, blemishes, water, and other forms of damage once it has cured completely.
This product has a quicker curing time than most, as your resin will have cured entirely after a period of 48 hours. For adding color, you can use a mica powder for the best results.
This resin is one of the safer choices in terms of toxic fumes. This is because the resin has almost no odor at all and produces absolutely no VOCs. However, we still recommend that you wear the appropriate protective gear when working with this resin. The thicker consistency of this resin means that it may be slightly more difficult to mix and apply.
This brand specializes in epoxy for countertops that mimic the effect of stone. You can use this resin to renew any of your countertops or to provide a protective coating.
It is extremely durable and will even resist heat. Once cured, this product is completely food safe. It will be easy to prepare this resin due to its basic mixing ratio. Ensure that you mix the resin components and any desired color together thoroughly, after which you will have approximately 45 minutes with which to apply the resin. You can expect a crystal-clear coating when using this resin, thus enhancing the surface underneath. While your resin surface may become dry to the touch within just 24 hours, you will not be able to use the surface for a minimum of three days.
You should only perform light work on the surface for the first month, which can be done by not placing any heavy items on the surface and by not sliding any plates.
After a week, the resin will be extremely hard. It will take 30 days for the resin to become fully resistant to heat and UV light, after which time it will have cured completely. If you also want to prepare the wood for your tabletop yourself , you will need a hand circular saw and a planing machine. Before you can start, the wood has to be cut to the right length and angle and divided in the middle.
It must also be planed to an even thickness. You can also choose an already planed board when buying your wooden board, then this step is not necessary and you only have to saw the wood.
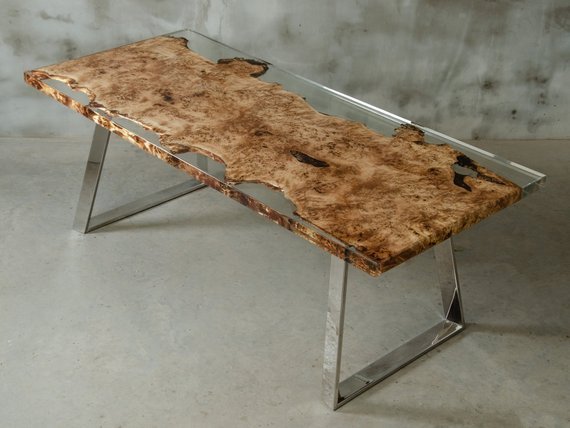
If you are a beginner do-it-yourselfer or have little experience with wood as a material, I recommend that you have these steps carried out by a carpenter. Choice of wood: For a River Table, you need a wooden board that is as natural as possible or a board made of a tree trunk that is at least 1. Alternatively, you can also use two attractive wooden boards from the DIY store, which you bring on one side with a jigsaw into a slightly curved shape.
For a really good River Table I recommend the first version. Because if you want to build such a fine wooden table yourself, when you are investing a lot of work, it is always worthwhile to organize a really beautiful, high-quality piece of wood.
Dry wood carefully: The most important thing is that the wood you want to use is sufficiently seasoned or properly dried. Saw it: The wooden panel is cut lengthwise in half with a circular saw in the middle. If you do not have a circular saw, have the carpenter do this. Both pieces of wood must then be cut to exactly the same length and the side edges cut at right angles to the straight long sides.
This is also done with a circular saw. If you do not have this equipment, have the carpenter do this. Planing: With a planing machine you make sure that the two wooden parts have an even thickness and the absolutely necessary flatness. If you do not have a planer, ask your wood supplier or carpenter to plane the wood. A dry, dust-free workshop environment or garage heated in winter is highly recommended for this work. It is also important to work in a well ventilated area.
Do not work in cold, humid or hot conditions as this will affect the performance, drying and appearance of the resin — this could ruin your epoxy wood table. Tip: Do not store the epoxy resin on the floor as the floor is always colder than the room. Even if you have the perfect temperature of around 20 C degrees, the floor will not be more than 15 C to 17 C degrees. If the resin is too cold, tiny bubbles will form which you can hardly get out of the resin, not even with a heat gun.
To calculate the required amount of epoxy resin you need for your resin epoxy table, acrylgiessen. We have created a tutorial about sanding epoxy resi n, where you will learn how to get a smooth surface for polishing. Tip: The lighter the desired surface, the finer you should grind, so the higher the grain size.
Before you can apply a finish on your resin tabletop, you should polish the epoxy resin. This will help to get rid of the little scratches you have in your epoxy because of the sanding process.
For bigger surfaces like tabletops, we recommend you to use a buffing machine for the best result. For smaller projects you also could use a towel and polishing compound to polish it by hand. The simplest way for the finish is to oil the tabletop to protect the wood. By oiling, you give the surface a smooth appearance with less shine, but a natural feel.
I recommend the oil from Odie. It seals the wood and gives it a natural touch. It is best to apply the oil evenly with a soft cloth onto the entire tabletop. Before you oil the tabletop, however, you should polish it — especially the resin River — with a polishing machine and polishing paste.
This is to remove any traces of sanding and to achieve a silky surface. We have created a special tutorial on How to polish resin epoxy. A polyurethane coating by a professional is not exactly cheap — but in my opinion, it is definitely worth investing in a professional varnishing of your tabletop with such a high quality.
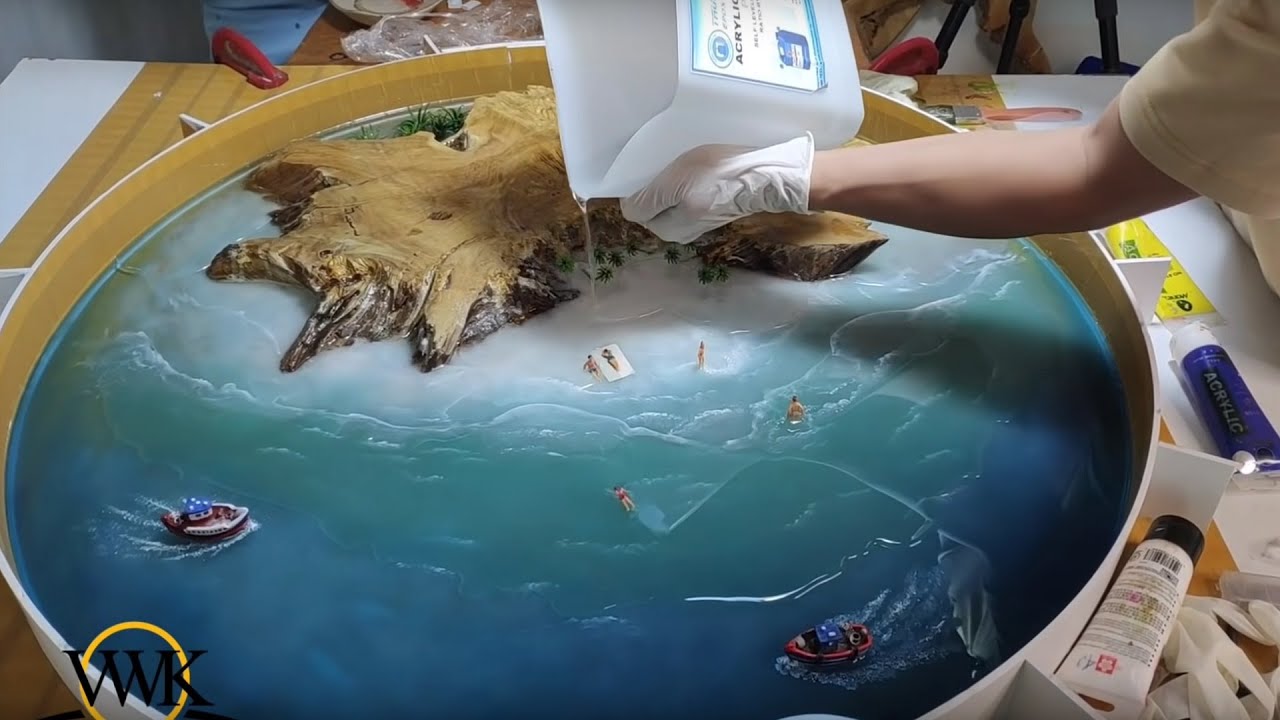
Would you like to read more articles about epoxy resin in combination with wood? Basically, you need wooden planks and Epoxy Resin to make a River Table yourself. You build a mould, where you place thw wood and fill the space between with Resin. After the hardening process, you unmould the tabletop, sand and polish the surface and mount the table legs.
The calculation of the amount of Resin Epoxy you ned is not that easy. First measure the depth, length and width of the space you want to fill. Then we recommend you to use en Epoxy Resin calculator to help you with the calculation. You can easily cast LED strips into the table top. When casting, pay attention to the temperature development so that the casting resin does not get too hot and the LED lighting melts.
You should fix the connectors well so that you can connect them afterwards. Use high quality LED lights, because you cannot change them after casting. You can also use cross-cut tree slices as a resin table. The wood must be dried very well here as well.
Glue the top and bottom of the disc well and fill the cracks times. Then you can seal the tree disc with epoxy resin and mount the legs. If you would like to build your own River Table, the biggest costs are the Epoxy Resin and the wood if you have to buy slabs.
If you have all other tools, you can build your own River table for about USD. I don't think random spots of epoxy would cause issues but if you coated the entire underside maybe it make moisture issues worse. Answer 1 year ago. Thanks for your enquiry. Bowing can be a difficult issue to solve. The problem being it can be caused by a number of factors, moisture in wood, humidity, temperature of cure etc etc.
All play a part and can have an effect at different stages of the cure too. Often all is fine then the heat of the cure dries the wood a bit or as it cools and cures, changes in humidity can play havoc.
You can route the surface flat but it depends on having the material thickness to play with. Hope that helps Question 11 months ago on Step 1. Dear All, Answer 11 months ago. Hi, thank you for your message. Reply 11 months ago. Dear Sirs, Very interesting you products, Please supply a Price List of your products together with instructions on use of them.
Is there any person at "Glass Cast" to whom I can direct my emails, instead using this form of communication? Looking forward hearing from you very soon, Yours, Claus-Peter Moeller. Hi Claus-Peter, We have a website www. Best wishes, GlassCast Resin. Reply 1 year ago. You need to overpour on the last layer which would get the blue resin on the 'riverbanks'.
How do you then get it off so the blue is only in the river? You could put the whole slab through a thicknesser or use a drum sander if you have access to the equipment. We didn't so set up a router over the slab on a bridge as we and routed the surface all over by making multiple passes.
Question 1 year ago on Introduction. Hello and thank you for the nice tutorial. I have been researching to create a partial resin table, and I am concerned about the epoxy yellowing.
I understand even if it is kept out of sunlight, it will still eventually yellow somewhere down the road. By mixing the resin with a color like your blue does it slow down or stop this process? Thank you, Kristy. Hi Kristy, thanks for your message and comments. All epoxies will yellow over time, however GlassCast Resin uses an industry leading UV resistant formulation and as you say keeping it out of direct sunlight will extend the life.
Adding a pigment to the resin can help to mask any yellowing down the line. The pigment where yellowing can be noticeable is white, but if you are tinting to give a translucent effect then this would not be a problem I am creating a table with Alaskan yellow Cedar and we want to take the company logo made of vinyl and lay it in the center of the table and then cover it with the epoxy resin do you see any problems with the resin sticking to the vinyl or the vinyl having issues with the epoxy?
If the vinyl will not work is there another material you would recommend to get a logo on the center of a wood table? Thanks for your comment, would the logo sit encapsulated in a river or sit on top of the table and be coated?
It would sit on top of the table. No river or gaps just a solid lumber table with the vinyl decal laid in the middle then a thin coat to cover the entire table top. You would be able to coat the table in a resin like GlassCast 3 coating resin, which is used in our other project - Penny Floor.
I would recommend carrying out a small test piece to ensure that there is no colour bleed from the logo before coating the table. It would also be advisable to pour a sealing coat on to the table as seen in this River Table project which will stop the main pour soaking into the wood and also stop air bubbles coming out of the wood into the resin.
The sealing coat would serve to stick the logo to the table. Esta guia es perfecta! More by the author:. Next you need to check for cracks, knotholes and gaps on both the top and bottom of the pieces of wood and fill these with resin to seal them Use some tape to seal the cracks and gaps to prevent resin running out- a release tape works well for this. Measure and mix a small amount of resin and pour into any gaps - make sure you check on this after a few hours to see if it needs topping up as the wood will probably absorb some of the resin.
Overfill the gaps slightly with resin and then leave to cure fully following the instructions. When the resin is fully cured use abrasives to level off the surface, removing any high spots with a sander or with abrasive paper - you are aiming to leave a keyed surface so a coarse abrasive is ideal.
TIP when you have thoroughly mixed the resin and hardener, pour the mixture into a second cup and mix again to make sure no unmixed resin remains - this is called 'Double Potting'.
The resin we used can be measured by weight at resin:hardener or volume at a ratio of Now position your slabs of wood and allow for your river channel so you can make a container around the whole table slab - this will support the resin whilst pouring and curing the river : Begin with a flat sheet - something like mdf or chipboard which is just slightly larger that the slab you will be producing which will make a baseboard to work upon.
Next using a suitable product we used polypropylene sheet as the resin doesn't stick to it cut a base and side barriers to create a container around the wood. Make the base approximately 8cm larger than the table size to allow for side barriers and battens if required.
Using a hot-melt glue-gun run a bead of glue all around the base and side barrier joins to make sure the container is water-tight. Test it's watertight but make sure you dry the container thoroughly. It's a good idea to use clamps or weights to ensure the planks do not float around in the resin - test this too, to ensure it stays in place and remains as flat as possible.
When you're happy remove all the clamps, supports and the wood for the table and you are ready to prepare your resin. You can work out the quantity of resin required for your project by using this calculator. Add the colour pigment to the resin - a little goes a long way so add a couple of drops at a time and mix thoroughly. Make sure the resin completely covers the whole base area Place the wood planks back into the correct position on top of the resin Using a brush seal the waney-edge and top surface with resin including filling any knots, splits or cracks Position pre-covered wood blocks over the barriers and batons and clamp into position Allow the resin to reach the B-stage of the cure B-Stage The B-stage means that the resin has started to become firm but still has a tackiness To tell if this stage has been reached - with a gloved finger, touch the resin and if it leaves a mark but does not stick to the glove it has reached it's B-stage and you need to prepare part 1 of the pour If you allow the resin to cure past the B-stage then the resin will not chemically bond to the next layer so will need to be keyed all over with abrasive paper to create a bond with the new layer.
Then leave Layer 1 to cure to the B-stage. Repeat the stages again for the 2nd main pour once the B-stage has been reached on part 1: Measure - Mix - Pour - Heat-Gun If required, repeat the process until the river is full - remembering to double pot the mixes and if pouring multiple layers wait for the B-stage before mixing and pouring the next layer.
Aim to slightly overfill the river channel, then leave the resin to fully cure!
|
Wood Workshop Los Angeles 05 Mallet Or Hammer For Tent Stakes Solution Pumpkin Carving Kit Ralphs Fr |

HAPPY_NEW_YEAR
03.03.2021 at 15:39:58
Alsu
03.03.2021 at 12:48:24