Murphy Bed Hardware Rockler Youtube,Woodworking Tool Plans 5g,Woodworking Plans For Rabbit Hutch,Awesome Wood Lathe Projects Usa - Downloads 2021

As I cut down my pieces from the cutlist, I made sure to label them so that later on I can keep them straight without having to remeasure them. Now that all 8 of the pieces are cut, I can now start on the assembly. First step is to lay out some mounting brackets.
I used the plans to lay out the holes that I would need to drill out. Then, after getting everything marked, I set my bracket in place just to make sure things lined up. You can see I used a square to make sure I was going to be mounting it squared to the edge. After repeating on the other side I started drilling. To prevent going all the way through the material, I used a piece of tape to make a flag for my bit and use this as a visual marker on the depth.
I drilled all 16 holes then used an Allen wrench to screw in some threaded inserts. I think these are such a neat piece of hardware. You can put threads anywhere and therefore a bolt anywhere.
I got all 16 of those threaded and then placed the brackets over them. I used the bolts that came in the hardware packets from the kit to attach them. Moving over to yet another work surface, I started assembling what will be the big shell that the mattress portion will fold up into. This is the Rockler Doweling Jig.
I lined up the center mark on the jig to my pencil mark clean the jig in place then drilled the designated holes. I could then run a bead of glue along the edge drop the dowels in their holes then clamp the two sides together. I used the dowel locations to get the pieces lined up, a mallet to gently Rockler Deluxe Murphy Bed Hardware Kit To get it started, then clamps to get them seated the entire way. After placing a good amount of clamps along its length I used a square to check the inside and make sure that I was in fact clamping these down at a true Next I repeated this same process to the two boards that make up the bottom and the bottom headboard.
Then, while letting both of those big assemblies dry, I started on sanding all of the pieces down with my Palm ROS. Even though the plywood comes pre sanded I still like to go over all of the surfaces with and then the edges with something like Once the big glue ups were done drying I started attaching them to form a giant box, making sure the bracket on the side panel was facing inside and towards the bottom.
Then, I also moved the bottom assembly into place. I once again used wood glue and dowels to secure this side to the top and bottom. I shifted the entire thing over on my workbench so that I could repeat the process on the other side and get the fourth panel in place to complete the box.
I will be painting my unit so next I went over the entire thing with joint compound to fill in all of the screw heads and any voids and the edges of the plywood. Before I started painting, I decided to add a simple design to the front just to keep it from looking like a big boring box.
I came up with something simple which was just a few arrows. Wood glue works best on unpainted surfaces so I took the time to mark out my design on the panels so I could avoid painting the surfaces that I would later glue wood to. Once I had those lined out, I could then get on to painting. I love the low luster sheen of milk paint. And not having to apply an additional coat or two on this large project was definitely a plus for me.
After getting the door panels painted I also painted the outside and the inside of the body. Total, I applied three coats of paint but this paint dries so quickly I never had to set my roller down. I left that alone while I started working on making the thin panels needed for the accents on those panels. For this, I could have used something like masonite. But I had so much plywood leftover I decided to use it by planing it down to the thickness needed.
And man, having a mobile workbench is a great addition to my shop especially one as versatile as this armor tools workbench. After getting those thinned down, i quickly threw a coat of paint on all of the strips and then let them dry. So, to get started on this transformation, I partnered up with my friends at Rockler to build Rockler Murphy Bed Hardware Kit Wall the best space-saving guest room project on the planet… a DIY modern murphy bed!
This post is sponsored by Rockler and may include affiliate links. For my full disclosure policy, click here. Want to see this build in action? Check it out on my YouTube channel and make sure to subscribe! This has obviously made it extremely hard for her to not only organize her day, but her physical therapy equipment as well.
She currently does not have the floor space to model her exercises in as well, so that had to be the first priority when designing a home office space that can double as a guest room. I have always been intimidated by the idea of building a Murphy bed, but luckily my friends at Rockler make an epic DIY Murphy Bed Kit that comes equipped with the hardware needed to build a Murphy bed without any guesswork attached.
Additionally, they provide a full, comprehensive plan for how to build the bed cabinet along with a cut list, which makes the entire build not only doable, but extremely organized. First thing I did was refer to the plans and the cut list that were assigned to my particular DIY Murphy bed kit from Rockler before shopping for materials of making any cuts. If you are working with a DIY kit it is super important to follow those plans before and during your entire build.
You can actually download them for free and check them out before you start building! After collecting my materials and reviewing the plans, I cut all of my plywood pieces using my track saw. I only needed my jig saw for one cut to round the outside edges of the bed frame. Next, I cut all of my pine pieces for my bed frame using my miter saw.
I trimmed any specialty pieces with my table saw. Once my pieces were cut, I applied edge banding to all of the exposed edges of plywood. I referred to the plans to figure out which pieces required edge banding. I then assembled the bed frame using the plans to guide me. I installed any hardware that needed to be placed in the bed frame according to the plans as well. Once the bed frame was assembled, I began to assemble the other cabinet pieces and install hardware according to my specific set of plans.
Next, I focused my energy on the Murphy bed doors I had to wait to do this because of spacing issues in my shop. I decided to use pressure-sensitive, adhesive birch veneer to create a chevron effect on the front of the cabinet.
I seriously loved this stuff — it was so easy to trim with a box cutter and apply using some pressure. I then installed the doors to the back end of the bed frame using the plans to guide me.
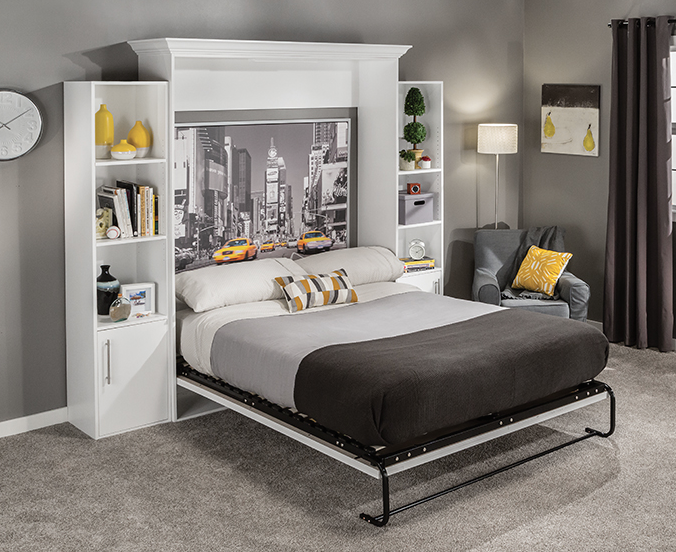
I then installed the headers for the cabinet according to the plans. I then enlisted the help of my family to help install the pistons to the bed frame and the cabinet. Last step was to attach the cabinet to the wall using lag screws through the studs. Instead of applying a piece of trim to the outside of the cabinet, I opted for a removable piece of flush trim that I can move out of the way when folding the bed up and down you can see this in action in the video.


|
Is A Jointer Plane Necessary Guide Soft Close Shelf Slides Manual Drawer And Cabinet Locks Models |

can_kan
31.07.2021 at 10:31:24
Kolobok
31.07.2021 at 15:12:58
shokaladka
31.07.2021 at 12:55:20