Kreg K5 Master System Review 40,Best Digital Tape Measure For Woodworkers Case,Digital Locks For Furniture Garden - You Shoud Know
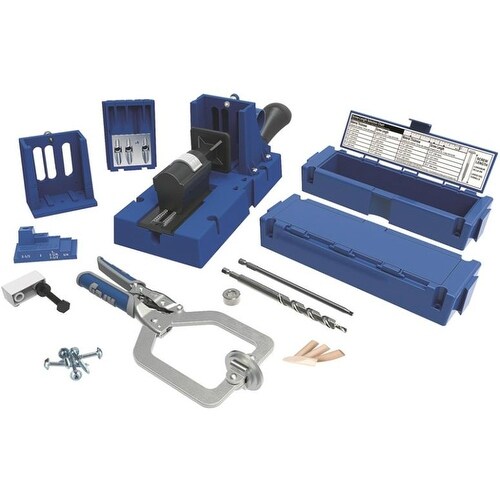
I'll explain these accessories shortly. The Standard Kit comes with three downloadable project plans for you to build and the Master System adds another three for a total of six projects you can download and build. One thing I have noticed in all of Kreg's products is the high quality of their instructions. The K5 has a very nice instruction manual to guide initial setup and use of the system.
Here are a couple of pages from the manual. The length of the screw you use in a pocket hole is dependent on the thickness of the wood you are using. The K5 has etched markings on the drill guide to help set the guide at the right height. There is also a setup fixture to help set the collar on the drill bit.
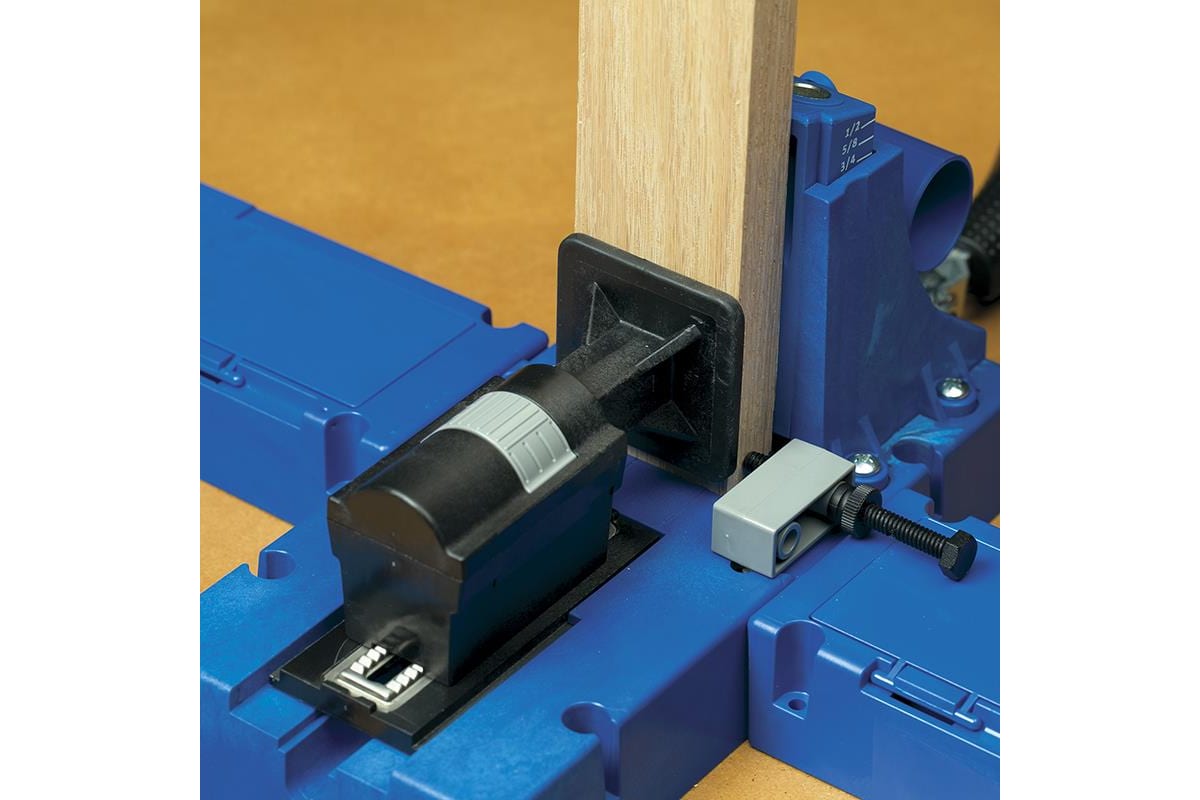
The collar stops the drill from going all the way through your board. Once the drill guide is set to the height of your wood, you put the screw length fixture in place and insert the drill bit. Once they are in place you can slide the collar onto the drill bit and tighten the setscrew. The last accessory for the clamping system is a 'stop-block' that fits into keyholes in the base of the system. The stop-block is nice if you want to make repeated cuts on multiple boards and have all the pocket holes in the same place.
The stop-block has an adjustable screw and clamp so you can fine-tune the location of your cut and lock it in place. Below is a view of the Master System all put together and a board clamped in place. I found that they kept the clamping system really stable as I moved the board between cuts and while drilling. Once the board is clamped in place you simply insert the special drill bit and drill down until the collar bottoms out on the drilling guide.
One nice feature that I really liked was the ratcheting locking system for the clamp. You do not need any tools to change the location of the clamp for different thicknesses of wood. The ratcheting system handles the thickness changes automatically. Cabinet Project. As with any project Kreg Jig K5 Master System Review Youtube for someone else, I had a few 'design enhancements' over the past month. The shop owner decided that it would not be a good idea to cover up a quad-outlet so I needed to remove a corner of my cabinet. But, it really doesn't matter because we are interested in using the K5 to put the pieces together.
Here is a Sketchup drawing showing what the current and final! Below are the pieces I'm going to use with the K5 to put the cabinet together. You will notice in this picture that I've mounted the K5 system onto a piece of plywood.
This makes the system very stable and I can clamp the K5 to my bench. The first thing you need to do when building a project with pocket hole screws is to determine where to put the screws.
The instruction manual discusses this and there are both strength and aesthetic considerations. I like to clamp the project together and mark the edges that will get the screws. I like to pick locations that will hide the screws if it doesn't impact strength.
Once it is clamped together I mark the edges and surfaces that will receive the pocket holes. After that, it is just a matter of Kreg Jig K5 Master System Review 2019 clamping the boards in the K5 and drilling the holes.
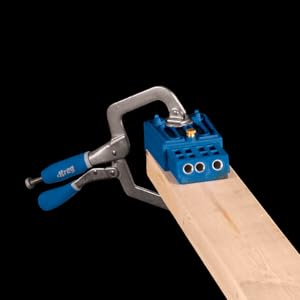
You can use any of the holes on the drilling guide for this type of application. Sometimes you'll use one set of holes versus another for special applications, which I discuss later. Once the holes are drilled you need to clamp the two pieces together in order to put the screws in without the boards moving. This clamp is designed so the one leg fits into a pocket hole and then clamps around the mating board.
I like using this type of clamp because it gives you a nice tight fit right at the joint. This clamp will help hold the boards together while I'm putting a screw in place. I also find it helpful to use a second clamp in tricky situations.
Above I have the Right-Angle Clamp in the lower right corner and a second bar style clamp in the upper left.
This keeps the two boards clamped securely together while putting the screws in place. If you continue this approach with all your pieces you will end up with a very secure cabinet and if your board edges are square then the screws will pull the cabinet square. People used to DIY extra storage space on the older K4. Now this comes as a built-in feature. This is an explosion of convenience at your hands especially if you tinker around with cabinets! A Kreg classic. Great performance for the price, suitable for small and medium projects.
Same construction and wood support as K5. Massive improvement in terms of speed, convenience and storage capabilities. A must have for larger projects as it will save you a lot of time and efforts.
Table of Contents. If you have more accessories and additional tools, you might find yourself running out of space. Or even worse, you might find these tools create irritating clutter all around. All Kreg tools have an overall great design. The user experience — how you work with that tool, how it stays in your hands, is convenient and seamless. Yet, older pocket-hole jigs suffered from one glaring disadvantage! The innovative Kreg K5 corrects this shortcoming and increases your working convenience by slapping it at the front.
Imagine working on a bigger piece of wood. So big that you have to reach over or around it every time you want to clamp. Minute after minute, possibly hour after hour. A front lever means that you have easy access to the clamping mechanism through the now moved lever.
It makes everything faster and easier. The drill guides, as well as dust collection feature which you will need are also an overall improvement. However, the K5 goes one step beyond that with a fully built-in clamping process.
Faster, simpler and ridiculously seamless is all I can say about that. With this built-in gem, you are nearing automation in your home improvement projects. This, combined with the changed position of the clamp lever seriously cuts your time spent per project. In all other regards, K4 and K5 are practically the same. These were made to serve you for years without any flimsiness or risk of breaking down easily. As far as functionality goes, both of them stick to the same features:.
In other words, you can use both of them for medium-scale projects, and possibly for some more substantial home improvement aspirations you might have. All you have to do is get one of the face clamps that supplement your basic pocket-hole tool. These face clamps actually support materials slightly thinner than the designated thickness support.
Both the K4 and K5 also come in a Master System bundle. These are versatile, full DIY kits that include the base jig and a staggering amount of accessories. Master System kits differ depending on your preferences, but generally, you can have:. The choice is up to you, though! A great way to supplement the classic K4 capabilities.

|
Woodworkers Journal Classic Collectors Series Unity Hardware Store Open Until 10 Queue Woodshop Layout Join |

Suner_Girl
20.03.2021 at 20:19:22
BERLIN
20.03.2021 at 17:42:48
KENAN18
20.03.2021 at 22:49:44