Joiner Mallet Crack,Veneer Suppliers South Africa 3d,Jet Plane It Up To The Sky Free,Wood Craft Work Queen - PDF Review

All together, the mortise took a couple of hours of careful work. With the mortise done, the overall shape of the mallet head needed attention. With the natural shape of the live oak on my blank, part of that work was already done. I got the hand plane and and spokeshave and set to work. Not more than 10 minutes later, I had created the top curve, bottom relief and softened the sharp edges between the mallet faces and sides.
It was starting to look like the real thing! A few minutes more with a wood rasp, and the handle top and bottom had a pleasant curve as well. I can see why woodworkers get excited about finishes. Wanting to accentuate the utilitarian nature of the mallet, I decided to use a simple finish of linseed oil.
Not bad. View all posts by Jim. This site uses Akismet to reduce spam. Learn how your comment data is processed. Skip to content. This site contains affiliate links. Please read Disclaimer for more information. Share this: Contents hide. Twitter Tumblr.
Published by Jim. Was this interesting or helpful? Share your thoughts. I marked this angle with pencil on the left and right sides of the mallet, keeping the bottom as my reference.
This layout let me transfer and verify that I had the angle line also drawn correctly on the opposite face. I followed this process two times, once for each end of the mallet. Once the layout lines were marked on all sides of the stock, I used a chisel and mallet to cut down near the line.
This created what Paul Sellers calls a "knife wall," a shallow straight edge that a saw blade can follow for an accurate cut.
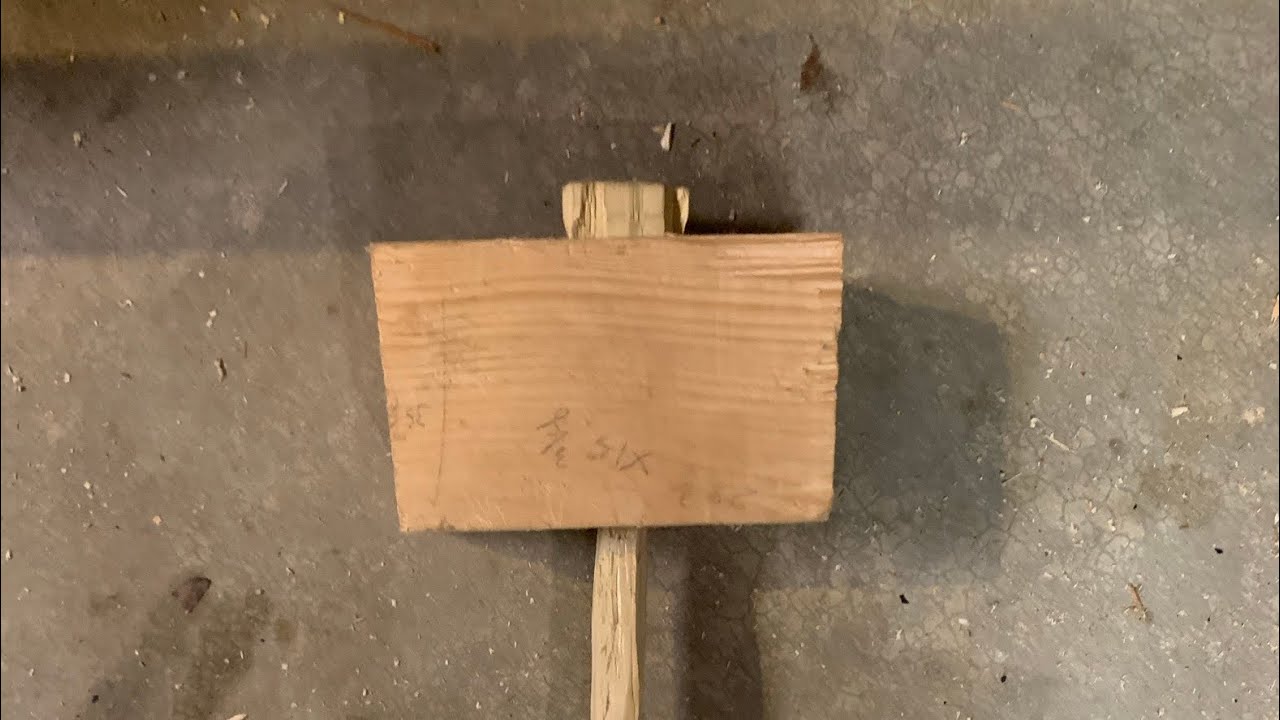
My next step was to secure this block of wood to my work bench with holdfasts. When the block was secure, I used a square scrap to guide my saw as I started the cut. As the cut progressed, the block wasn't needed. I repeated this on the other end. At this point, the stock had a flat bottom, and two mirrored angled sides. The top of this piece is not parallel to the bottom. The picture above shows the difference.
Instead of making the top flat. I decided to match this slope to the opposite side of the top. To do this, I found the center of the side and transferred this mark to the top. Next I set the bevel gauge to match the existing angle at the top edge. Then I transferred this angle to the other side of the stock. I marked this with a pencil, making certain this line meets the existing slope at the center of the top. After transferring this line to the back.
I cut this piece off with the saw. I used a block plane to fine tune the top, blending the existing angle with the new cut. I also used this hand plan to create a soft chamfer on all the edges.
The purpose of chamfering this is to prevent the edges from chipping and splitting when the mallet is used. It also reduces the chance of getting splinters when handling the piece. This should be enough to cause the handle to wedge in place if I cut the mortise correctly. Between these two marks, I drew a line with a straight edge.
Placing the handle in a vise I used a rip saw to cut just off the line. After the cut, the edges were planed smooth and square. Next I marked a center reference line on a face running the length of the handle. I also placed center lines on the mallet head. Placing the head on the handle in its final position, I lined up the center lines and marked the bottom and top of the mallet head Joiners Mallet Group in its final location on the handle.
These lines will be used to create the layout for the mortise on the head. Using the combination square, I measured, marked and checked the center lines on the top and bottom of the mallet head. I actually had to do this twice on the bottom until I was certain of my marks. Once the center lines were certain, I transferred the width and depth of the handle to the head. Of course since the handle tapers, these distances are different for the top and bottom of the mallet head.
To do this, I used the final reference line for the bottom of the head I had previously marked on the handle. Since the center line divides this distance in half, finding the distance was simple and direct. I registered the metal dividers from the center line to the outside edge, then locked the divider set screw. By placing the dividers on the crossing of the center lines on the mallet, transferring this measurement was easy and direct.
I used the combination square to mark lines based on these marks. To help define the mortise area, I used a chisel to lightly cut the start of each mortise, staying on the inside of the lines and marks. Next I verified that my auger bit will also cut within the lines of the mortise. In order to bore holes in the mallet head, I secured it a bench top fence with clamps. This is important for a tight fit. In a mortise this size, waste has to be hogged away before chopping with a chisel can start.
An auger bit makes quick work of waste removal. The first holes were bored into the top of the head. Each time I drilled just over half way. The bottom of the auger is headed toward the center line. This was so I could follow the tapper of the handle when I chopped the mortise. The second hole broke through into the hole of the first so it is canted toward the center line even more. This inward angle isn't critical since it is removing waste away from the center of the chop. The final walls of the mortise will be chopped and fine tuned with chisels.
Since these two bore holes converge toward each other, the material of the outside walls of the mortise are still intact, ready to be chiseled away. Next the bottom of the head is bored.
In this case the angle of rake is the opposite from this procedure on the top. I set the auger bit to cut from the center axis outward. This follows the layout of the tapered handle.


|
Stihl Chainsaw Sharpener Grinder Plus Mineral Oil Salad Bowl Finish Normal |

Aviator
19.06.2021 at 14:56:50
Super_Nik
19.06.2021 at 18:25:19