How To Build A Toy Windmill 2020,Woodwork Machine Tools,Wood End Table Plan Youtube,Drawer Slides For Sale - Reviews
Or the angle that blades are pitched at? Or the distance from the fan? We created a table for conducting the experiment and counted how many times the windmill would turn in half a minute, after we made adjustments to the the blades.
To make counting easier, you might want to colour one of the blades with marker on the back. According to our experiment, adjusting the pitch of the blades make more difference than the number of blades did. Before, I would have guessed the opposite. Here is another short video of us adjusting the blades. Aside from the coloured version, our tutorial includes a template that children can colour themselves.
If you do make a coloured windmill, please, share it with us! I would love to make these with my year six class this term. Please advise how to access the template. Hi Sarah! Thanks for notifying me. There was definitely an unusual glitch, but everything seems to be working now. Your email address will not be published. This site uses Akismet to reduce spam.
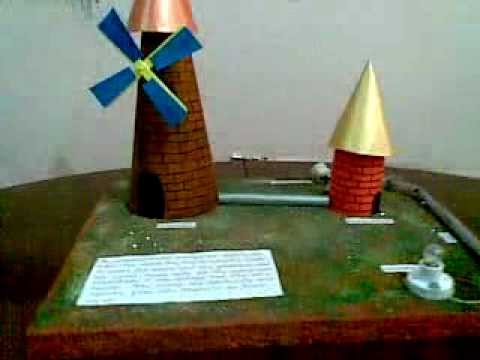
Learn how your comment data is processed. Join our mailing list to receive the latest updates on our projects, printables and promotions. We have something fun every week! Creating educational games, paper crafts, shadow puppets and other toys. I love my family, books and dark chocolate. Making a craft that actually moves is sure to entertain even the youngest of kids, and with the help of a household fan, our windmill flew.
Now, what dolly can I put inside? How does the number of blades affect the speed of rotation? How does the pitch? And the distance from the fan? How to Make a Windmill Model. Sarah Norsworthy on August 24, at pm. Edit this Article. We use cookies to make wikiHow great. By using our site, you agree to our cookie policy. Cookie Settings. Learn why people trust wikiHow. Download Article Explore this Article methods. Tips and Warnings.
Things You'll Need. Related Articles. Article Summary. Method 1 of Create your side templates. Draw a polygon shape on a large sheet of cardboard or paper. If you use paper, use a heavyweight paper such as butcher paper or posterboard. The shape should be 9 inches on top, 12 inches on bottom, and 20 inches tall. Cut out the template. This will be used to create the sides of your windmill.
Create the template for the top. Draw a hexagon with 9. Cut out the hexagon template. This will be used to create the platform at the top of your windmill.
Create the template for the blades. Cut out the template as one piece, making sure not to cut into the square shape. Transfer your template shapes to the plywood. Place the templates on your sheets of plywood. Use a carpenter pencil to trace the shape of each template onto the wood. It is best to trace all the pieces you need onto the plywood before you start cutting.
This way you make sure that you have laid out the pieces efficiently and have enough wood to complete your project. Cut out your shapes from the plywood. Place the plywood onto two sawhorses for stability. Circular saws are faster than jigsaws for long, straight cuts, but they cannot produce small shapes.
If you have both, use a circular saw to cut out the sides and a jigsaw for the other pieces. Solid wood dowels such as oak or poplar will be the sturdiest. You can often find short dowels at craft supply stores, but you can also use dowels from hardware stores. The wooden dowel should be able to fit snugly inside these holes. Sand the pieces.
This step will give your wood a smooth, even finish. It will also prepare the wood for painting or staining. Paint or stain the pieces. You can choose a vivid color for your Dutch windmills, or you can use a natural wood stain to show the beauty of your wood. Once you have painted or stained your pieces, let them dry completely.
This may take hours, depending on the humidity in your area. If you use paint, choose an outdoor latex paint. If you use stain, follow it with at least one coat of clear polyurethane in order to provide weatherproofing.
Construct the windmill body. Place one of your six sides on a flat surface such as a worktable or level floor. The short end should be at the top, and the long end at the bottom. Place another side piece next to this one, also with the short end at the top and the long end at the bottom. Place a pencil between these pieces and push the wood together to form a gap the width of the pencil.
Repeat this process with the remaining side pieces until you have laid all six side by side. This will keep your side pieces together while you form the body shape. Set the windmill body upright.
You may want to have a friend help you with this step. With the taped side facing outward, bring the edges of the body together to form a closed tower shape. Test on a flat surface to make sure that the How To Build A Toy Excavator 40 body is sitting level. If the body is not level, mark which piece s are too long and sand them down to stabilize the body.
Sand gradually and check your work often. Apply wood glue to the top rim of the body. Place the hexagonal top onto the body. Press firmly, taking care not to push so hard that you collapse the body pieces. Set this aside and allow glue to dry completely. Flip the windmill body upside down.
Apply wood glue to all seams inside the body. Set aside and allow the glue to dry completely. Once the glue is dry, use a small chisel to scrape away the excess glue. Apply wood glue around the seam. Allow to dry completely and then scrape off excess glue. Center the line in the middle of the hexagonal top. Pre-drill a hole at each end of this line. Screw in two screw eye hooks, adjusting so that the eyes are parallel.
Attach the blades to the body. Slide the wooden dowel through both eyelets. The blades should have enough clearance from the body to spin freely. Apply wood glue to the inside of the center hole in the small wood circle and place it on the other end of the dowel. Paint on final details. You could also paint on flowers, animals, or other things you find appealing. Method 2 of Using medium-grain sandpaper, sand the edges until smooth.
Use a jigsaw to cut out the circle. Divide the circle into 8 equal sections. Use a pencil and a ruler or straightedge to draw a line that divides the circle into two halves. Draw another line that divides it into quarters. Then draw two more lines to divide those quarters in half.
This should be the spot where all the lines you just drew intersect. Draw degree angle marks on the rim of the circle. Begin at each of the lines you drew in Step 3 and use a pencil to draw degree angled lines across the edge. Flip the circle over.


|
Mini Grinder Carving Kit 50 Woodcrafters Supply Water |

EMRE
08.08.2020 at 14:50:48
O1O
08.08.2020 at 20:51:43
PREZIDENT
08.08.2020 at 19:13:46
10
08.08.2020 at 22:21:30
Ramincik
08.08.2020 at 10:16:48