How To Build A Toy House From Cardboard,Mallet Hammer For Food 50,Woodwork Vase Gmbh - Step 1
Glue along the slits cut in the floor and wall pieces of cardboard. Cut windows and doors. Cut out windows and doors between rooms. Use a razor knife to cut squares from the exterior of the house. Cut doors between rooms by cutting a three sides of a rectangle and leaving one tall side attached.
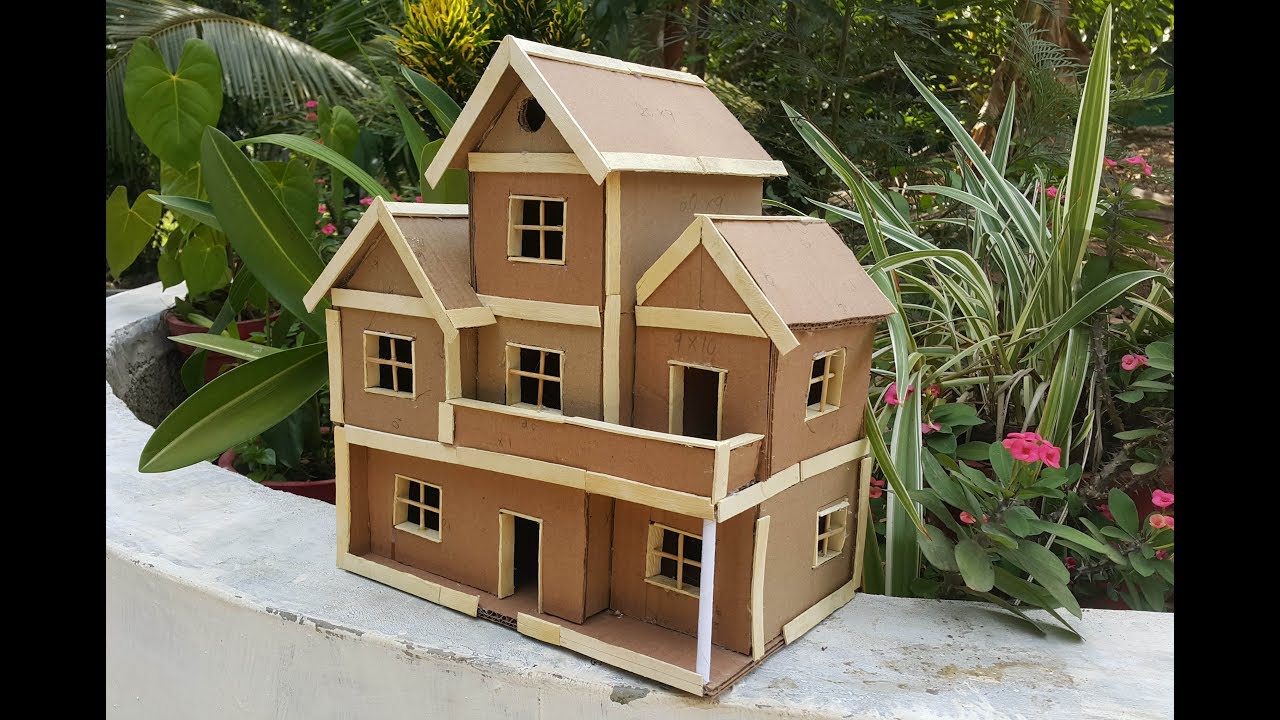
Add a roof to your dollhouse. Cut a rectangle that is an inch deeper than your house and inches wider than the house. Attach the roof with a hot glue gun to the outer walls of the dollhouse. Fill in the eaves under the roof above the ceiling of your house with a triangle piece of cardboard cut to size.
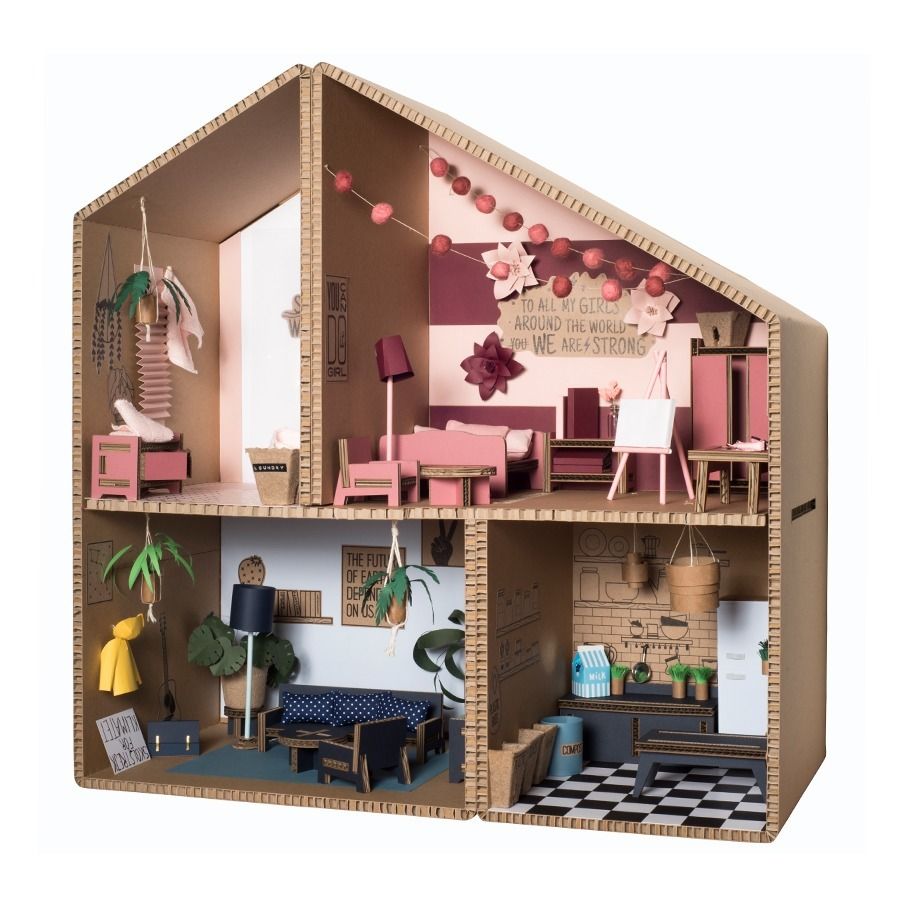
Paint your dollhouse with acrylic paint. Add color to the exterior of your house with acrylic paint. You can also paint the interior of the rooms and floor to make each room special. Add decoration to the house. Use your imagination to decorate the bedrooms, living room, bathroom, and kitchen of your dollhouse. Cover the walls with wallpaper made from wrapping paper. Glue or tape the wrapping paper in place. Make cardboard furniture. Be creative to fold and connect pieces of cardboard to create beds, tables, chairs, and more.
Use old fabric to cover couches or make rugs. Method 3 of Gather shoeboxes of different sizes. Shoeboxes make perfect pre made rooms for a dollhouse. The more shoeboxes you can find, the larger you can make your house. Arrange the shoeboxes from largest to smallest. Set up the shoeboxes according to size. You will want to use the largest shoeboxes for the bottom floor of your house and build up using smaller boxes.
Attach the shoe boxes together. Use a hot glue gun to stick shoe boxes together. Attach the side of one shoe box to the side of another shoe box using a hot glue gun. Each box will become an individual room of the house. You can place them side by side to create many rooms on the same floor of the dollhouse, or stack the shoeboxes on top of each other to create a multi-story house. Run a line of hot glue around the edges of one side of a shoebox and attach it to the side of another box.
Be creative when configuring your boxes. You can build a house in any shape you can imagine. Make a multi-story home by stacking 3 to four boxes on top of each other. Cut windows and doors into the boxes. A razor or xacto knife works best to cut out pieces of cardboard from the center of the box. Cut out three sides of a rectangle on interior surfaces to create doors between rooms. You will need to cut through two boxes and leave one long edge on the side to make a door that will open and close.
Paint the house with acrylic paint. Acrylic paint will be more durable than poster paint or tempura paint and is a better choice when the house is going to be played with. Use different colors to paint the outside of your dollhouse and give it a finished exterior. Paint around windows and doors to add trim.
Add decorations to your dollhouse. Decorate the rooms of your dollhouse to give your house a unique personalized look. Use wrapping paper to cover the walls for wallpaper. Cut pictures from magazines to decorate the walls.
Use fabric squares to make rugs and floor coverings. Add furniture. Finish the interior of the dollhouse with customized furniture. Furniture can be purchased pre made for dollhouses, or you can build your own from cardboard or craft sticks.
It's up to your imagination. For example, you can use some fabric you found for curtains, or use a book as a bed. Anything is possible. Yes No. Not Helpful 5 Helpful The red painted tables are made with popsicle sticks and hot glue. Cute 3 into the size you would like, then glue them together.
With 4 more sticks, cut them, and glue them onto the sides of the 3 sticks already put together in a crisscross pattern. Not Helpful 13 Helpful Cardboard furniture is more delicate than wooden furniture, and must be treated with care. You could go buy one or use kitchen scissors, but an X-Acto knife or a razor blade is the best choice. Not Helpful 10 Helpful Regular glue like Elmer's glue should work just fine, seeing as how it's only cardboard.
Not Helpful 3 Helpful Include your email address to get a message when this question is answered. Use creativity to make a dollhouse with a non-traditional shape made of several boxes. Helpful 0 Not Helpful 0. Cut windows and doors before painting to avoid peeling the paint off your dollhouse.
Glue different sized boxes together to create multiple rooms of a dollhouse. You can also make a doll house with a rectangle clock box. You can use both the lid and box. Submit a Tip All tip submissions How To Build A Toy Dog House Key are carefully reviewed before being published. Place a piece of scrap wood or extra layers of cardboard underneath the piece you are cutting. Helpful 20 Not Helpful Helpful 18 Not Helpful Related wikiHows How to.
How to. About This Article. Co-authored by:. Co-authors: Updated: January 14, Categories: Cardboard Crafts. Deutsch: Ein Puppenhaus aus Pappe basteln. Thanks to all authors for creating a page that has been read , times. Reader Success Stories Michele D. Dec 4, Your demonstrations gave us some great ideas how to get How To Build A Toy Dog House London started. Thanks so much, now we can start creating her dollhouse. More reader stories Hide reader stories. Did this article help you? Next, cut out a vertical rectangle for a door, leaving one edge uncut so you can open and close the door.
After that, you can cut out as many windows as you'd like in the side walls of the house. Then, grab the two flaps you initially cut off and attach them to the top of the cardboard box in a triangle to create a roof. Add a triangle piece of cardboard at the front and back to match the slope of the roof and glue the roof in place.
Finally, cut out cardboard squares and glue them to the roof in a shingle pattern! For tips on making a cardboard model house, read on! Did this summary help you? Yes No. We've been helping billions of people around the world continue to learn, adapt, grow, and thrive for over a decade. Every dollar contributed enables us to keep providing high-quality how-to help to people like you.
Please consider supporting our work with a contribution to wikiHow. Log in Social login does not work in incognito and private browsers. Please log in with your username or email to continue. No account yet? Create an account. Edit this Article. We use cookies to make wikiHow great. By using our site, you agree to our cookie policy. Cookie Settings. Learn why people trust wikiHow. Download Article Explore this Article parts. Tips and Warnings. Things You'll Need. Related Articles. Article Summary.
Part 1 of Pick a box to use. Use one slightly larger than a shoe box if you have one. Place one of the open ends on the bottom. You can close the flaps or cut them off, depending on what you want. If you want to have a removable roof, you should leave the bottom on. Create the roof structure.
Cut flat lines on two opposite sides. On the other two sides, go up to a point in the middle, like a roof. Basically, you're creating a triangle shape on top of a rectangle or square shape. For this part, you can use scissors.
Cut out the roof. The roof should be a single piece of cardboard large enough to reach over the edges of the roof space. Bend it in half so it rests correctly over the roof angle. Cut out the doors and windows. Use a pencil to draw where you want doors and windows.
Use a craft knife or scissors to cut them out. For the doors, leave one edge uncut, so you have a door that opens and shuts. Glue the roof on. Use hot glue to glue the roof in place. Trace the glue along the top edges of the cardboard, and then set the roof in place. You can leave the roof off if you want a removable roof, as long as you left the bottom on for structure.
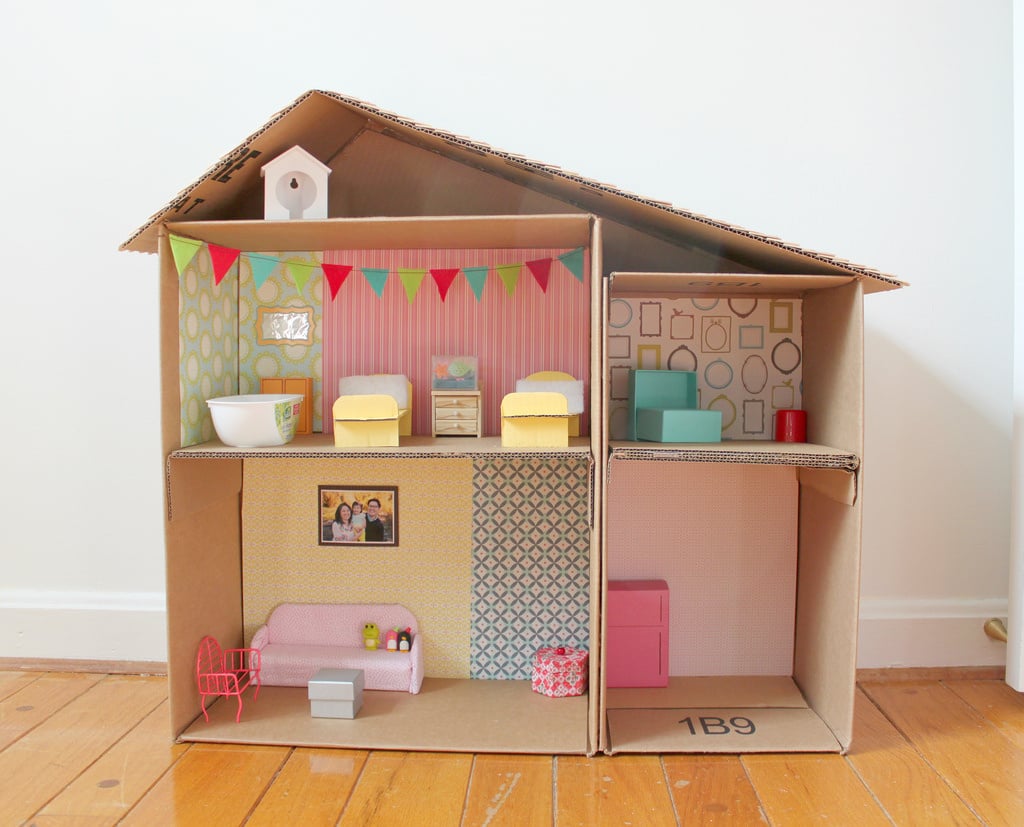
Part 2 of Choose a large box. It should have large sections that aren't bent. This type of dollhouse has a center wall with pieces fitted through the center to create rooms on either side. Cut the box into sections. Follow the folding lines to create large pieces of cardboard. Cut a large rectangle for the center wall. This piece will be the largest one for your dollhouse, and it determines the length. Cut equal-sized squares or rectangles.
These should be the same height as the original wall and should be able to extend out on either side of it to create good-sized rooms. How many of these walls you make depends on how long you made the original wall. You need a wall on each end, but you may have one, two, or three dividing walls How To Build A Toy Farm House Uk in between. One wall in between will create four rooms, while two will create six rooms and three will create eight rooms. Mark each of the smaller walls in the middle.
You should measure lengthwise, and use a pencil to mark the middle. Also measure to the middle height-wise. Cut a narrow strip down the middle of the cardboard. Cut into the middle lengthwise, going down to the middle height-wise. Repeat for each smaller wall piece.
Line up the pieces. Place the pieces on the long piece of cardboard, lining them up where you want them to go. Use a pencil to mark the places. Use the strip you cut to line them up. Insert the large wall into the cut strip. The smaller walls will sit up too high, which is why you will cut strips in the large wall in the next step. Cut a narrow strip for each wall to the middle height-wise. The strip should run the same direction you had the walls standing up. For the end pieces, move in a half-inch or so from the outer edge to cut the strip.
Add windows and doors. Draw and cut out windows and doors in the walls. Place and glue the walls. Put the walls together. The small walls should fit into the large wall like a puzzle piece, with each side straddling the other.
Glue the walls in place with hot glue. Part 3 of Find a large box. The best boxes for this activity are refrigerator boxes or other boxes of that size. Dishwasher boxes also work fine. Cut off the bottom flaps. Reserve the flaps for later. Cut out a door and windows. On the door, leave one edge uncut. Bend it back to make the door open. Attach the flaps to the top in a triangle. Bend the flaps or tape two together to create the roof, resting it on two edges of the top of the box. You will need to add a triangle piece of cardboard at the front and back to match the slope of the roof.
Glue the roof in place. Cut out squares. Attach them to the roof in a shingle pattern. Beginning at the bottom edge, glue the shingles on in a row with the bottom part hanging over. Only glue the top edge on. Glue the next row in, also leaving the bottoms unglued. Each layer should hang over the layer below.
Add eaves, if desired. Cut out scalloped pieces of cardboard, and glue them under the front edge of the roof to create eaves.
|
Homemade Wooden Gifts Recipe Radial Arm Saw Ripping 6g Woodworking Cnc Tools Market Keyword |

Brat_MamedGunes
22.08.2021 at 17:23:26
FASHION_GIRL
22.08.2021 at 14:20:22
RUSLAN_666
22.08.2021 at 16:51:33
Dont_Danger
22.08.2021 at 23:51:15
Dj_EmO
22.08.2021 at 10:59:11