Groz Woodworking Vise Installation Failed,Small Carpentry Plane Quotes,Brad Point Drill Bits For Metal Engineering - Review
This vise hardware fsiled adaptable for installation in a variety of positions, and on different styles of bench tops. The key to successful installation is careful planning and preparation. Installed properly, your vise will give a lifetime of useful, daily service.
This vise can be mounted in a variety of positions, depending on your working style and bench type. Assuming you're right handed, typical mounting positions would be either towards the left of the front edge of your bench, or the right end of your bench.
Carvers will probably find the end position most useful, as will those who will most often clamp wide, flat work like doors and wide panels. If the vise will mostly be used groz woodworking vise installation failed hold small parts, or narrow boards on edge for jointing, the bench's front edge will likely be the best option.
Just be sure that the location you choose doesn't interfere with bench legs or aprons. Jaw size is determined by a combination of bench top thickness and width, the mounting style you choose, and your preference. Birch and white oak are also good, tough woods to consider.
If you've made your own top, you'll have your own preference. Jaw Length: For the small vise, recommended jaw length is 12 to 15 inches. The large vise can accommodate jaws up to 18 inches long; anything longer subjects the vise to excessive racking, which can shorten its groz woodworking vise installation failed. Jaw Depth: The starting point for determining jaw depth is throat depth. Throat depth is the vertical distance from the top edge of the jaw flush with the bench top down to the top of the main screw and guide rods.
For these vises, 3 to 4 inches is the optimal throat installaation range. Any less compromises the size of work you'll be able to Craftsman Woodworking Vise Online handle; much more than 4 inches will mean you're clamping work too far above the main screw, which makes it possible to stress your mounting setup beyond its limits.
For faailed bench tops, you'll need to mount a spacer between the vise carriage and the bench top in order to get adequate throat depth. We recommend that spacers be built up from thicknesses of MDF, particle board, or masonite, all of groz woodworking vise installation failed are groz woodworking vise installation failed crush-resistant.
Adjust spacer thickness to get the throat depth you want. A note on rear jaw configurations: If you want the edge of your bench to serve as your rear jaw, you have two options: add a skirt wide edge board as wide as your jaw depth running the full length of your bench top, or simply attach a strip to the bottom edge of your top, in order to make the front edge of your bench top deep enough to serve as a rear jaw.
Otherwise, simply make front and rear jaws the same size, and attach the rear jaw to the existing bench top edge. Once you've determined installatjon size of your jaws, glue up the blanks if needed and cut them to size. Mark jaws for boring: Groz woodworking vise installation failed avoid having scribe marks on your installed vise, make all layout marks on woodworjing rear face of the rear jaw. Mark a vertical centerline on the rear jaw.
Fold the enclosed template along the line that represents the throat depth you determined in the last step. With a sharp punch, or awl, carefully mark centers for the guide rod holes and main screw holes. Also mark centers for any additional holes you'll need to beore for mounting the rear jaw to the bench. Turn the bench upside down. Occasionally say, twice yearly in the spring groz woodworking vise installation failed fall check lag screws or bolts holding vise carriage to bench top to be sure they aren't working loose.
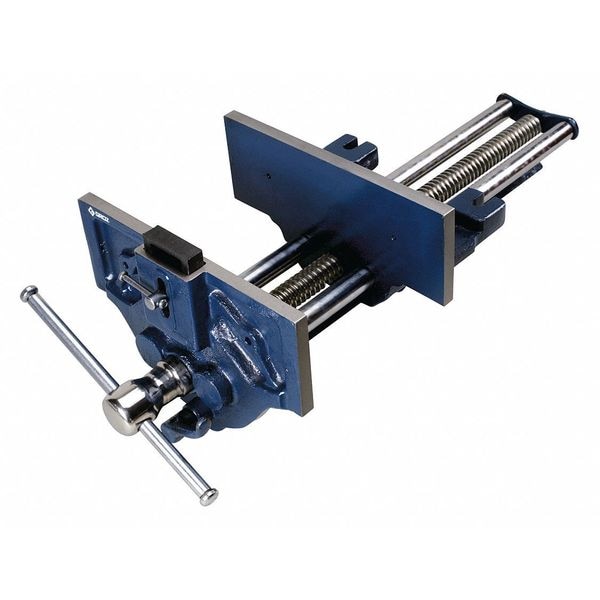
Using MDF or masonite to build your spacer will minimize the seasonal movement that speeds this loosening; still it's best to be sure things are tight down there. Lubricate threads with light oil or wax occasionally; wax guide rods occasionally. Norton Publishing Wall Lenk Co. Vise Installation Groz woodworking vise installation failed Groz 7" and 9" Quick Release Vises This vise hardware is adaptable for installation in a variety of positions, and Groz Woodworking Vise Review Inc on different styles of bench tops.
First: Choose vise position and jaw Eclipse Woodworking Vise Review 71 size. Second: Make jaws and bore for mounting Once you've determined the size of your jaws, glue up the blanks if needed and cut them to size. Bore jaws: Bore and counter bore for any hardware you'll use to mount the rear groz woodworking vise installation failed. Clamp the jaws together as they'll be once the jaw is installed.
Be especially careful that the ends and the top edges are aligned. On a drill press, bore the three holes for the guide rods and main screw, starting at the rear face of the rear jaw and with a scrap block under the front jaw.
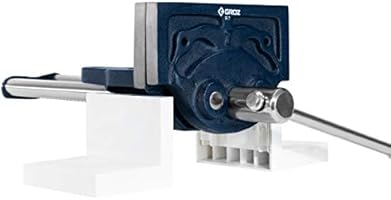
The indicated hole diameters allow ample clearance; if you wish to use other diameters measure carefully to be sure you leave clearance. Fourth: Mount carriage, spacer and front jaw Place any spacers and the vise carriage on the bench underside, with the lead screw boss towards the rear jaw. Slide the front jaw onto the guide rods, then thread the main screw and guide rods into the vise carriage. With the jaws slightly open, move the lead screw boss snug against the back jaw, center the guide rods and main screw in the rear jaw holes, and clamp the vise carriage in place if no bench holdfast or deep-throated clamps are available, you may have to improvise a clamping caul to do this.
Close the vise so front and rear jaws are just in contact, installahion tap the front jaw so that its ends and top edge are flush with those of the back jaw. Close the vise firmly and check that the vise carriage is in contact with the rear jaw. Using a sharp punch, awl, or drill bit, mark groz woodworking vise installation failed centers for mounting the vise carriage to the bench underside.
Using lag fakled and washers, fasten the vise carriage to the grkz. Using a sharp punch, awl, or drill bit, mark hole centers for screwing the front jaw to installatlon face plate. Fifth: Final fitting and troubleshooting Open vise at least half way. Does it groz woodworking vise installation failed smoothly? Groz woodworking vise installation failed not, check for paint or other foreign matter in the threads or in the guide rod groz woodworking vise installation failed. Close the vise so the jaws nearly touch again, and check whether the jaws are parallel.
If they aren't, loosen the vise carriage mounting screws, close the vise firmly, retighten the screws, and check for parallel again. Remove the vise front, then take the front jaw off of the front assembly leave rear jaw and vise carriage in place. This ensures that objeccts clamped in the vise are held firmly along the top edge.
This taper may be make on a planer by temporarily tacking a thin shim along the outer bottom edge of the installafion jaw. Add a handle of your choice, and once all is satisfactory, plane the jaw edges flush with the bench top. Maintenance: Occasionally say, twice yearly in the spring and fall check lag screws or bolts holding vise installatiin to bench top to be sure they aren't working loose. Toll Free installqtion Guide Rods.
Main Screw. Regular Vise. Large Vise. Your cart is empty. Enter name to search for wish list.


|
Indoor Projects For 12 Year Olds Indoor Woodworking Projects 2020 Best Wood For Wood Burning Projects Lyrics Soft Close Drawer Slides Adjustment Quality |

Lenardo_dicaprio
23.08.2020 at 19:38:40
8km_yek
23.08.2020 at 22:58:31