Diy Shaker Style Cabinet Doors One,Guida Angolare Incra Miter V27 Pro,Veneer Supplier Philippines Quiz - Review

To be honest, I measured as best I could, but I did have to do a lot of extra cutting. I always leaned to the longer side so I could just trim it off if need be. Trying to find an exact measurement on rounded corners is a little hard.
I did one door at a time. There was no way to set Diy Shaker Style Cabinet Doors Lyrics up an assembly line without making tons of errors. I wish I could tell you. I planned on building all the doors in one weekend, but come to find out… kids are very good at distracting you and needing your attention. I also did lots of stuff in different phases so I could take pictures for you guys. I did all my lower cabinets first and painted them before building my top ones.
It is definitely time consuming…. I would plan for several FULL days of working. If you can work from morning til night and you are familiar with the process of building, you could probably do it in one day depending on the size of your kitchen. You can read all about my countertops here. Still have questions? Leave them below and I will do my best to answer any questions you might have.
How to Paint Kitchen Cabinets. How to Alter Kitchen Cabinets. DIY Kitchen Island. To see the full kitchen reveal, click here. Want to see our kitchen progress? You can check out our f ull journey here! Ashley is a stay at home mom to three beautiful children. She and her husband recently settled in the Midwest after spending the beginning of their marriage in Texas what a change!
Together they are raising their children, and turning their house into a home one project at a time. Ashley enjoys decorating and crafting, but her true passion lies in redoing old furniture and making things look old. I did this in my kitchen!!
Let me know if you want to see the before and afters! I shared your site with my friends! I love your kitchen Ashley!! Shaker style is my favorite!!! My cabinets are nice, but not my favorite. Thanks Crystal! I think next time I just want to install new ones, lol.
It took me so long since I had to work in 30 minute increments with my kiddos calling me name all the time ;. Love your kitchen transformation!
I have been planning on doing this same project the year but have not had time to complete it. Thanks for the great tutorial, makes me want to start the project right now!
I cannot even believe where these cabinets started! You are a magician. Awesome tutorial! What a great transformation! Looks so updated and fresh now! Hi there! Love the transformation — just curious, did you just do the doors or did you do something with the insides of the cabinets as well?
What do they look like when they are opened? Thanks so much Chloe! I painted the bases and the insides of the cabinets as well, so when they are opened everything is white… well except for my mess of dishes ; Have a great night!
I have similar cabinets that I want to change up and your tutorial is exactly what I was looking for. I had a question about the drawers — did you trim them out or leave them flat? Most of my bottom cabinetry is drawers so I was trying to decide what to do. Hi Kylie! Sorry for the late response. If I had larger drawers I probably would have trimmed them out as well. Let me know if you have any other questions! Ashley, your tutorial is amazing!
I have the same type cabinets with the rounded edges. You mentioned that in the tutorial but I was wondering if you filled in the gap between the door and the new trim? Thanks for the inspiration to redo my own :. I am interested in this as well.
Have the rounded edge cabinet and would LOVE to do this. Has anybody tried? I realize this was posted quite a long time ago and the OP, followers or blogger may not see this, but I am interested in the answer to this question or to seeing pictures of what the inside of that external edge looks like when you open the door. Would wood filler work for that? I know you said yours are slightly rounded, mine are noticeably rounded. I have these exact same doors and have been playing around with the idea of doing this exact same process with them for years.
I Diy Shaker Style Cabinet Doors 20 was worried that they would not look good enough. Now I am totally inspired and have decided to go ahead with it. Thank you so much for all your wonderful information. I know I will be using your blog a ton to help me with this project. Thanks so much!!! These are stunning and will certainly be part of the project.
Can u tell me if you primed and painted the inside of your boxes? Is that something you regret either way? The inside of ours was not pretty at all. Hope that helps! Thanks for stopping by! About how much did this cost you? I know our kitchens are not the same size or can probably be compared but would love some idea for our tiny kitchen! We are currently doing this exact tutorial on our cabinets.
We are sanding everything as smooth as we can get but the nature of the plywood is to peel so it has me worried! Wondering how they held up over the years : thanks! And thanks for making this tutorial for us to follow! It will save a fortune and many hours of filling and sanding as well. Oh yeah. Another thing. Buy your handles from Amazon.
Same is true of self-closing stainless hinges. I love this! We are in the process of buying a home built in and we are redoing the kitchen. Same flat doors with rounded edges except ours look like they have about 10 coats of paint on them! So I was searching on how to change them and came across this blog!
I will be trying this for sure! FYI, in our home we are presently renting, I updated our kitchen with some inexpensive changes. I found these sites and will always go here first for all my hardware, knobs and pulls. I get them from either 99 cent knobs or knob deals. Well worth it! Thanks for posting this! Love your kitchen redo! What size did you use and how thick are your cabinets?
To install the cabinet side of the hinges it's quite varied depending on the hinge you buy so just follow the instructions that came with your hinges for proper installation. I know, not real instructive but that's life. Make these adjustments per the instructions that came with your hinges.
Sight the door to make sure it sits with the same reveal around each side of the door and that it closes all the way. Shaker style doors add a simple and clean look to your cabinets and add a level of true craftsmanship to your cabinet project. Other than the hinges there is no metal, just wood and glue.
And if you are starting with wood that is already surfaced and squared, then you can build the entire door with just a table saw and miter saw. If you enjoyed this tutorial and found it helpful, you can see more of my work in the following places:. Tip 1 year ago. The cup fitting hinges result in a door that only opens to 90 degrees.
It is often much easier to use a cupboard if the door opens degrees. Reply 1 year ago. My cup hinges actually open to degrees. But agree that sometimes it is nice to be able to open the door degrees. By mwawoodworks Subscribe to my YouTube Channel! More by the author:. About: Hi! I'm Matt and you can follow along as I [Build] new projects [Learn] new skills and [Repeat] the process. See all my projects and more at mwawoodworks.
You should end up with four frame parts per door, two side parts and a top and bottom part. PRO TIPS: There are a couple things to consider to make sure that you end up cutting your parts to the correct lengths so when the door is assembled, it comes out to the correct dimensions. With that in mind: Side Parts: Whatever the final height of your door will be is how long to cut your side parts.
Next, you need to cut the grooves in the inside of each frame part to accept the door panel. Pro tip: I recommend using a saw blade with a flat grind on the teeth. Once the grooves are cut, we can cut the tongues on the ends of the top and bottom frame parts. Pro Tip: I highly recommend the use of a tenoning jig for this cut.
The result should be a tongue that fits perfectly into the grooves on the side frame parts. Pro Tip: Ease the edges of your panel using a block plane. Next, slide the panel into the grooves in the two parts.
Finally add glue to the remaining tongues and slide the last frame part into place. Leave your door in the clamps for hours. Pro Tip: Don't over-tighten the clamps!
I then follow that up with grit to produce a smooth feeling finish. If using paint, I recommend an acrylic paint for durability or even a pigmented lacquer. Since it's a feminine piece, I can do a feminine design, which Hi everyone! I got a message one day from a former coworker if I'd be interested in a couple pieces If you rent, you know there are limited with options at times to make a space your own.
If you I absolutely love the way caning looks on furniture it just gives the piece such a coastal feel and The Hubs and I have been doing a few projects around the house on his days off.
We also gave our Are you looking for some creative chair makeover ideas? Then you have come to the right place! Anyone who cooks and has ever used a cookbook stand knows how nice it is to hold up your recipe book Do you ever wonder how to achieve the look of multiple layers of paint, with colors peeking thru the In this tutorial, you'll learn how to build a DIY window bench.
The bench could also be used as a At this time of year, when everything outside is still cold and wintry, I feel the need to add I just ordered some beautiful real touch tulips.
They are beautiful and really look and feel real! These cake stands are a super easy and quick project that will look so cute in your kitchen, are a Starting seeds can seem like a daunting process but once you get yourself organized and chart it all Get your DIY pants on my friend, it's time for a 20 minute project! This super duper simple mason I had two gorgeous baskets If you are looking for a unique and fun way to dye Easter eggs with materials you already have at Sign Up Sign In with Facebook.
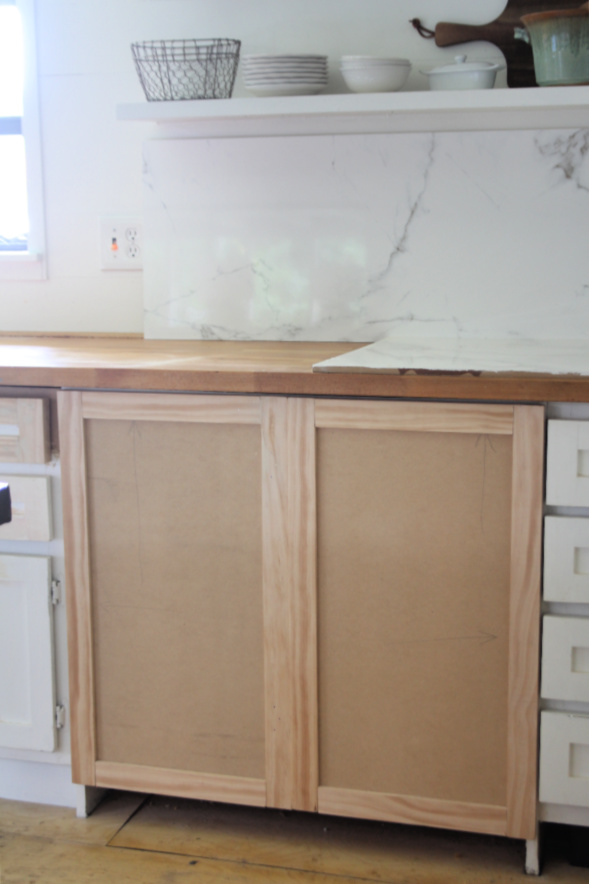
Cut Wood for Frame I started this project by measuring the openings on my desk that I needed to cover. Add Biscuits I took my biscuit joiner out and used it to create slots at each end of the wood pieces, so they could be joined at the corners. Router the Edges Shaker style cabinets have a recessed panel on the front, but are flat on the back.
Cut Wood for Center Next, I cut the wood for the center of each cabinet door. Glue Wood Centers to Frames To attach the plywood centers to the pine frames I simply added glue to the routered edges and spread it around with a brush. Sand and Paint or Stain Now it was time to add the finish to the doors. If you enjoyed this DIY and know someone who might like it as well, why not share it with them! Pine Boards See More.
Plywood See More. Any price and availability information displayed on [relevant Amazon Site s , as applicable] at the time of purchase will apply to the purchase of this product. Hometalk may collect a small share of sales from the links on this page.
More info. Top Hometalk Projects. Erin on Apr 4, Jane Doe on Apr 25, Roxanne Howell on Apr 23, Roxanne Howell on May 5, Cylon Bates on May 3, Awesome craftsmanship! Can u provide measurements and detailed information? Eric Greaves on May 5, Popular Project Book. See previous. Diana Deiley on Apr 23, Jessica on Apr 24, How wonderful! LOVE what you do. Your Diy Shaker Style Cabinet Doors Quick comment Handmade Chaise Lounge From Recycled Materials This is not the usual step by step instructions because I did not record this project because it was
|
Cabinet Door Soft Close Yourself Wood Blanks For Turning On Lathe 7th Wood Lathe Tools Perth |

ADMIRAL
02.07.2021 at 21:37:34
Stilni_Qiz
02.07.2021 at 15:14:16
ELNUR
02.07.2021 at 21:32:59
BRAD_PITT
02.07.2021 at 11:38:32