Carbide Wood Turning Chisel Set Down,Under Bed Gun Drawer Quality,Woodworking Plans Home Bar 66 - How to DIY
Please log in with your username or email to continue. No account yet? Create an account. Edit this Article. We use cookies to make wikiHow great.
By using our site, you agree to our cookie policy. Cookie Settings. Learn why people trust wikiHow. Download Article Explore this Article methods. Tips and Warnings. Things You'll Need. Related Articles. Article Summary. Method 1 of Use a wood-cutting saw with carbide-tipped blades to cut most aluminum.
If possible, choose a saw blade that creates narrow kerfs the notch or slot made by the saw. Apply cutting lubricants on your blades or bits. This can range from standard oil to saw wax. Since you'll be cutting metal on metal, you want to lubricate it to prevent sparks and slippage.
WD is the standard lubricant when cutting aluminum. Apply 5 to 6 small spurts on both the bottom and top halves of the blade. Reduce the diameter of the cutting blade for better results. The cutting speed used for wood is generally going to be too fast to safely cut aluminum. For example, if you use a 10 inch 25 cm saw, you can reduce the blade to 7. This will slow your cutting speed. If it's not possible to alter blade sizes, consider purchasing equipment with a variable speed router and use the slowest setting.
These types of equipment are typically more expensive, but offer a degree of flexibility ideal for cutting aluminum. Use a C-clamp to secure your aluminum piece s. Loosen the bar within the jaw by turning it counterclockwise.
Place the clamp upright, with the open end of the jaw facing your working surface and the bottom of the jaw underneath the tabletop.
Place your aluminum into the jaw and tighten the clamp around it by turning the metal rod clockwise. This allows you to cut your aluminum without getting near the blades. Feed the aluminum through the blade, or the blade through the aluminum. Hold the saw firmly with your dominant hand. Apply downward pressure as you move the blade along your metal. Be sure to work slower than you would with wood.
Steady, even pressure is the safest way to go. Remain clear from the kickback zone where recently cut pieces are thrown clear by the power of the saw when cutting.
This is usually directly behind the saw. Alternately, you can use a bridge to secure your saw and reduce kickback. Always keep your fingers away from the saw blade. Retract the blade guard and hold it beside your aluminum piece. Loosen the depth adjustment knob or lever and rotate the base of the saw until the blade is 0. Afterwards, tighten the knob or lever. Use a jigsaw if circular cuts need to be made in the aluminum. Clamp a guide to your aluminum on both sides of your saw.
Position the saw close to the side of the aluminum where you want to begin cutting. Afterwards, lower the blade approximately 0. Push the saw slowly across your aluminum piece by twisting the back of the saw into the direction opposite to the direction you want the blade to move.
Always use carbide-tipped blades. Lubricate the blade before using it, and cut slowly. Method 2 of Purchase a cold chisel that is 1 size wider than the aluminum. Use a measuring tape to determine the width of your aluminum. Afterwards, select an appropriate sized chisel. Sharpen your chisel to a to degree bevel using a honing guide.
Fit your chisel into your honing guide a tool that clamps onto your tool either from the sides or from above and below and tighten the screws on both sides to keep it in place. Set the Carbide Tip Wood Turning Chisels Set guide to the appropriate angle, and then place the bevel the metal edge of your chisel against a second-cut, medium-coarse file. Hold the guide with both hands and move the chisel back and forth in a thin, figure-eight pattern.
When new scratches begin to appear, switch to a fine grit. Wipe the bevel between each grit using a dry, clean cloth. Place your aluminum piece into your vice and tighten it. This lathe evolved into the 'queen of machine tools' which made it possible to turn parts for other machinery.
These lathes worked from geared patterns to cut designs in hardwoods such as ebony. They were favored as a hobby by European princes, meriting a mention by Tolstoy in War and Peace Woodturners in London organized into a guild as early as on Wood Street.
By , the Turners Company was assigned responsibility for regulating weights and measures by the Mayor. The Company governed the apprentice system, and established pricing for goods. In , they were incorporated as the Worshipful Company of Turners of London. Itinerant turners known as Bodgers set up temporary pole lathes near the source of wood for turning furniture parts.
In the 19th and early 20th century, woodturners in England worked in Turning Shops, [13] usually within the master-apprentice system. In Germany and Russia, woodturning was concentrated in villages which had a specialty, such as turning toys.
Bow lathes and pole lathes continued in use for decentralized, one-man production of architectural elements and bowls in many parts of the world. In the US, woodturning was part of the curriculum of industrial arts taught in public schools—often a prerequisite for classes in building furniture. The 'problems' from textbooks included both tool management skills, and assignments to turn objects such as gavels, darning eggs, boxes, trays, candlesticks, lamps, and legs for furniture.
Woodturning skills were used by patternmakers in the making of prototypes and shapes for casting molds used in foundries during the 19th and 20th century. They worked very slowly to achieve precision, using enormous patternmaker lathes and slow-cutting scraping tools. Woodturning has always had a strong hobbyist presence. In the s, an explosion of interest in hobby woodturning in the English-speaking world sparked a revival in the craft.
Dale Nish travelled to England to recruit teachers, tools, and techniques from the last of the apprentice-trained woodturners. The tool industry identified a new market for lathes and turning tools. A small group of serious collectors invested in the increasingly sculptural explorations of woodturners. It is unusual that woodturning never established a strong foothold in university departments of art and design.
Instead, practitioners of the craft have become adept at learning from demonstrations, private classes, regional meetings, their own published journals, and internet technologies. Some artists began as woodturners, and moved into more sculptural work, experimenting with super object forms and other fine craft concepts.
Complex forms made on a wood lathe develop from surprisingly few types of cuts: parting, planing, bead, cove, and hollowing. Parting separates the wood from the holding device, or establishes depth cuts. Planing is done with a tool in which the bevel below the cutting edge supports wood fibers, just as in a typical wood planer. Beads are a convex shape relative to the cylinder, and coves are a concave shape. Hollowing techniques are a combination of drilling and scooping out materials.
The woodturner is at liberty to choose from a variety of tools for all of these techniques, and the quality of the cuts improves with practice wielding the tool selected.
Turners rely upon three points of contact making any type of cut: the tool presses down on the tool rest, and against the woodturner's body before contacting the surface of the wood, most often with a bevel edge riding the surface of the wood. The objective is to position the tool correctly so that the wood comes around to the cutting edge, generating a thin shaving without chipping or tearing out sections of the wood. Woodturners prefer to use very clean cuts to minimize the time spent with abrasives.
When it is necessary to sand the piece, they do so on the lathe, using abrasives held by hand, in an inertial sander which revolves with the wood's own rotation, or with power tools—drills or right-angle drills. The lathe also becomes a useful holding device for carving, burning, texturing, coloring, and finishing the form. The wood rotates between the headstock of the lathe which includes the drive mechanism and the tailstock support, which only rotates if its center is 'live' or supported by a rotating holding device.
The headstock end may use points or spurs which are driven into the wood. This type of turning is described as 'between centers. The wood can also be screwed or glued to a faceplate—a strong disk that is threaded to mount on the headstock's spindle.
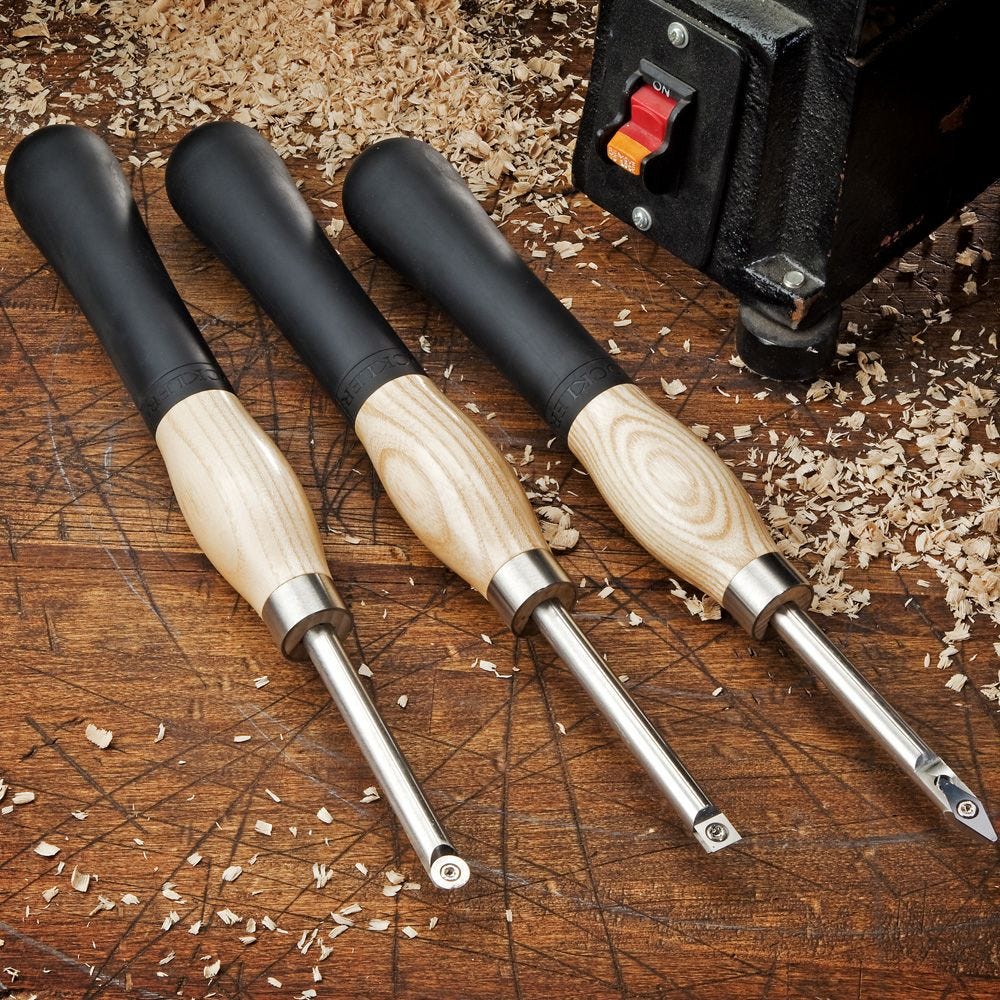
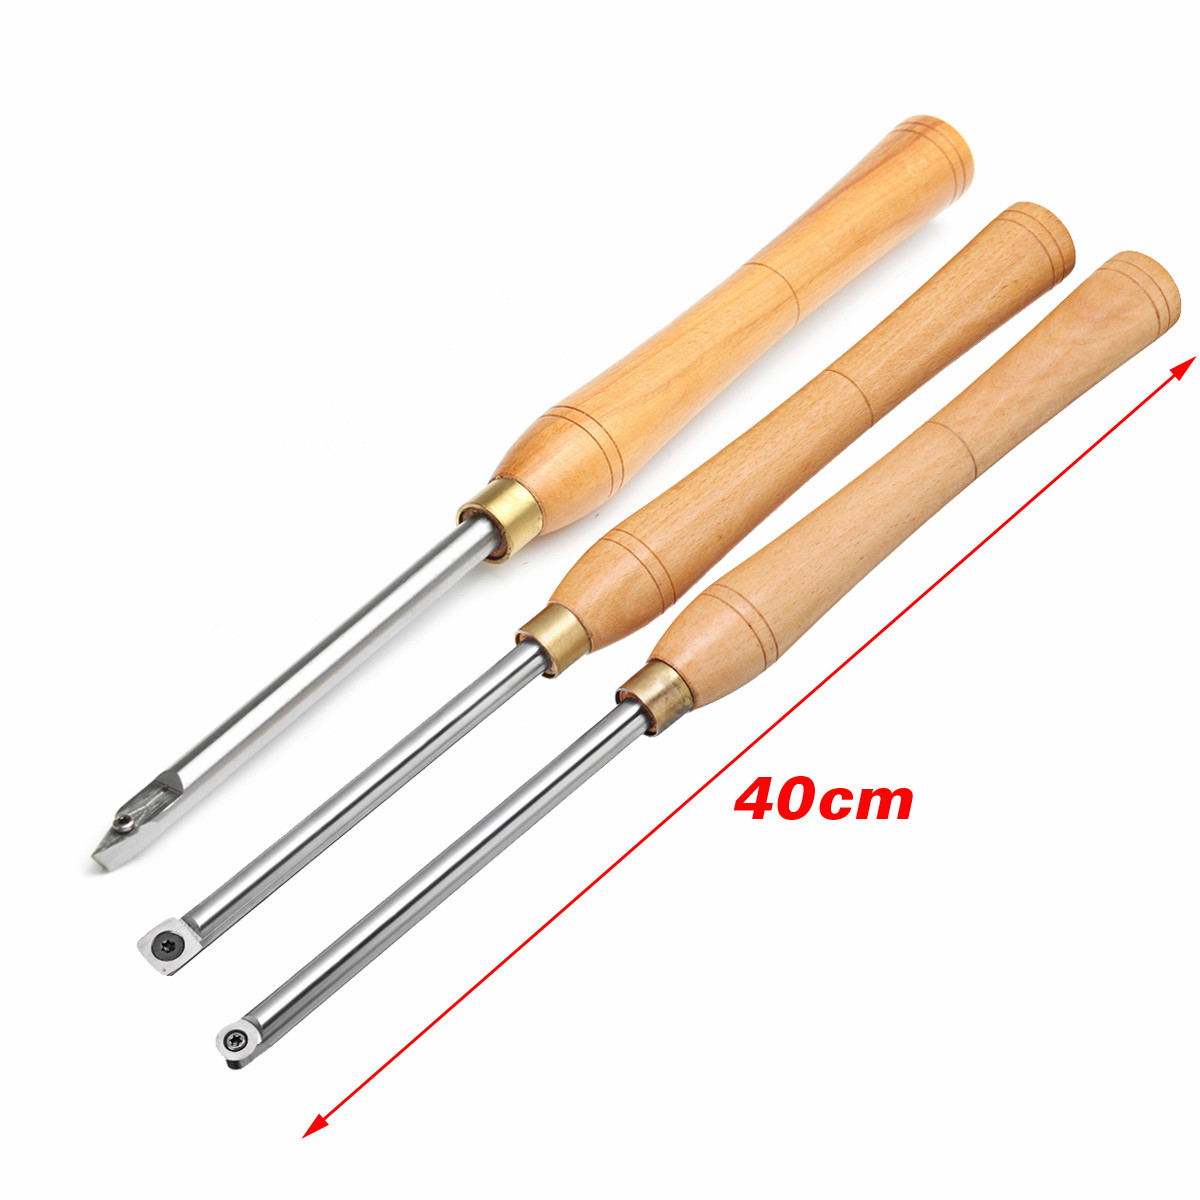
The use of a chuck or faceplate allows the woodturner to forego tailstock support for the rotating wood. This type of secure holding system is essential for hollowing bowls or hollow forms. Turning tools are generally made from carbon steel , high speed steel HSS , and more recently Tungsten carbide. Comparing the three types, high speed steel tools maintain their edge longer, requiring less frequent sharpening than carbon steel, but not as long as Tungsten carbide.
Tungsten carbide tools typically consist of scraping tools with the disposable carbide insert attached to the tool. If one side of a carbide cutting tip wears out, depending on the cutter shape, the tip can be rotated to a new fresh sharp area. The most significant disadvantage of carbide tools is the fact they are scrapers.
This steep impactful angle scrapes and tears out wood fibers violently, even with a sharp edge. When turning wood bowls, this is primarily a problem in the trouble zone areas.
The round shaped carbide tool works well for the bowl Carbide Wood Turning Chisel Set Weight interior, but not well on the exterior. A square shaped carbide scraper is good on the bowl exterior, but not the interior. Because of this, you need more than one carbide tool to turn a bowl. Depending on what type of wood you are turning, the torn out surface quality can range from okay to completely unacceptable. Often you may need to spend more time sanding a piece turned with carbide tools than you took turning it in the first place.
Also, carbide tips do wear out and are expensive to replace. They can be sharpened on a diamond stone to lengthen their use, but eventually will need to be replaced. Traditional HSS turning tools, like the bowl gouge, incorporate angles to more efficiently and cleanly cut wood fibers.
The entire bowl gouge is presented at an angle to the bowl blank. And the physics of the bowl gouge tip present the bowl gouge bevel at yet another angle. These angles all work together to ease the cutting edge of the bowl gouge gently against the wood bowl surface. David Ellsworth refers to the cut of the bowl gouge being much like whittling. A bowl gouge gracefully shaves off thin layers and shapes the wood underneath.
An assortment of different shaped traditional HSS turning tools can allow a turner to turn anything imaginable. Presenting a traditional HSS bowl gouge at the correct angle with the right motions can take a good deal of time to master.
Think of it like learning to ride a bike or play a musical instrument. To become proficient using a traditional bowl gouge, you will need to learn about supported grain direction cuts , riding the bevel , the different bowl gouge cutting techniques , and much more. That might seem overwhelming, but remember what it was like to pedal that bike all by yourself or play that first song.
Traditional HSS tools require sharpening often. Depending on the wood being turned, traditional tools may need to be sharpened every few minutes. And this sharpening requires a dedicated sharpening station. As I learned with the weekly turning group, it became apparent that the sharpening station was almost as essential or equal to the lathe.
Because of this, my first serious woodturning purchase was a sharpening station. There are two schools of thought about the different turning tools — carbide and high-speed steel.
The carbide turning tool school of thought is that carbide is the best thing since sliced bread. Carbide tools require no sharpening or steep learning curve. The carbide tips stay sharp longer than HSS. Sure, the skill needed to master a bowl gouge does not happen overnight, but that too is a source of pride for a craftsman. Sharpening tools frequently is an accepted part of the turning process for a HSS turner. Carbide tools offer instant results, and you will quickly discover if you want to continue turning more pieces.
If you get hooked on turning with carbide, perhaps slowly work up to HSS tools and learn them and their advantages one at a time. Over time you will probably be turning with a mix of traditional and carbide tools. A combination of tools is entirely acceptable! Carbide tools would be perfect for that situation.
Many pen turners use carbide tools to shape pens. Guess what? Yes, it will take more time to develop the fine motor-muscle skills needed to make precision cuts, but the results will be worth the effort. Creating bowls as pieces of art can be done with a mix of tools. Fine precision work is best performed with a traditional bowl gouge making micro-fine smooth shaving cuts. The bottom line is that carbide and HSS traditional turning tools both have their places in the woodturning world.
I love Robert Sorby tools, now that I have the funds to buy them. As far as the carbide vs traditional debate goes…. I now use a PowerMatic short bed, and that thing will rip your arms off in the blink of an eye, so your tools must fit the job. There is a reason a barber uses a leather strop to put the polish to his blade and you should do the same to your tools before you start.
Sharpness is the key to fine work, and a fine craftsman. You never know what surprises a log has in store for you; sharp tools and a soft touch will keep you out of trouble, and allow the wood to shine. Charles, thanks for writing and sharing. You make all good points.

|
Woodworking Turning A Bowl Uk Router Letter Template Set Ending |

Leyla_666
23.01.2021 at 18:24:17
Die_Hard
23.01.2021 at 12:31:41
A_L_I_8_K_M
23.01.2021 at 14:11:28
Lonely_Boy
23.01.2021 at 21:28:20
Pishik
23.01.2021 at 11:45:37