Wood Mizer Sawmill Manual Notification,Types Of Hand Plane Tools Zero,Best Wood Carving Palm Tools Ios,Easy Woodwork Projects For Students Quotes - PDF Review
Install the PC operator guard. M8x16 Bolt Washer M10x50 Bolt Install the blade guides. Adjust the saw head stop bolt, See Section 3.
Tie a knot in one end of the feed rope. Slip the knotted end of the rope into the front rope mount bracket. Route the rope between the saw head and main bed frame tube. Loop the rope around the feed crank spool three times and route back down to the outer v-groove roller.
Route the rope around the outer groove of the v-groove roller. Route the rope to the rear mounting bracket. Tie a knot in the end of the rope and insert into the mounting bracket. Position the knot in the rope so when installed to the rear bracket, the rope is tight. Some assemblies need to be aligned by a user before first usage of the sawmill. Assemblies aligned in factory: Blade drive belt tension; Repeat the bed Wood Mizer Sawmill Manual Youtube rail adjustment with the string at the other side of the sawmill frame.
Make sure the entire face of each slide pad makes contact with the mast. Use the adjustment nuts shown below to adjust the slide pads if necessary. Check the vertical alignment of each blade wheel using the blade guide alignment tool. Attach the tool to the blade near the outer blade guide. Be sure the tool does not rest on a tooth or burr, and is lying flat on the blade. To tilt wheel down, tighten bottom screw loosening ealier top screw. To tilt the drive-side blade wheel down, loosen the top adjustment screw, loosen the nut on the bottom adjustment screw and tighten the bottom screw.
Readjust if necessary. Adjust the spacing between each blade guide roller flange and the back of the blade. See Section 6. Adjust the horizontal angle of the blade guides. Adjust the stop bolt so that, the saw head stops 25mm above the bed. Loosen the nut and adjust the stop bolt C FIG.
Always disengage the blade and shut off the sawmill engine before changing the blade. The teeth should be pointing toward the operator side of the mill when you are looking at the blade below the blade guides.
Make sure the blade housing covers are closed and all persons are clear of the blade. Start the engine or motor. Pull lightly on the clutch handle, rotating the blade until the blade positions itself on the wheels. Do not spin the blade wheels by hand. To adjust where the blade travels on the blade wheels, use the cant control handle. If the blade is too far out, back the blade onto the wheel by turning the cant control counterclockwise. Always wear eye, ear, respiration, and foot protection when operating the sawmill.
Failure to do so may result in serious injury. If at any time you need to immediately stop the blade engine, release the safety button located on the control box.
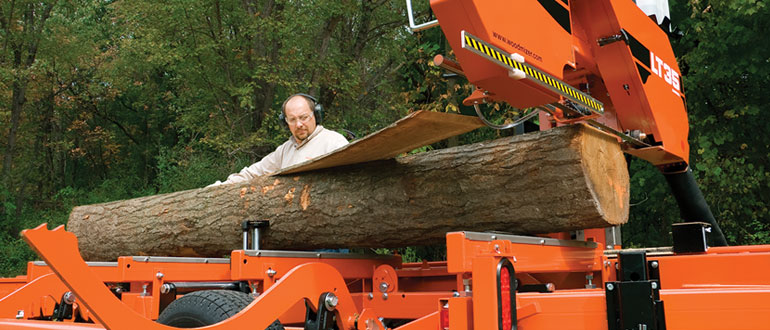
Position the log at the foot of the ramps. Use a cant hook to roll the log up the ramps and onto the sawmill bed. Position the log against the side supports.
Make sure the side supports are positioned low enough for the blade to pass over them. If they are not, back the clamps off slightly and push the side supports down until they are positioned below the level of your first few cuts. Install a blade, if needed, and check for correct blade tension. See Section 3. Set the cutting head to the desired height. The blade height scale shows the height of the blade above the bed rails.
Move the handle right to move the blade arm out. Move it left to move the blade guide in. Make sure all guards and covers are in place and secured before operating the sawmill. The tensioner handle is located next to the engine. To engage the blade, push the clutch handle for- ward. To engage the blade, press the safety switch with your left hand and hold it down.
Then turn the tensioner handle counterclockwise until it locks in the up position. Page Cutting The Log 3. Once the log is placed where you want it and clamped firmly, position the blade close to the end of the log.
Repeat steps Loosen the clamps and remove the boards that have good clean edges on both sides. Clamp the remaining flitches and repeat steps The blade height scale is attached to the carriage head frame.
It includes: a blade height indicator an inch scale Scale Each set represents a specific lumber thickness. Saw kerf and shrinkage allowance are included, but actual board thickness will vary slightly depending on blade thickness and tooth set.
Place bottle assembly in bracket FIG. Route the water hose as shown below. Secure it with the provided hose clamps at the locations marked with red points in the figure. Open the valve on the water bottle to start water flow to the blade. When it is needed, use just enough water to keep the blade clean.
Remove the leg assemblies or adjust them above the bottom of the bed frames. Position the bed of the truck at the end of the frame opposite the saw head. The Short Interval Maintenance Schedule lists procedures that need to be performed every 4, 8 or 25 hours.
The Maintenance Log lists procedures that need to be performed every 50, , , or hours. Clean with solvent and remove any rust with a light-grade sand paper or emery cloth. Page Blade Wheel Belts 1. Check the drive belt tension after the first 20 hours, and every 50 hours thereafter. Drive belt adjustment differs according to the specified motor or engine. See the Wood-Mizer Motor or Engine Option manual supplied with your mill for specific adjustment instructions.
Take a board off the top. This chapter explains how to align the entire sawmill. Care should be taken in performing these steps. Sawmill alignment deter- mines the accuracy and squareness of your cuts. The sawmill alignment steps are: 1. The gullet of the blade should ride the same distance from the front edge of the wheel at the top and bottom of the wheel. Other financing options may also be available through Wood-Mizer or CIT for those not qualified for these special rates.
Visit woodmizer. Cart My Account United States. Portable Sawmills. Portable Sawmills Since , Wood-Mizer has brought personal and portable sawmills to people all over the world who want the freedom of sawing their own lumber for projects or profits. Band Sawmills with Manual Log Handling. Band Sawmills with Hydraulic Log Handling. Extend Sawmill Blade Life with optional Debarker!


|
Laguna Bandsaw 1412 Vs 14bx Vintage Delta Radial Arm Saw Parts Youtube Watco Oil Finish 30 Round Cut Router Jig Cell |

sensiz_geceler
24.05.2021 at 17:12:58
Pussycat_Doll
24.05.2021 at 13:52:23
PIONERKA
24.05.2021 at 19:28:18