Whole Shop Dust Collection Guide,Woodwork Craft Supplies 2020,Build A Toy Box Bench Online,Best Contractor Table Saws 2019 English - Test Out
This article is from Issue 29 of Woodcraft Magazine. When we first work with wood, taking on a small project here and there and buying a power tool or two, addressing the mess of sawdust and chips with whole shop dust collection guide broom and dustpan seems reasonable enough…and cheap. But as our passion grows and the projects become more frequent and involved, our investment in machines increases as well. And so does the sawdust. Eventually, we realize that our paltry militia of maintenance tools falls behind the volume of sawdust and chips.
We ask: Is my shop a candidate for a central dust collection? Can I even afford such a system? And, if so, can I plan and install it myself? With the whole shop dust collection guide system, cleanup at the end of the day may amount to five minutes instead of half an hour or more. It moves more air, has better filtration and pre-separation, and works with gravity to pull dust downward.
The end result: an overall healthier shop environment and reduction of the slippery fine dust on the workshop floor. The downside? This high-end approach would include an efficient two-stage cyclone dust collector with metal pipes and fittings. However, you can work whole shop dust collection guide to a whole-shop system by starting with a quality dust collector and filter and adding ductwork in stages as your budget allows and needs arise.
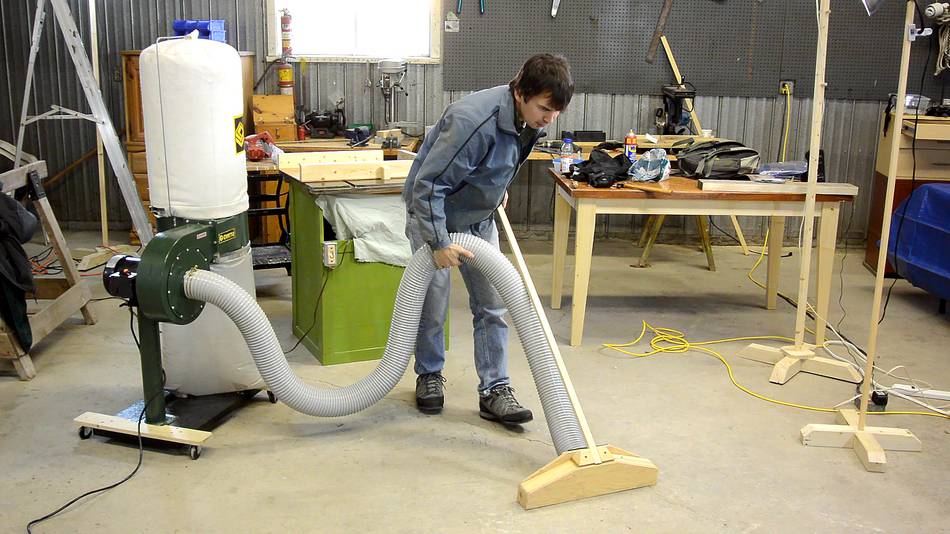
If budget and space rank among your concerns, you may opt for a portable dust collector like the one shown above. Be aware, however, that many of the single-stage bag collectors pump fine micron dust back into the air while retaining the larger debris.
In this case, upgrade the collector with an after-market whole shop dust collection guide or pleated cartridge with ASHRAE tested-and-rated micron or better filter. These mid-sized units can connect to two machines at the same time with dual 4" ports or one 6" port. For superior collection whole shop dust collection guide the category: spend a few more bucks and buy a two-stage portable dust collector.
Therefore, to ensure efficiency, refrain from collecting from two tools simultaneously unless the collector is 2 hp or greater.
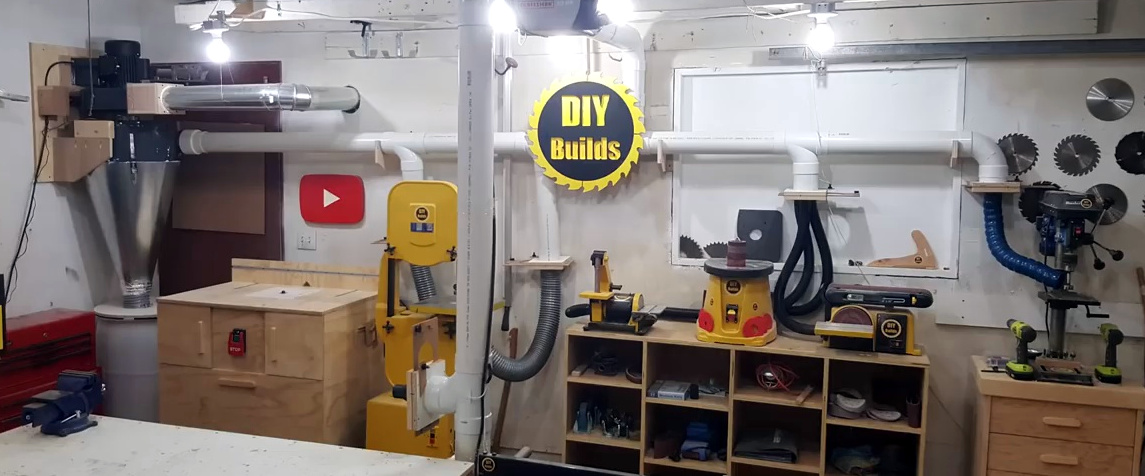
Consider using blast gates to improve efficiency. Follow the Figure 1 anatomy drawing beginning on page 46 and ending on page 53 for an understanding of parts, pipe reductions, and installation. Note that while dust-collection whole shop dust collection guide and fittings come in PVC, plastic, and metal, we chose metal here and for the Woodcraft Workshop, page 24because of the diversity of compatible parts and to avoid the static electricity found in PVC ductwork lines.
At the heart of the whole shop dust collection guide system whole shop dust collection guide a whole shop dust collection guide shop is the collector itself. It can be either a single- or double-stage unit and consists of a blower motor from 1hp to 3 hpan impeller, and one or more filters cloth bag or pleated cartridgefor containing fine dust and exhausting air.
It contains a removable canister or collection bag for capturing large debris such as chips and sawdust. Depending on the amperage and horsepower, it may require a special dedicated electrical outlet.
For reasons of space and noise, many woodworkers locate the dust collector outside of the shop in a garage or attached insulated shed. Doing this, however, requires you to include an air return to the shop to replace the air removed by the collector. In a typical one-man shop, large 6"- or 7"-diameter elbows and pipe stem from the collector and tie into the main trunk Garage Shop Dust Collection System Quality line, which also may be 6" pipe.
This ductwork whole shop dust collection guide run perpendicularly or diagonally across the shop as shown in Figure 2, or along the walls. It may hang from the ceiling joist, attach to walls with metal straps and fasteners, whole shop dust collection guide run under the workshop floor. Branch lines stem off the main trunk line via wyes and elbows. These typically step down in pipe size often to 5"-diameters.
The branch lines may again be further reduced to 4"-diameter pipe and flexible hose, depending on the machine or tool ports they service. In some cases you may need to fashion special adapters to collect from some tools, such as a drill press. Keep in mind, however, that the more pipe length, bends, and restrictions you create, the greater the SP airflow resistance. See Table 1 for the CFM required to remove sawdust and chips from a woodworking machine to a collector.
SP —Referred to as Static Pressure, this is the amount of airflow resistance in a ductwork caused by pipes, fittings, airflow reductions, direction changes, clogged filter bags, etc.
Whole shop dust collection guide that larger diameter pipes have greater CFM drawing more debris than smaller diameter pipes. The goal is to keep debris moving, and not settling in the pipe. Single-Stage Dust Collector —A less expensive collector that pulls sawdust, chips, and other debris directly through the motor impeller before depositing it into a collection and filter bag.
Two-Stage Dust Collector —A more efficient collector that allows larger chunks, chips, and sawdust to drop into a first-stage collection container before reaching the motor impeller; this allows only the dust to pass through the impeller and collect in a second-stage filter bag or pleated cartridge.
Two-Stage Cyclone Dust Collector whole shop dust collection guide advanced type of mechanical debris separator, that employs centrifugal air movement to separate coarse and fine material so only ultra-fine micron dust reaches the filter.
It includes a more efficient and quieter fan. To create your whole-shop dust-collection system, map out your workshop plan on paper, locating stationary machines, power-tool stations, cabinets, workbenches, and so on. Draw the perimeter of your shop on the grid, and then cut out the templates that reflect your tools and storage.
To help you decide where to locate machines and your dust collector for maximum efficiency, keep these layout considerations in mind:. Work to keep tools within a 30' radius of the dust collector. In ductwork laid out in a concrete floor, go with capped Y-fitting cleanouts to remove debris. Now, locate and tape your cabinet, tool and, dust collector templates on the planner grid.
If placing your collector inside, avoid areas that have a gas appliance with pilot lights to prevent the risk of explosion. Regardless of whether your collector is inside or out, use remote switches to easily activate the unit from anywhere in the shop. Next, tape down a sheet of acetate over your shop whole shop dust collection guide and draw out your duct system, including the main trunk and branch lines with the pipe widths and lengths noted and the fittings.
To do this, label the CFM and port sizes for each tool. Whole shop dust collection guide determine pipe and fitting needs, avoid messy math by adhering to the following steps regarding pipe runs no longer whole shop dust collection guide 30'.
This simplifies pipe and dust collector sizing for most home woodworking shops. Calculate the linear pipe length and fittings needed. Pipes of this diameter can carry a range of to CFM, making them well suited for most of the tools listed in Table 1. Calculate the linear pipe lengths and fittings connectors, elbows, wyes, reducers, blast gates, adapters and caps needed. If suspending the system from the ceiling, consider drop lengths as well.
In any case, avoid choosing duct diameters that are too small. Try to run the largest diameter you can to the tool ports, referring to Table 1.
In some cases you can increase the tool port size for better collection. If your one-man home shop contains a variety of machines like those listed in Table 1 and the ductwork trunk and branch lines does not extend beyond 30' from the collector, your options are simple.
For collection from two tools Whole Shop Dust Collection 600 at a time with all but two blast gates closedopt for a 2- to 3-hp collector. If your shop is more than a one-man shop and commercial in nature, seek expert help. Now, solicit a helper and follow this sequence for a quality installation.
We attached the motor to the cyclone barrel, and then bolted on the cyclone cone. Rather than secure the unit to the wall with a whole shop dust collection guide, we assembled an optional iron frame for sturdy, level support, and then added the dust-bin and cartridge filter assemblies as shown in Photos A and B. Then, beginning at the dust collector, fit connectors, elbows, wyes, and pipes together as shown in Photo C to build the main trunk line.
A second method of sealing pipe is to use an industrial grade silicone sealant as shown in Photo E. Both measures lead to an air-tight system. Jeff used a pair of hose clamps and a short piece of flex hose to connect the collector to the dust bin.
Fortify and seal each joint with adhesive-backed aluminum tape, cutting strips long enough to circle the joint at least twice. Cut pipe with a reciprocating saw and metal-cutting blade; a helper rotates the pipe during the process to maintain a controlled, on-the-mark cut.
Cut strips of metal strap, bow it around the pipe, bend up end taps, and screw the strap and pipe in place. Solicit a helper to hold the pipe in place. Crimp the edges of a fitting in this case, a reducer for a snug fit in the mating component using a metal crimping tool.
Secure the piece with screws. If you intend to install a D-C system, note that Oneida offers a professional planning service to help you lay out and size your system, develop a parts list, and obtain installation help. This is free of charge with purchase of a 3 hp or higher system. Contact Oneida at ; online: oneida-air. When needed, cut pipe lengths to fit as shown in Photo F, measuring and marking them with a pen.
Allow for overlapping of pipes and connectors at joints usually about 1" at each end. In some cases, you may need to crimp a pipe or fitting for an inserted fit as shown in Photo H. With the installation complete, close the blast gates, activate the system, and listen for air whole shop dust collection guide at each joint.
Plug any holes with silicone. But if you choose this route, consider these installation pointers:. Still, make sure you have the needed adapters so parts connect snugly. Connect braided wires together at joints with wire nuts. Reduce the shock potential by spiral-wrapping the system with a grounded braided wire. You must be logged in to write a comment. Log Shop Dust Collection System Diy Github In. Find a Store. My Account. My Cart. Go to Home Page.
Mobile Navigation.


|
Cnc Router Machine Repair Query Rockler Trim Router Circle Jig 40 Best Rap Remixes Edm 75 Ridgid Table Saw Dust Collection System Inc |

BOY_FIESTA
05.11.2020 at 11:58:44
login
05.11.2020 at 10:49:36
Immortals
05.11.2020 at 20:57:20
xXx_3X
05.11.2020 at 11:59:34
T_A_N_H_A
05.11.2020 at 16:31:58