Marking Knife Material Network,Fine Woodworking Editors Video,Ryobi Belt And Disc Sander Bunnings - How to DIY
But don't be surprised if you can't spot anything with at least some of them — the technique that works could be very subtly different to the one that doesn't, and at normal working speed it could be impossible to see that difference. Last suggestion is the knife itself. If you find you just can't use it for this then don't feel any pressure to continue to struggle with it 2. I no longer use a single-bevel marking knife at all for this very reason, having made two I found I just couldn't get along with them.
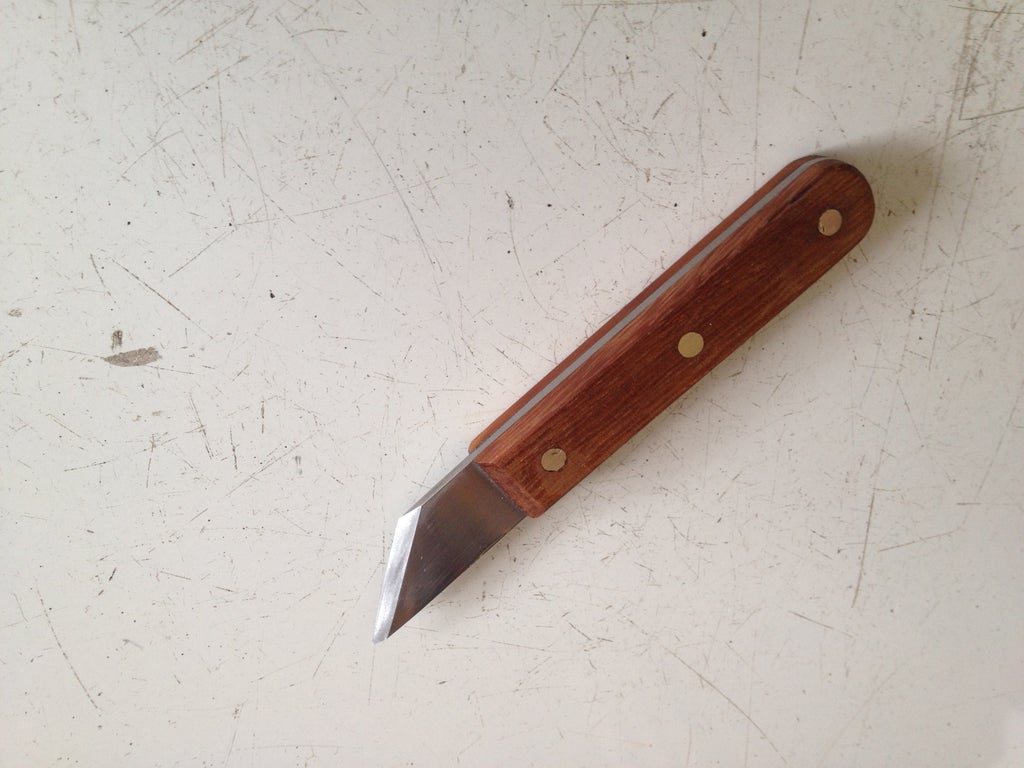
I've defaulted back to a basic Stanley knife or a folding utility knife these use the same blades at the urging of a friend who rightly pointed out that they're easier to use, safer to have lying on the bench blade Marking Knife Material Design retracts or folds away , and, most importantly, there's no difference in terms of the marks made in basic knife marking. But not at all, you're sure sure to find other uses for it. If you think of it as a double-bevel skew chisel you should immediately see how you might use it to help clean up corners in dovetailing a common use for spear-point marking knives.
And generally it will make an excellent joint-cleanup tool. You could also push it dead flat against the working surface to do some paring tasks, could make a superior choice for paring dowels flush in some circumstances.
Keep the flat side of the knife against the rule. Your mark will not be as accurate if you are trying to press the beveled edge against the rule. Reduce the angle of the knife relative to the board. This will give you more area of contact between the knife and the rule as well as allowing the knife to more gradually sever the wood fibers.
I personally prefer the single bevel blades, but then you need to have two of them one for each side. You don't actually have to put that much pressure against your square as you make your cut. The bevel of the marking knife will keep it moving against the rule. Try making several light cuts focusing on keeping the knife vertical in the cut and not leaning over the ruler.
Then go back for another pass to get a well defined line. Sign up to join this community. The best answers are voted up and rise to the top. Stack Overflow for Teams — Collaborate and share knowledge with a private group. Create a free Team What is Teams? Learn more. Difficulties using a marking knife Ask Question. Asked 1 year, 2 months ago. Active 1 year, 2 months ago. Viewed times. I do have a problem though, I keep running my marking knife into the square.
I try to press less but either this repeats or I'm drifting the knife line away from the ruler. What am I doing wrong? What should change? Improve this question. This is partly a matter of technique and simply practice — I can assure you we've all had difficulty in keeping a knife of many different kinds against a steel straightedge or square as we were marking wood. Wood is just a grabby, difficult material sometimes which doesn't make this easier, but you get some of the same thing with card and hardboard which of course are completely uniform and have no grain structure.
A drill press works best, but a handhel drill works fine too. Heck, use a brace and bit if you want, itll give the same results, it just takes longer. This is the step that takes this from a lump of steel to being an actual knife. Forewarning though, this step involves extremely high heat and flammable substances. If you don't have the facilities to safely proceed, lack the necessary equipment or this just makes you nervous, don't do it. Instead, you can send out your knife to a commercial heat treatment service.
Tru Grit is a delight to work with, just download the packing slip, write down the steel type O1 and desired hardness 61HRC and ship it out, then join us at the next step.
Pretty simple process really. O1 is extremely easy to heat treat, use a blowtorch to heat the cutting edge to about f, which will make the steel glow cherry reddish in a dim room, and keep it there for about a minute. After that minute is up, dunk the blade in some warm oil, canola or peanut oil both work well. Hot tip, hold the blade in a set of pliers instead of by hand to avoid an ER visit! Now, after quenching, the steel is extremely hard, harder than glass and just as brittle. It will shatter like glass if you drop it, so don't bloody drop it!
Instead, wash off the oil and pop the blade into an oven preheated to f and let it bake for an hour. Take it out, let it cool, then send it back in for another hour. Do this one more time. This is called tempering, and doing this will soften the steel and toughen it up, so you'll actually be able to use your knife without cracking it. Once you're done tempering, proceed to the next step! A quick note, heat treating steel is an extremely complex process, and this is the bare minimum of information needed.
If in doubt, consult the data sheets for your grade of steel, O1's can be found here. Alrighty, now that you've got your heat-treated blade, time to finish up the metal part of things. First things first, you need to flatten the back the side opposite the bevel , so it sits nice against a straight-edge and makes a sharp edge.
To do this, stick a piece of sandpaper on a flat surface table saw top, kitchen counter, granite surface plate, piece of mdf , mark all over the blade with a sharpie and scrub it on the sandpaper until the sharpie disappears. Repeat with higher grits of sandpaper, up until you hit about grit.
Flip the flade over, repeat with the top side to make it look nice. Nows also the time to fully finish the bevel. Use your file to bring it down almost to a sharp edge, then go back to the sandpaper to sharpen it. If you've ever sharpened a chisel, its the same process. The key things here are to keep both the back of the blade and the bevel as flat as you can, and to polish both those surface as high as you can, so make for the best edge.
Its a lot easier to do these steps before you get the handle on, so get it right now and make your life easier later! Alrighty, now that the blades cleaned up, time to attach the handle scales! First, lets drill the pin holes in the handle material, which is hopefully oversize. First, stack the 2 piece of handle material on top of each other, then center the knife on the scales. Drill a second hole, then stick in another pin in that hole.
Doing this will allow you drill the third and final hole in exactly the right spot, so everything lines up right. Once you've got all the holes drilled with the pins maintain alignment, trace around the knife, then cut off the excess material. Once you have the front cut, you need to do some shaping. Round over the front, bevel it, do whatever yous like, then sand down the front. You need to do this now, once the scales are attached you wont have access to the front of the scales.
Now that the front of the scales are finished, time to glue them on. Degrease the knife and the Veritas Marking Knife Network inside of the scales with some acetone or denatured alcohol, then mix up some 2 part epoxy. Apply the epoxy to the inside of the scales, then insert the pins. Use the pins to line up the scales properly on the blade, then clamp up the whole assembly and let the glue cure. Once you've got the clamps on, be sure to clean any glue from the front of the scales before it dries, otherwise you'll scratch the blade trying to remove it.
Once the epoxy is set, use a ball peen hammer to peen over the pins, then shape the handle to fit. I cant really tell you how to do this, just use files and sandpaper to shape the grip to be comfortable to hold.
Once you've got the handle shaped and sanded, apply an appropriate finish. Again, cant tell you what to use for that without knowing what handle material your using.
Taadaa, you're all finished up after sanding. In my case, i sanded the scales up to grit, then buffed with some white rouge. Since the wood has been stabilized, it takes a lovely polish and doesn't require a finish. Hopefully this has inspired to you get to work making your own marking knife, its an extremely hand tool and a fun project.
This style blade is also handy for loads of other tasks, its an excellent general-purpose utility knife. Ive use mine for everthing from leather work to paper-craft, in addition to layout work. He or she typically has access to books and magazines full of good knife designs to study and analyze. On occasion, I might even go oversize on handle length in an attempt to keep the grip from being too short.
A knife handle of this size can be used on blades that are up to a half-inch longer than the project blade. See the accompanying photo for two versions of the knife. The knife on the right in the photo is the full-sized project knife, and on the left is a computer-enhanced version with a slightly shorter handle. Knives on paper look quite a bit different than they do when mocked up in wood or cardboard. What I can do is use the belt grinder to grind straight and curved lines that are what they should be.
A drawing can be scanned into a computer and then printed out to whatever size is wanted. The pattern is then sawed, sanded or whittled to shape. The physical pattern gives me something to hold in my hand and some idea as to proportion and size. This is where needed changes become more obvious and can be made.
Once the hard pattern is satisfactory, it is transferred to steel and the real work starts. I keep a lot of the hard patterns I make. Having a collection of rough models on hand gives me a head start on size proportions when I have a new design to develop. My customers furnished some of them, while others came off of knives I customized, and at least three came from broken knives.
There are lessons in all of them, both good and bad. Often, a new design comes together quicker because I have an actual handle to work from. A scanner hooked to the computer is a valuable design tool.
Microsoft Publisher is not only a great program for desktop publishing projects, but also a valuable tool for resizing knife designs. Depending on which handles of the marquee are dragged one of several ways with the computer curser, a knife in a picture can be lengthened without being widened, widened without being lengthened, or made larger or smaller proportionately.
Microsoft Publisher will allow you to set up your page at any size. I can then work my pattern full size and print it out. See the photo showing three sizes of the same knife printed out from Publisher. The design for the project knife is practical and simple from a construction standpoint. History is on our side because it was simple working knives that got meat from the hoof and into the kettle.
And, there were all the other cutting chores required for those living close to the land. It will employ only that which is necessary to get the work done. The drop-point blade is not only stronger but also more useful for almost every job of which I can fathom.
The drop-point blade allows the opening cuts on game animals to be made without the point digging in. See the related photo. An attached guard must be ordered from me as an extra.
The modern hunting knife should be built to last. First class, beautiful handle materials might raise the cost of making a knife but are well worth the difference. I have seen many knives sold, not only by me, but also by others, to customers who were actually buying the handles. The blades were secondary. A modern knife is apt to have a plastic-based handle material. These materials are waterproof, strong and dependable.
A knife with a stainless blade and a Micarta handle could outlast its owner. My favorite material for a foolproof handle is Micarta, which is in the family of thermoplastics and includes more than two dozen types of material. Traditional materials for handles depend somewhat on the country of origin. Wood, ivory, horn, antler and bone were, and are, still used for handles.
A disadvantage to using natural materials for knife handles is that they are subject to cracking, or attack by bugs and animal teeth. Natural materials have the ability to soak up moisture when wet, then shrink and sometimes crack when they dry. The trend today is towards using wood that has been stabilized. Wood can be stained nearly any color and then stabilized. A year is better. The wood in the center of a 2-byinch chunk of hardwood will have quite a bit of moisture in it compared to the outside layer.
Like almost everything else, I learned this the hard way. About 25 years ago, I bought a beautiful piece of Macassar ebony that was 2 inches thick, 8 inches wide and about 18 inches long. I got it from a wood dealer who had the large board it was cut from for more than 15 years. I brought it home and sawed off enough pieces for a matching bowie and Texas toothpick set I was making.
One slab had shrunk very little; the other three slabs had shrunk to varying degrees, and I had to replace three of the four handle slabs. Number four was closest to the center of the ebony and it was the one that shrunk enough to crack. I had cut my slabs off of the end that was fresh cut by the wood dealer. The other end was sealed with wax so there was no way for the wood to be free of excess moisture. The moisture came out fairly quick once the slabs were exposed to the warm air of an Oregon summer.
I write the weight on the test piece with pencil and then put it under my epoxy curing light. The light is adjusted so that the temperature is around degrees Fahrenheit. The wood sample is weighed every 4-to-6 hours until such a time that there is no more loss in weight. This shows me how much moisture it has to give up.
At this point, the material is drier than it should be. If attached to a knife in the dehydrated condition, it will probably swell as it becomes normalized to the average humidity and temperature of its new home.
The trick is having material on hand with average moisture content percent , then, with luck, it will stay close to the same size and remain attached to the steel of the knife tang. Our project is to make an everyday working knife. The knife we decide to carry for our daily cutting chores will depend on our experience and the type work we do. An electrician working in the mild climate of Eugene, Oregon, will need a very different knife than that used by a rancher from Wyoming.
On the other hand, my experience is that most folks actually get the work done with whatever knife they have, regardless if it is truly suitable for the job. The governing principle is that when real work has to be done, any knife is better than no knife.
The project knife will have a narrow tang with a two-piece handle that is carved out to receive the tang. This is a handle that requires no attached guard, and can be done with all hand tools. I like the lightweight feel of knives put together with this method and employ the process often for every type of knife, from small utility pieces to larger camp knives.
I recommend easing into the purchase of major tools. Give a new maker all the tools in the world and it will be a long time before he or she is turning out consistently good work. It will be all right to use more advanced tools if you have them. Neat and accurate work is what will make you a good knifemaker. The idea is to get started with what you have. An old wood chair without a back served as a platform to hold things on for drilling with my electric drill.
You can make knives if all you have is a sharp pocketknife and some scraps of soft wood.


|
Laguna 1412 Bandsaw Review Mac Diy Wood Overlay For Wire Shelving Work Scrap Wood Projects For The Garden 2020 Circle Cut Wood Home Depot Near Me |

NATALIA_ORIERO
16.04.2021 at 20:11:44
crazy_girl
16.04.2021 at 11:47:59
insert
16.04.2021 at 13:27:44
lovely
16.04.2021 at 20:48:31