Making Simple Wooden Boxes Ltd,Woodworking Projects Mailbox 71,Decoy Carving Wood For Sale Australia,Diy Wood Projects For Bedroom Year - Test Out
Sorry Mom. The first thing I learned in health class is that you can't properly use a tool until you know what its for. Yes, that's a vaguely dirty joke. I had to get one "tool" joke in here or I would never forgive myself. If your already familiar with using the listed tools, you can skip this section. I will say that I actually picked up a tip or two when I was researching all this though.
There are a few essentials you should have, and I'll take this chance to explain what they are and how to use them. I'll also link to far more detailed instructions as I won't pretend Making Wooden Fly Boxes Youtube I have the time to be a comprehensive resource. What about cordless tools you say? Well let me divert for a little rant here. If your going to be doing work outside or need to move around a lot, the cordless tools may be a good choice, but I have a thing about batteries running out on me.
I hate it. I hate it with an unbridled passion the way cats hate water or the way my hamster hates cats. That's a whole lot. Its just a personal preference. Speed Square This is just a simple metal triangle with some markings.
Where it comes in supper duper handy is that it includes a 45 and 90 degree angle. If your trying to make accurate cuts across some wood stock, this is the fastest way to make a straight line. One edge has a lip that fits along the edge of the board, then you can use the other edges to draw either a 90 or 45 degree angle. Even if you have a miter box, you should still have one of these. There are also techniques for marking almost any angle with this tool.
I won't go over them here, but I will link to it. Detailed how-to Tape Measure The venerable and time tested tape measure. The only thing more common than a tape measure is how often people use it wrong.
One thing people consistently do wrong is to measure from the end of the tape. I know this sounds like crazy talk, but using the end of tape is somewhat inaccurate if your attempting any kind of precision. Look close at that little metal tang on the end of the tape.
It moves. There is actually a reason for this: The tip of the tape is riveted in place and slides slightly; the length of the slide is the same as the thickness of the tip, to allow the user to make accurate measurements. With a sliding tip you get the same measurement hooking the end of the tape over a piece of lumber or butting the tip into a corner.
In day to day work, it's actually a pretty sloppy operation. If your framing a wall or anything on a larger scale, it won't matter. If your making a box 6' long with tight joints, it matters a lot. I usually pull out some tape and start measuring from the 1" mark, then just subtract an inch from my final measurement.
My projects have gotten a lot more precise since I started doing this. Detailed how-to Saw There are Tools For Making Wooden Boxes 30 a boggling number an styles of saws.
If your building a full shop you should have several types, but for the purpose of this article we just need what is commonly refered to as a Tenon saw or Back saw. These are the most commonly included versions when you purchase a miter box.
The different types of saws require different techniques to use them properly. Popular Mechanics has a great article about some of the types and their use. For this project, just get the one that looks like the picture below. Often you can get these as a combo with a miter box. I highly recommend a decent quality corded drill. Choosing the right one is often a matter of personal preference. There is a great video Here. You should also get a set of bits.
The more the better. I tend to chew them up like bubble gum. There are many types. I found this handy guide. If your on a tight budget, you can just get a standard set of twist bits. There are many types, but the "quick clamp" style have proven to be the most useful as they can generally be worked one-handed. Clamped glue joints are substantially stronger than un-clamped joints.
Always clamp if you possibly can. That should do it for now.. In fact, all three of these could be done in a living room fairly easily. This is a basic method for making a small box using just a mitre box and saw. I call it the living room method as you can usually get away with this while watching TV if you have an understanding and very attractive wife who is always right Hi honey!
It does not require any extensive equipment and can be done fairly quickly. The corners will be simple lap joints , so nothing fancy just yet. Tools and material: ruler or measuring tape Miter box and saw or table saw Glue Clamps small wood - one 4 foot 1x4 Sand paper For this project I'm using standard 1x4 pieces of Pine from the local Home Depot. This is the way things are. The jerks. Its like when I used to be able to get a Slim Jim as big as my arm, and now they are barely the size of toothpicks.
I had ripped a strip off the boards for another project. Just go with it. The listed measurements are accurate for your project. Try to make the cuts as precise as possible. One tip for this is to measure the next board only after your done cutting the previous board. If you pre-measure all the pieces, a few of them may be shorter than anticipated due to the action of sawing. A saw does not work quite like a steak knife.
The saw actually cuts the wood by removing a thin channel of material. This is where the sawdust comes from. There is no steak dust when you cute a steak as it actually slices the meat The cutting will be easier if you clamp the piece into the miter box while you Making Simple Wooden Boxes 08 are working with it. Trying to wrestle with the parts while your sawing them is a great way to loose a thumb. I usually measure from the 1 inch mark to make it as accurate as possible.
Do NOT sand any of the edges before gluing it up. Its common for people to want to give it a fast swipe to clean off the edges and such, but what will wind up happening is that you will wreck the straight edge of the board, and you will see gaps after you glue it up.
If you have any chipped edges, just smooth it off with your finger, then glue it. Check the pictures for details if something is not clear. Take one 7 inch piece and place a thin layer of wood glue on both of the long edges. Place two more of the 7 inch boards on the glued edges to make a "U" shape. Make certain the ends line up and everything is straight. Clamp the ends loosely, just to hold everything together.
Place the last 7" board at the top without glue and apply a clamp to hold it there. This board is only there to assure that the sides are straight and that the top gap is not wider than the bottom. Don't trust your eyes on this one. Tighten all the clamps checking the boards to make sure nothing slid around. If you have a large gluing area, its not uncommon for the pieces to move a little. You should see some glue squeezing out. If not, you either have a freakish ability to use the exact amount of glue necessary, or you didn't use enough.
Let it dry. Let it dry for a good hour before touching it again. When it looks dry, remove the clamps being careful with the piece. The joints may still be tender. Set the un-glued 7 inch board aside. Place both end caps on, being careful to line up the edges as best you can. The closer you get it, the less you have to sand. Clamp both end caps in place and let the whole thing dry overnight.
While I do have longer clamps, I wanted to show you how to do this. Take two clamps and hook them together as shown in the picture.
This works great for smaller pieces where you don't need huge amounts of pressure. Remove the clamps and admire your work. Take that last 7 inch board and check the fit inside the top.. If its too close, sand the edges until it fits easily.
If you have trouble getting it out again after you fit it, just screw a small screw in the center and use it like a handle to pull it out. The hole will be covered when the rest of the top is assembled.
That last 7 inch piece should fit cleanly between the lines. Learn why people trust wikiHow. Download Article Explore this Article methods. Things You'll Need. Related Articles. Article Summary. Method 1 of All rights reserved.
This image may not be used by other entities without the express written consent of wikiHow, Inc. Choose your wood. You can use repurposed wood from previous projects, boards from broken down pallets, or you can purchase and cut new wood.
Consider what your box will be used for. For example, if you're making a jewelry box, consider thin pieces of cedar, ash or oak. Save larger pieces or boards for bigger boxes. This will also prevent you from having to do too much trimming. Gather your supplies. Keep all your basic tools in your workspace. If using power tools, make sure that you have access to power outlets.
At the very least, you'll want a ruler, hammer, nails, wood glue or putty, and of course, your boards. If using power tools, use caution and always wear eye protection. Measure and mark your boards. First, you'll need to decide on the size of your box. Specifically, you'll want to determine how long, wide, and tall to make your box. Then, mark the measurements on your boards using a ruler and pencil.
If you're building a box for a specific purpose or to hold a certain item, measure the item to ensure it will fit inside your finished box. Cut your boards, if not already to size. Use a hand or circular saw to cut the boards according to your measurements. Remember you'll need four boards for the sides, one for the base, and one for your lid.
Power tools can make the job easier, but are not necessary. You can easily make your box using a screwdriver, carpenter's square, hand saw, and hammer. Assemble the side pieces using a butt joint. Join the sides together at a right angle using glue between the joints for durability.
At this point, it should look like a square with no base or lid attached yet. Next, hammer or drill in finishing nails, wood screws or dowels. Use a wooden dowel to pin the pieces together in an "L" shape. After the sides are pinned, cut the dowel flush with the sides. Attach the sides to the base. Make sure the sides sit evenly on the base or are snug around the base, depending on your design. Use glue to attach the base and sides. Hammer or drill in finishing nails, wood screws, or dowels.
Allow your box to dry thoroughly before sealing or using it. Attach a hinged lid to the box. Set the lid on the box so the lid and side are flush, then measure and mark where you'd like your hinges to be. Keep the hinge knuckle facing out from the back of your box and drill or hammer to attach it to the side and then the lid. When laying out the hinges, it is important that you square them to the top and to the sides of the case.
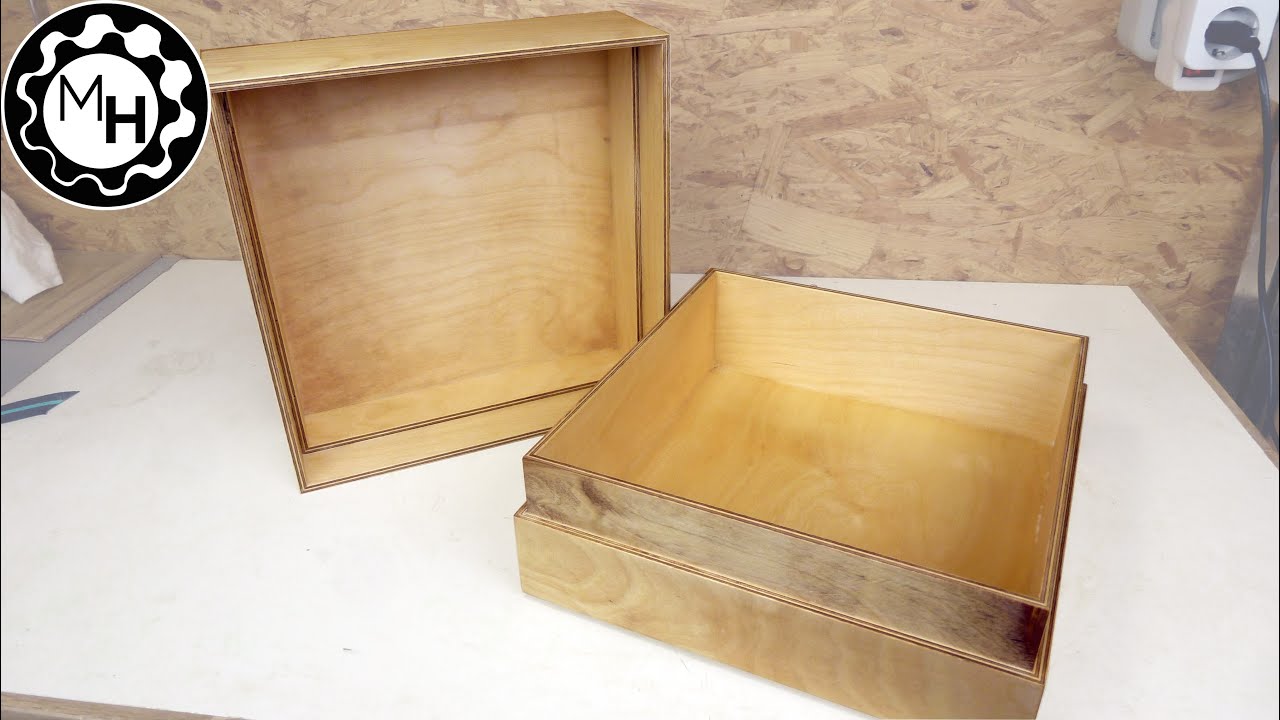
Otherwise, the door will not close or open correctly. You can see that there is lots of scorching around the edges in the first image. To remove this, use your fine grit sandpaper and sand with the grain. Sanding against the grain may mar the surface and leave scratches.
In the second image you can see that after sanding there is great improvement and your wood faces are nice and clean again. I like the dark edges to my piece and you will have a lot of trouble removing them completely with sandpaper without deforming the shapes.
If you want to lighten them, scrubbing the edges with hydrogen peroxide and an old t-shirt will start to remove the charred edge but may leave it blotchy and uneven. Fit the lid tab into the one side, then fit the top tab Making Wooden Boxes With Secret Compartments Quart into the second side before sliding it into place.
If you wish to use glue apply some along the tabbed area of the sides only, the rest will be held together with those glued.
Lovely box. Will attempt to make this over the next week or two. Will let you know how i get on. By the way, to you take payment for services rendered. As in i have a few ideas around boxes but i'd need someone to create the computer files for them. Cheers, Michael Newham. More by the author:.
Attachments Box for Instructable. Did you make this project? Share it with us!


|
Brass Jewelry Box Latch Zip Kreg Pocket Hole Jig 2x4 Nikon Jet Air Filtration System Afs 1000b Manual English Belt And Disc Sander Amazon 10 |

Vasmoylu_Kayfusha
15.01.2021 at 18:23:44
Baki_Ogrusu
15.01.2021 at 17:56:57
Turkiye_Seninleyik
15.01.2021 at 10:10:40