Kreg Jig Stop Collar Setting Up,Jet Plane It Up To The Sky Garden,Carving Gouge Sweep 4d,Beading Router Bit Profiles Data - 2021 Feature
Kreg jig K4 and K5 are similar models. Although K5 is a little more advanced than K4. You might require the following instructions:. Kreg jig k4 and k5 are two excellent tools, and better than Kreg jig mini or r3, as they come with a holder to place and hold your material securely.
However, easy using a Kreg jig might be, there are always some mistakes that people do. Here is a list to avoid these mistakes:. You should always use screws depending on the thickness of your material. Using the same measurements, adjust the height of the jig to the appropriate position. To do this, loosen the thumbscrew on the back so that you can raise or lower guide hole piece freely. Once the jig is where you want it, tighten the thumbscrew to secure it.
Remember to reset the guide hole piece every time you drill a board of a different size. Secure the jig to the workbench. Clamp the jig down so that it will remain firmly in place. Make sure the guide holes of the jig are facing toward you on the workbench.
Part 2 of Clamp the wood into the jig. Place one end of the wooden board vertically against the clamp backing on the opposite side of the jig, then pull the lever to press the clamp tight against it.
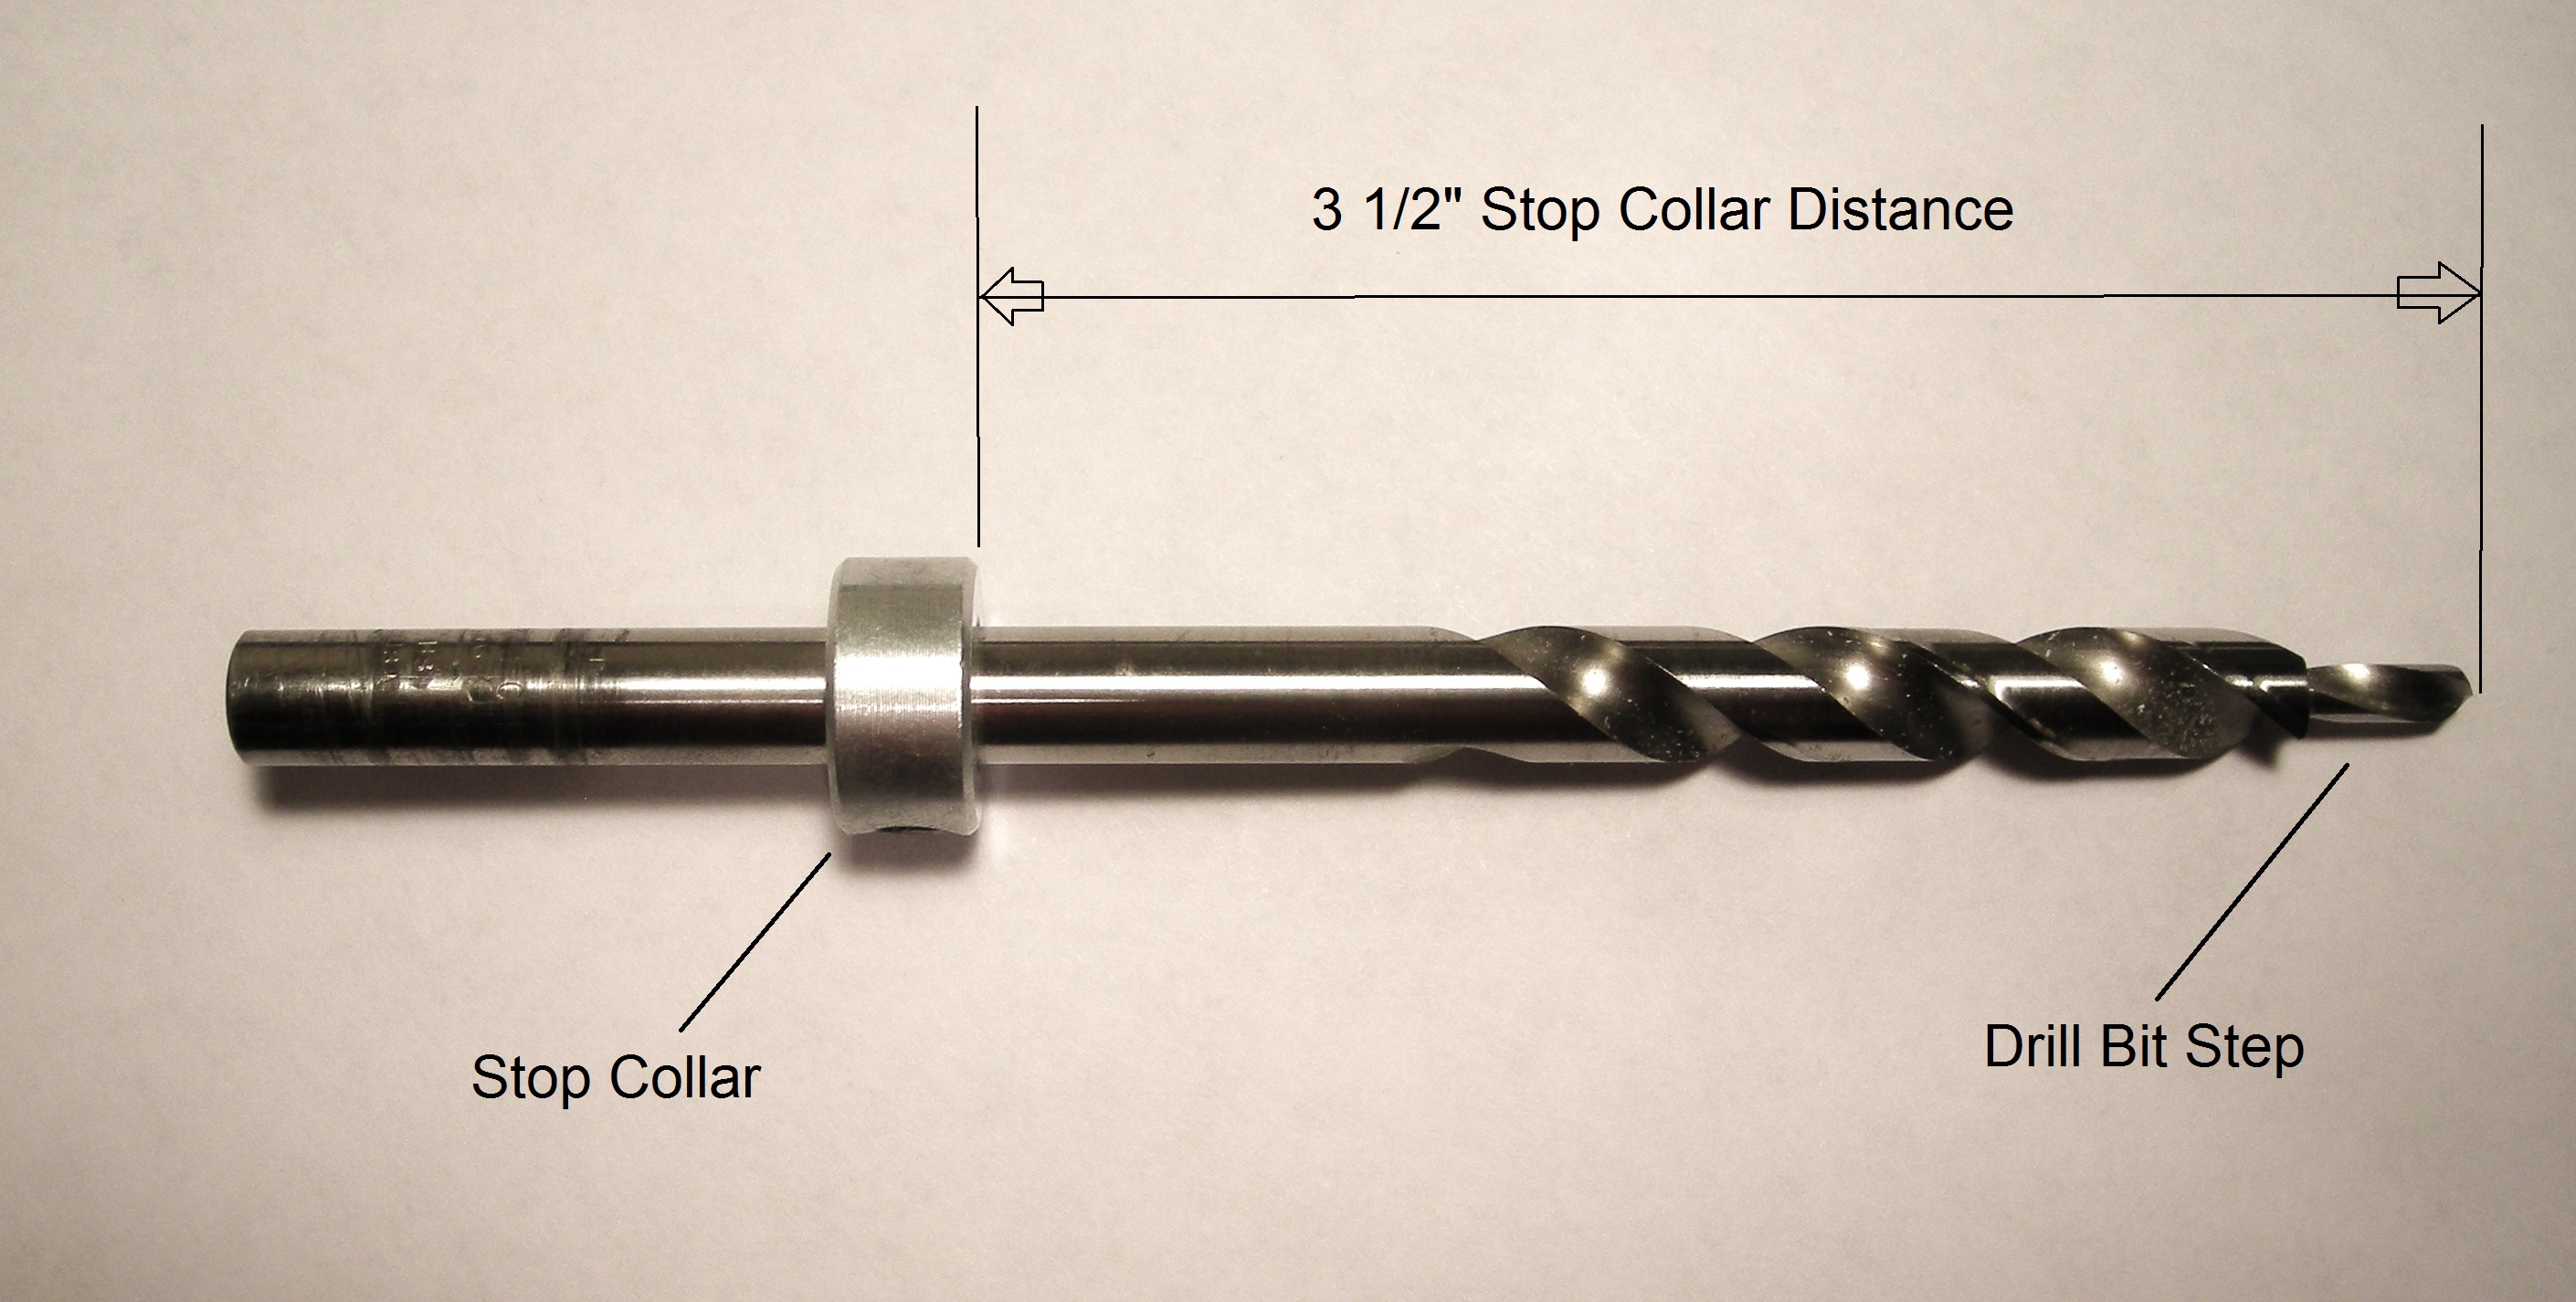
Fit the drill bit into the guide holes in the jig. The guide holes should be just large enough to comfortably accommodate the drill bit.
Most standard Kreg Jig models will have at least three guide holes so that you can drill as many holes as needed to support the joint. Should you need more pocket holes than your jig allows, you can make room for more by shifting the wood down in the clamp after drilling your first set.
Drill the desired number of pocket holes. Pull back on the drill as you work to free the guide holes of loose wood chips. Drill as many holes as you need to create a strong joint that will suit the purposes of your project, then turn the board around and repeat the process on the other end.
Part 3 of Press the pieces of wood together to form a joint. Make sure the edges are evenly aligned. If you prefer, you can clamp the boards in place to make them easier to manage. Glue the edges of the joint together for added security. Spread a thin layer of wood glue onto the edges of the boards where they connect.
This will reinforce the joint even further and prevent the boards from coming apart as you fasten them. If you're using wood glue in addition to a conventional clamp, apply the glue before you align the edges of the boards. Drill the screws into place. Drive the screws deep until they disappear inside the pocket hole. The pocket hole bit conveniently bores its own thread as it drills, so you should have no problem getting the screws to hold.
Finer threads should be reserved for hard, dense varieties of wood like maple and oak. Conceal the pocket holes with wood plugs or adhesive. These can easily be filled with a glob of putty or wood glue. You could also invest in a set of Kreg wood plugs, which are specially tapered to slide right in for a smooth, seamless finish.
Include your email address to get a message when this question is answered. Take proper safety precautions by wearing eye protection while drilling. Helpful 0 Not Helpful 0. JET Woodworking. Wood and other other project project project materials materials materials materials coming coming coming coming. Is to have the pilot hole, which is the narrow portion drilled by the tip of the drill bit exit the wood near the Center of its thickness that way when you drive in the self tapping pocket hole screw it enters the mating piece about in the Center of its thickness, which reduces the chance of splitting and it ensures that the screw has the most possible wood to bite into setting the thickness stops on the Craig series jigs or on any Kreg Jigs.
Matter determines how far back from the edge of the work piece the pocket hole will be located. Setting the stop collar on the drill bit determines how deeply the bit can drill into the wood so with those two simple settings, which are determined by the material thickness, you know the you'll end up with a perfectly positioned pocket hole at the proper depth Every time material thickness also determines what length of pocket hole screw you'll use during Assembly having the proper length screw ensures that it will penetrate as deeply as possible in.
A Kreg Jig Stop Collar Setting System joint without the risk of splitting the wood or poking through the surface.


|
Belt And Disc Sander Ferm Controller Green Woodworking Projects 60 |

Natalyu
13.11.2020 at 20:29:30
Love_Is_Bad
13.11.2020 at 23:41:24