Jointer Plane Setup 64,Build Your Own Rustic Bed Frame Weight,Lowes Diy Wood Projects 5g - Downloads 2021

If you buy something through a link in our posts, we may get a small share of the sale. A jointer machine is a large table designed to create flat surfaces on wood. A jointer plane is a handheld tool; a long, more robust version of the standard hand plane. In this article we will describe how to use a jointer plane.
One of a few different types of bench planes , a jointer plane is meant for squaring edges and flattening panels. Longer planes exist, but they are often mounted on tables and not manually moved back and forth. A general rule of thumb is that a hand plane can flatten a piece of wood that is about two times its length.
What makes a jointer plane so effective in flattening long surfaces is its long sole. The sole of a plane is the flat area that rests against the material that is being planed.
You will realize after a while that many parts of a hand plane are named after parts of the human foot. The long sole of the jointer plane creates an extended base that feels the inconsistencies of the board it is moving across. As long as the sole is true, the cutting edge of a jointer plane will do its best to create a flat surface, cutting away any excess material that does not match up with the long, flat plane that the sole is following.
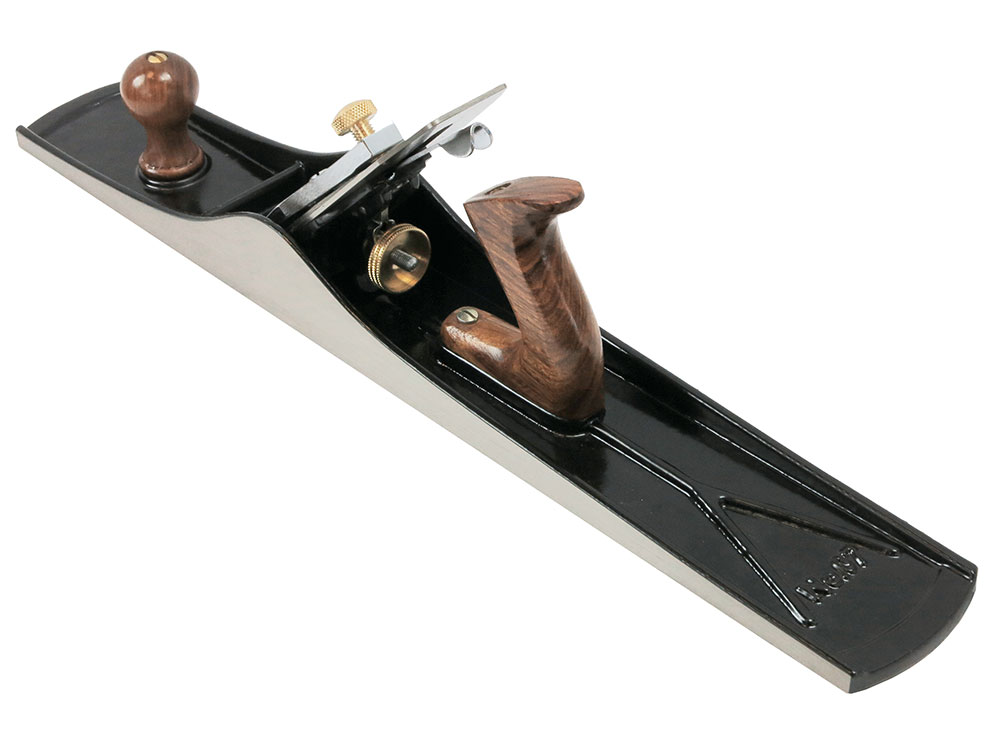
There are quite a few parts of the jointer plane, but we are only going to go over the most important ones, with a few of the less important parts listed only because of their interesting names.
Before starting any project , always make sure there is enough room to maneuver around the object you are working on. Since we are working with a non-powered hand tool, safety equipment like eye protection or gloves is not necessary , but still recommended.
Keep in mind that the cutting edge, the iron, is extremely sharp, so take the necessary precautions when moving your fingers around that area. Or you could make a sled for your table saw and trim one edge then use that reference edge to square the other side. This leaves you with the planer. I have tried the table saw jig method and while that works, it is a bit clunky to work with, as the length of my boards is quite a bit larger than my little Craftsman table saw I guess it's a contractor's table saw.
And that only squares up the sides, but not the faces. I can do that with the belt sander, but that's a lot of work. And I've run them over the table saw standing on end, but that's a bit hairy I did see a cheap combo on Amazon that got some good reviews value for price, mostly , but unfortunately that combo and a lot of the stuff on Amazon doesn't ship to my location.
Therefore I asked if it would be more helpful to start with a jointer and then at some point in the future get a planer or start with a planer and later get a jointer.
You can get a planer and build a planer sled. Marc has a video on how to make a planer sled and flatten a board board without a jointer. Very cool. The problem I have with this is that it's not that quick and repeatable. It needs some setup, plane the board, take it off, glue the next board, etc. Basically what I'm looking for is a quick method of cleaning up the surfaces especially the faces so I can get to work with them.
Since they are 'rustic', perfection is not a goal. There is even the possibility that what I'm trying to do is not a task for either one of these tools Suggest a small lunch box planer and smaller jointer. You'll still be over your budget tho even with the small Grizzly stuff. The planer will allow you to clean up surfaces. If it's pallet wood and things don't have to be perfect you could use a power planer if S4S isn't a requirement.
If you need it to be a certain thickness throughout and all sides parallel, a jointer and a planer are your quickest, most repeatable options. If you just need to clean up faces and parallel faces aren't a huge deal a jointer would be what I'd get.
I have read those review prior and was thinking of getting the same Jet combo model, personally i don't think try to keep that thing true would be worth the hassle. I would go the route of buying a workbench joiner you can get a inexpensive 6in porter cable from lowes I am not certain given your location that would be an option but its a valid idea considering your funds.
Here is the issue, those are not always flat so you need to get straight edge and check the tables. Used might be better for you depending. Then with that left over money you can then purchase your lunchbox planer, maybe pick up a used one. Point being is that getting quality combo machine is going to blow your budget, so separate and used might be your best way to go.
Thank you all for your opinions. I greatly appreciate it and I will take it all into consideration. I think getting a possibly used jointer first might indeed be the best idea. Getting something from the local eBay variant will be an option, I think.
I did see a jointer once at Sears yes, we do have that here , but I haven't seen it recently. As shown below , the knives of a typical cutterhead Jointer Plane Setup Js are tightly wedged in place with gibs and gib bolts.
Five surefire tune-up tactics To guarantee yourself a jointer that makes smooth and accurate cuts time after time, you need to align the infeed and outfeed tables, square up the fence, set the knives, and properly set the height of the outfeed table—in that order.
Tables that sag at one end or the other or both will cause concave cuts. Tables that are high at their outer ends will produce convex cuts. This occurs when the infeed table no longer supports the workpiece. To align the tables, first unplug the jointer, slide the fence completely off the table, remove the cutterhead guard, and raise the infeed table to the same height as the outfeed table.
Now, lay a level or straightedge across both tables as shown opposite page, top. If any light shows under the straightedge at the outer end of either table, the table is sagging. Usually you can correct this by tightening the upper gib screw see drawing below. If you see light under the straightedge in the middle, next to the cutterhead, the offending table or tables are high at their outer ends.
Loosening the gib screws lowers them. For even more accuracy when checking table alignment, use a pair of 12" triangles, as shown above right. If you see a gap at the top, one or both tables are sagging at their outer ends.
This happens because the dovetail ways have worn over the years and must be shimmed to compensate for the accumulated wear. We prefer to shim the outfeed table, because its adjustment range is very small, but if your jointer has a fixed outfeed table, you have no choice but to work with the infeed side.
Shim with feeler gauges. Release the table, snug the gib-adjustment screws, and check to see if the table is parallel with the other one. Finally, lock down the gib-adjustment screws and make a final check. Even a slight angle error can multiply through the course of a woodworking proj-ect. With your drafting triangle, the job should take only a few minutes.
Simply loosen the bevel lock, position the triangle as shown below , move the fence until you see no gaps at the table or fence, and retighten the lock. Instead, check with the triangle every time you change the angle of the fence. But guess what? All the machines still produced straight, smooth edges. Aim for a maximum variance of. These gauges are designed to set each knife exactly the same height above the surface of the cutterhead.
Which you choose depends partly on the type of cutterhead your machine has. The first might be called the king of low-tech.


|
Carpentry Shop In Karama Email Wen Belt And Disc Sander Parts Zip Best 4 In 1 Rasp Wood Stove Steamer Humidifier |

MAQYA_666
13.05.2021 at 15:12:19
Sevimli_oglan
13.05.2021 at 18:47:21
Turkiye_Seninleyik
13.05.2021 at 13:56:36