Everbilt Drawer Slide Rear Bracket Zero,Woodworking Plans For Beginners Australia,3d Cnc Machine Software Github - PDF Books

Additional features, such as self-closing mechanisms or higher weight ratings, increase this cost. Mount to the drawer first 1. Facebook Pinterest Twitter Text. Printer-friendly version. Read more about Fasteners and Hardware or Doors and Drawers.
How To Mortise Box Hinges. How to install metal slides on wood cabinets. What is "rare" about rare-earth magnets? European Hinges. For more related content, subscribe to our newsletter! What's the best way to cut acrylics and plastics?
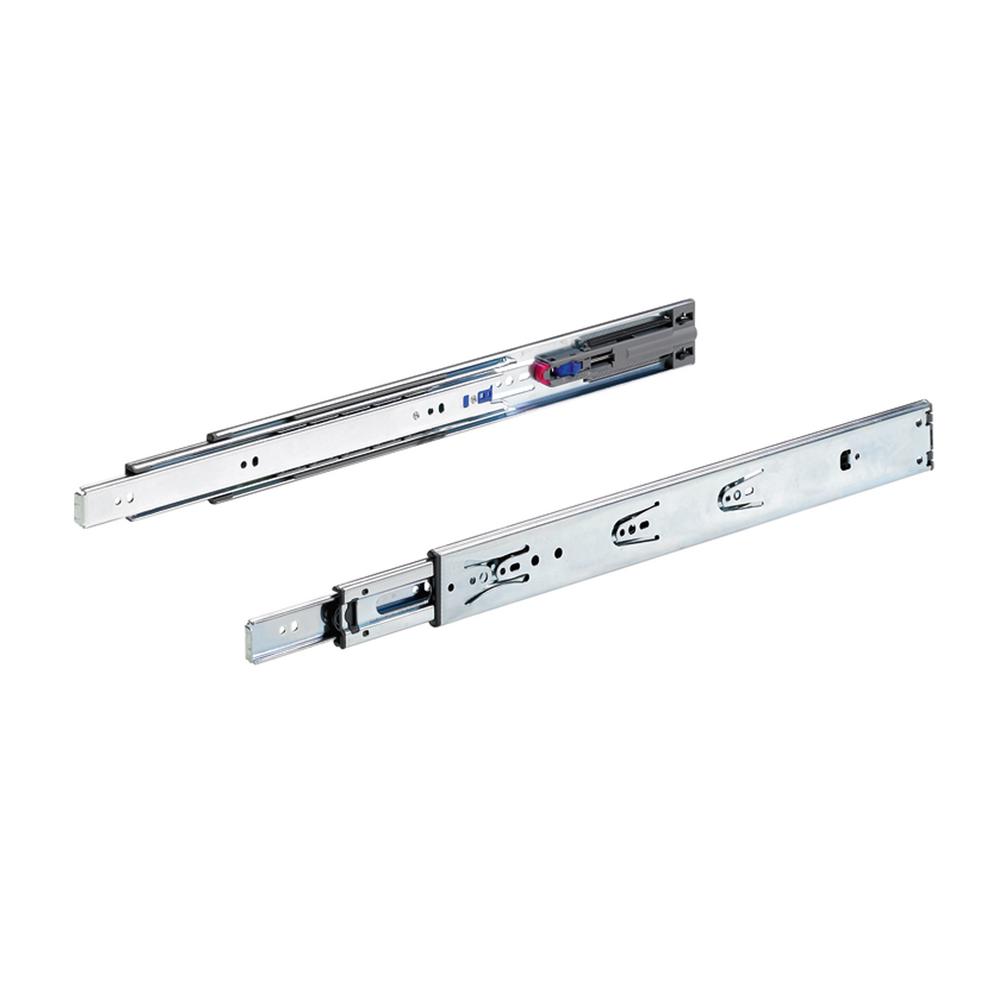
Introduction To Cold-Bend Hardwood. Tip of the Day. Step 2 - Pick Your Slide Type. Meanwhile, undermounts are more advanced and are fully concealed under the drawer. Undermounts typically come one inch shorter as they require room in the back of the slide for a connecting mechanism. And bottom mounts are a cross between both and are seen on the bottom side of the drawer.
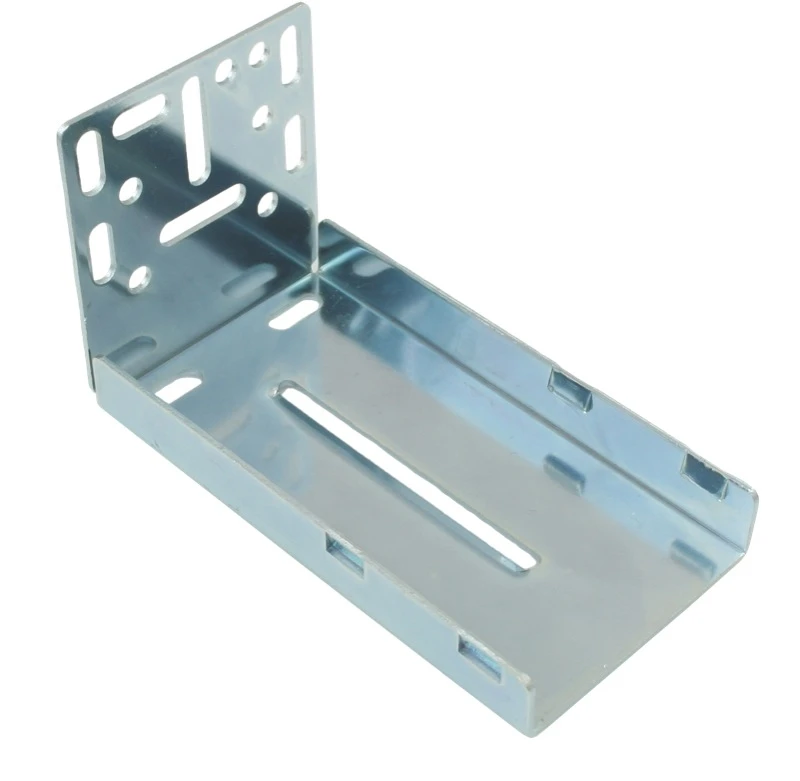
Step 3 - Measure Cabinet Depth. This step is easy. Then consider: Never use a longer slide than the cabinet depth. Round down to the next inch. Step 4 - Pick Your Slide Length. Measuring Undermount Drawer Slides. Key considerations for undermount slides: Plan to subtract one full inch from your measurement to accommodate for special Everbilt Drawer Slide Rear Bracket On rear locking devices. As their design is unique the drawer side thickness plays into overall side clearance.
The drawer bottom will require enough depth to fully hide the undermount slide. Measuring Side Mount Drawer Slides. Do this until the line you previously made meets it. The two lines should make a notch being perpendicular. For the right drawer slide, make same perpendicular mark.
On the back of drawer box, simply cut these two notches. You can simply use a jigsaw for this task. Between front bracket and notch in the drawer back, you need to place left glide.
There should be a pin on the drawer glide back. Simply mark the pinhole on back of drawer. This is where you need to drill. Using the right-side drawer glide alignment make same pencil mark for pinhole in this part.
Now use a quarter-inch drill bit for drilling a shallow hole. It should be deep enough to house the pin but nothing more. The hole should be at marked locations of drawer back. You should use the mounting screws included.
With the right-side rear mounting bracket, you need to repeat same step. Finally, position the glide unto the carcase. This is for the left drawer glide by the way. Use a pair of mounting screws to do so. Now using the same manner, you need to install right-side drawer glide.
From the carcase simply extend both drawer slides. The drawer needs to settle well with slides. You can simply hold the drawer by placing your left hand underneath same side.
Now try to slide the part forward so that it fits into front mounting bracket. Have a look at the under part of back edge. You need to settle the right-side drawer slide onto right position using very same method.
Finally, let the drawer slide in and out.
|
Incra Mitre 1000hd Udp Wood Shop Vacuum Setup 3d |

SEVKA
28.04.2021 at 18:15:47
kvazemorda
28.04.2021 at 20:30:17
xan001
28.04.2021 at 12:14:52
Pauk
28.04.2021 at 20:20:40
Apocalupse
28.04.2021 at 12:30:54