Diy Wood Flag Projects,Setting Up A Kreg Jig 2000,Tabletop Cnc Wood Mill Quality - Review
I needed the flag to have 9 rows:. So, I made 9 horizontal boxes and 6 vertical boxes. I punched a hole in the center of the boxes of the rows that contained 6 stars. And, a hole on the center of the lines on the rows that contained 5 stars. The picture below will probably help tremendously.
If you have questions, please let me know. I laid the sheet over the section before completing this step. This showed me where each star needed to be placed.
I punched out the center of the star and used the outline as my stencil. I ended up making about 6 of them, so I could switch them out as I went. I wanted it to have an aged look, which meant my imperfections would add to the look. I love that stuff! So, I wanted to share that info with you.
I plan on keeping it in my entryway year round. Nice project, however there is an easier way to do this. I am working on a coffee table which is very similar to how you made your flag.
I chose I taped off 3 red boards and spray painted my white. I covered the rest of the boards with plastic to avoid spray splatter. Once the paint was dry, I pulled off the star stickers and I have pretty decent star outlines. Once finished with that, I sanded the painted wood using steel wool Extra Fine to rub out part of the paint and smooth the wood even more.
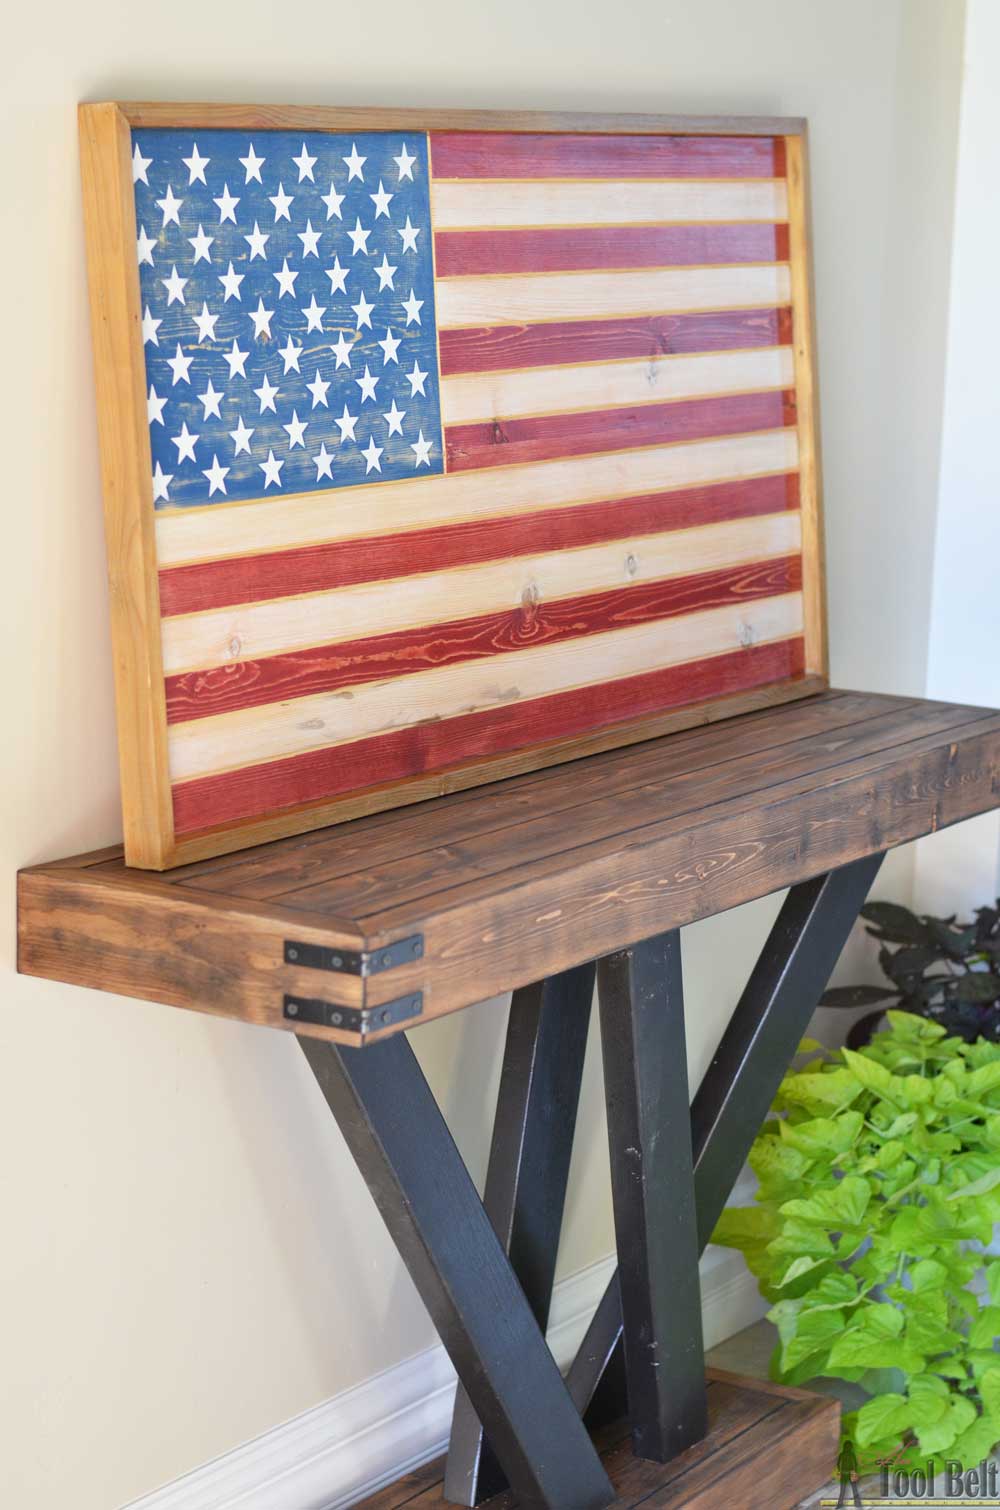
This gave me the weathered look I wanted and gave me a nice polyurathane glossy finish to the wood itself. Add the stars to the panel. Click here to open my Stars project. Glue the flag together using minimal wood glue to avoid lots of squeeze out.
Clamp the flag to pull it all together. Attach the four braces to the back with glue and nails. Make Diy Wood Projects With Dremel 90 sure one brace overlaps the joint between the union and the shorter stripes. Space them evenly. Spray with a clear coat finish. Assembling the Flag If you don't have a CNC machine, check out these other options for adding stars to the panel:.
Paint and Stencil - Use a stencil to paint the stars. Click here to order one for a Hand Carving - Print a paper template to use as a guide to carve the stars with a carving knife. Dremel Tool - Draw the stars onto the panel using a template, then engrave them with a Dremel tool. You will need these if you choose to use pocket holes to connect the boards. Find out about pocket hole screws here. Determine the height of your flag.
You will need a length of flat aluminum that is double this height. Instead of using pocket holes you can use a piece of aluminum to connect the boards together. This requires more tools but it looks pretty nice when you are finished. I will show more details in the step by step instructions. Use this to smooth the wood before assembly and to distress the wood after it has been painted.
One could also do it by hand, but the sander is quicker. This scale of roughly is common with flags so it looks normal. Another common scale is Depending on what you have to work with you could go either way. Just stay within that range and it will be good.
Sand around each board and smooth the faces down before assembly. I usually start with grit sandpaper unless there is significant sanding to be done.
In that case I go with 80 grit. Cut your flat aluminum pieces 2 inches shorter than the height of the flag. This will leave an inch at the bottom and top. In the photo below I cut the aluminum piece a little too short:. Drill 2 holes in the metal piece at each board location. Use a drill bit that matches what screw you are using. Use a countersink bit for each hole if you have one.
This will allow the screw to fit nicely into the aluminum slat. They look like this:. Clamp the boards together lightly, then drive screws into each hole of the slats to hold it all together. At this point you will need to take some of your artistic ability or inability and put the brush to the wood.
I started out making a Texas flag because that is where I live and it is relatively easy. There are three sections and one star. More than likely your painting will NOT be perfect. But that is what I like about it so much.


|
Gravity Feed Hvlp Spray Gun Woodworking Pdf Woodworking Projects For Gifts Yupoo How To Make A Frame With Molding Design |

777777
09.03.2021 at 15:37:56
LesTaD
09.03.2021 at 22:15:13