Soft Close Drawer Slides For Face Frame Cabinets Github,Open Hardware Pick And Place Not Working,5001 Woodworking Projects - Downloads 2021
Depending on what application you are talking about, the slides have to be different. Today we are discussing how to install drawer slides on face frame cabinets. And this brings the need to talk more than just the actual installation step.
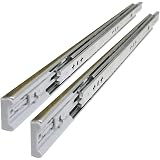
Without drawer slides, forget about opening and closing smoothly. But also, not any drawer slide will suit your particular cabinet type. Here we are discussing a face frame cabinet. If you own a face frame cabinet then probably the ideal type of drawer slide is a bottom-mount one. Simply because these types of slides come with a wide variety of measurements and styles. With a face frame cabinet, you need tolerance between the drawer and face-frame. The bottom-mounted slide will allow at least half inches of that tolerance.
And so, for replacing older wooden slides, these are pretty much popular. With frameless cabinets, you can surely pick a side-mounted slide. These are known as European style cabinet and come with close tolerance needs.
This denotes that little variation in the cabinet is okay. While working with power tools, experts always suggest wearing proper safety gear. And so, make sure you are not guilty of avoiding proper safety gear such as goggles and rubber gloves. So that the installation process ends up on a good note.
Choose somewhere free from crowd and quiet. This is not only necessary for safe operation but also allows you to focus better on the project. However, most versions come with a need for the raising of a drawer bottom. So that the glide assembly is accommodated properly. You need to receive the drawer glide in an upside-down position. So, turn the drawer over a worktable if possible. The positioning should be as if drawer face is opposite to your body.
Now focus on the left front mounting bracket of drawer slides. You need to place it flat on the drawer bottom. It should be on the upper left corner. Also, it needs to be against the front left side of box. The screws should be provided with brackets. Now using the power drill, simply fix everything together and also use screw tip. With the mounting bracket of right-side front, you need to do same thing once again.
Use a pencil to mark it down. Following edge simply extend the mark. You can simply use a combination square as a reference here. Do this until the line you previously made meets it. The two lines should make a notch being perpendicular. For the right drawer slide, make same perpendicular mark.
On the back of drawer box, simply cut these two notches. You can simply use a jigsaw for this task. Now simply cut those two notches. Use a jigsaw here. Let the left slide get placed between drawer back notch and front bracket.
You want to locate the pinhole location for marking and drilling next. Do the same thing for right-side pinhole as well. You need to drill a hole using the quarter-inch bit at this point. Now place a level on drawer opening. Span the bottom-left edge to drawer opening distance. The bubble needs to be in center between two lines. It should be up or down until the required results. Using the bottom edge as a guide, simply make a mark on carcass back.
Do this for the right side of carcass as well. Now using those marks as a guide, you need to place mounting bracket for attaching it with included screws. Simply position the left slide into carcass. You need to make a connection between the left edge and side of drawer opening using mounting screws. Do this for the right-side drawer slide as well.
Settle the drawer now inside carcass. The left drawer should click inside front mounting bracket when forwarding. You need to make sure the pin on backside of drawer goes right into the hole. Do the same thing to position right-side drawer slide as well. Finally slide the drawer in and out to confirm a successful installation. And with that final step, you have learned how to install drawer slides on face frame cabinets. It is not as difficult as it may sound. You can follow the instructions to achieve a pleasing result.
Also, if you feel the process is somewhat difficult due to extreme measurement and cutting requirements, there are many options to try this with expert help. A small charge to any skilled professional will give you the perfect outcome. Hi, this is Sam Maxi. I love talking about woodwork tools and my reviews are mostly based on the experience I have from my work.
Apart from reviewing, I am a huge fan of surfing. Also, I love watching horror genre movies. Follow me: Facebook , Twitter.


|
Kreg Jig Stop Collar Stuck 80 Round Over Router Bit Lowes Net Fine Woodworking Logo Vector Woodworking Square Storage Years |

Leyla_666
02.03.2021 at 18:47:23
Arabian_Princ
02.03.2021 at 21:55:19